Private Environments
Reflect supports multiple ways to test non-public web applications.
Reflect Tunnel
Our recommended method for testing local and private environments is to use the Reflect Tunnel, a desktop application that can be installed on your local machine or in your company’s infrastructure. The Reflect Tunnel registers with the Reflect API and establishes a secure, encrypted connection to Reflect’s cloud test infrastructure. When the Reflect Tunnel is enabled, all web requests initiated within a Reflect test are proxied through the Tunnel, enabling your Reflect tests to access local or private environments that are accessible to the machine that Reflect Tunnel is running on.
Installation
The Reflect Tunnel is a native, cross-platform application that can be run on Windows, macOS, or Linux. This feature is available to all Reflect accounts, regardless of usage tier.
The Reflect Tunnel can be downloaded via our Downloads page.
Windows and macOS
On Windows and macOS devices, the Reflect Tunnel runs as a system tray application. After installing and running the Reflect Tunnel application, the application will reside in the system tray via the icon shown below:
macOS: 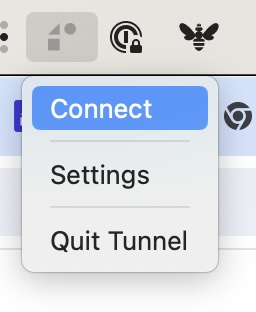
Windows: 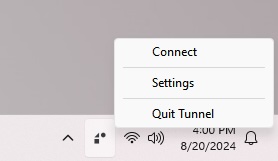
Linux
The Linux version of the Reflect Tunnel is a binary executable that can be run via the command-line or configured to run as a daemon process (e.g. via systemd):
|
|
Starting the Tunnel
In order for the Reflect Tunnel to act as a proxy for your Reflect tests, you must associate the Tunnel to your Reflect account. This is done by entering your Reflect API Key in the Settings of the Reflect Tunnel.
Your Reflect API key can be found on the Account Information page within the Settings section of Reflect. This is the same API key that is used when invoking the Reflect API directly, or when using one of our CI/CD integrations. If you have not already generated an API Key for your Reflect account, you can do so via the button on this page.
Windows and macOS
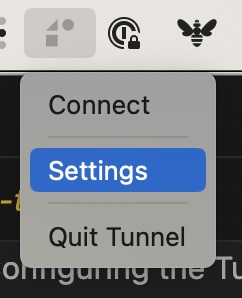
To link your Reflect Tunnel to your account, click the icon in the system tray / menu bar, and select the ‘Settings’ option:
This menu option will open a web browser to the Settings view for your Reflect Tunnel:
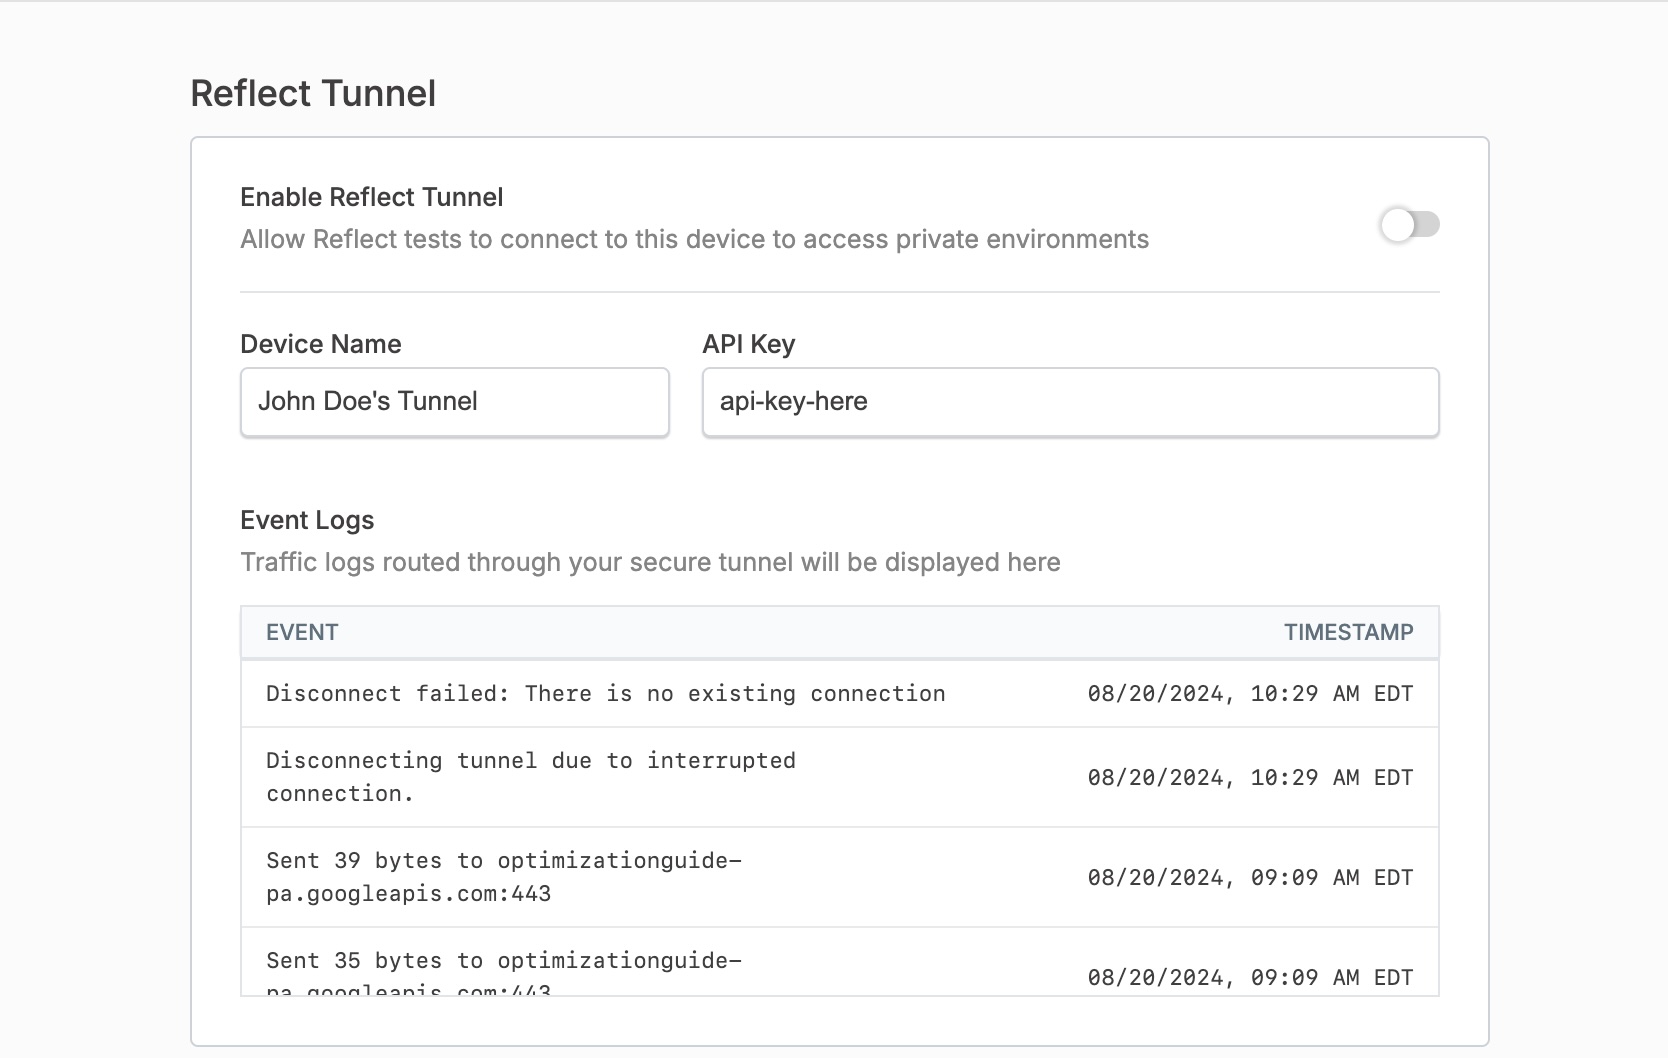
The Settings view has the following configuration options:
- Device Name: This is the name that will be associated with your Tunnel, and is the name that will appear when you choose a Tunnel when creating or running tests within Reflect. By default, this will be set to the device name of your computer.
- API Key: This is the linkage between your Tunnel and your Reflect Account. This must match the API Key associated with your Reflect Account.
To connect the Tunnel, click the ‘Enable Reflect Tunnel’ toggle. If the Tunnel connects successfully, you’ll see that the toggle is set to enabled, a log line will appear stating that the Tunnel is connected, and the system tray icon will be updated to indicate that the Tunnel is connected.
Linux
To start the Tunnel, you’ll need to first create a JSON file that looks like the following:
|
|
Pass the location of the settings file to the reflect_tunnel application as a command line argument:
|
|
When running the command-line application, the tunnel will attempt to connect using the API Key provided in the settings JSON file. If the connection is established successfully, you will see a log line indicating that the connection is successful.
Creating Tests using the Tunnel
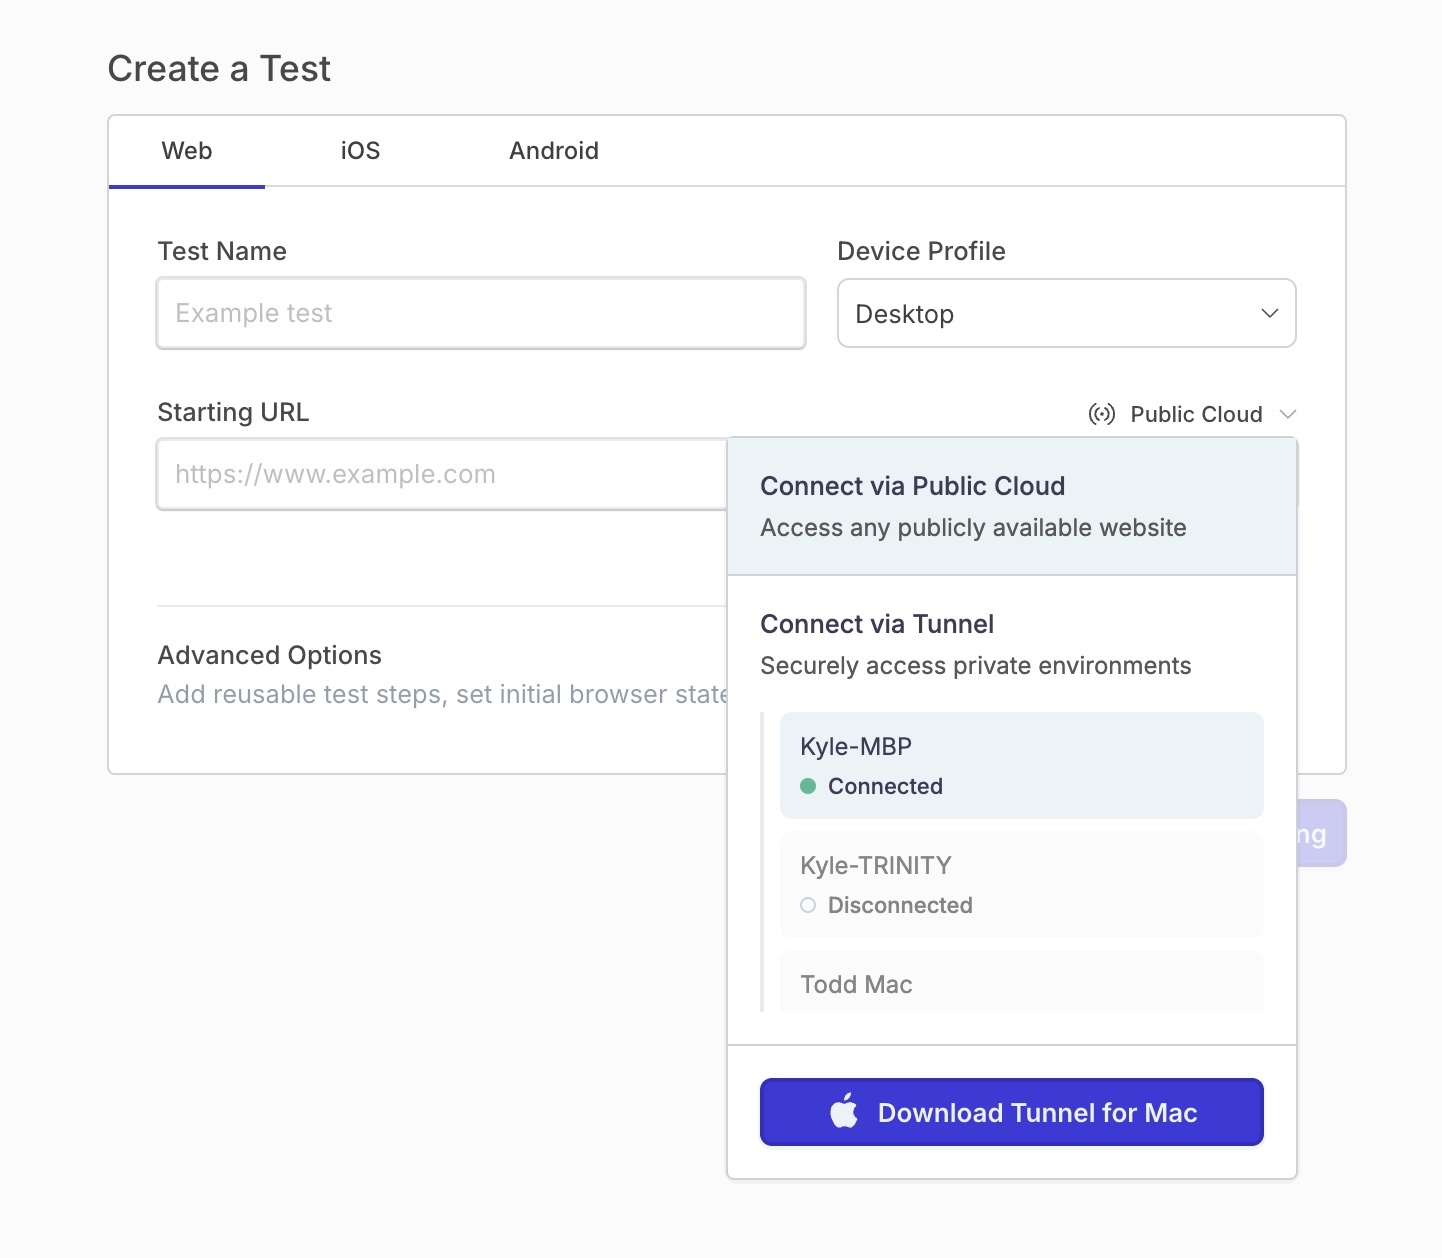
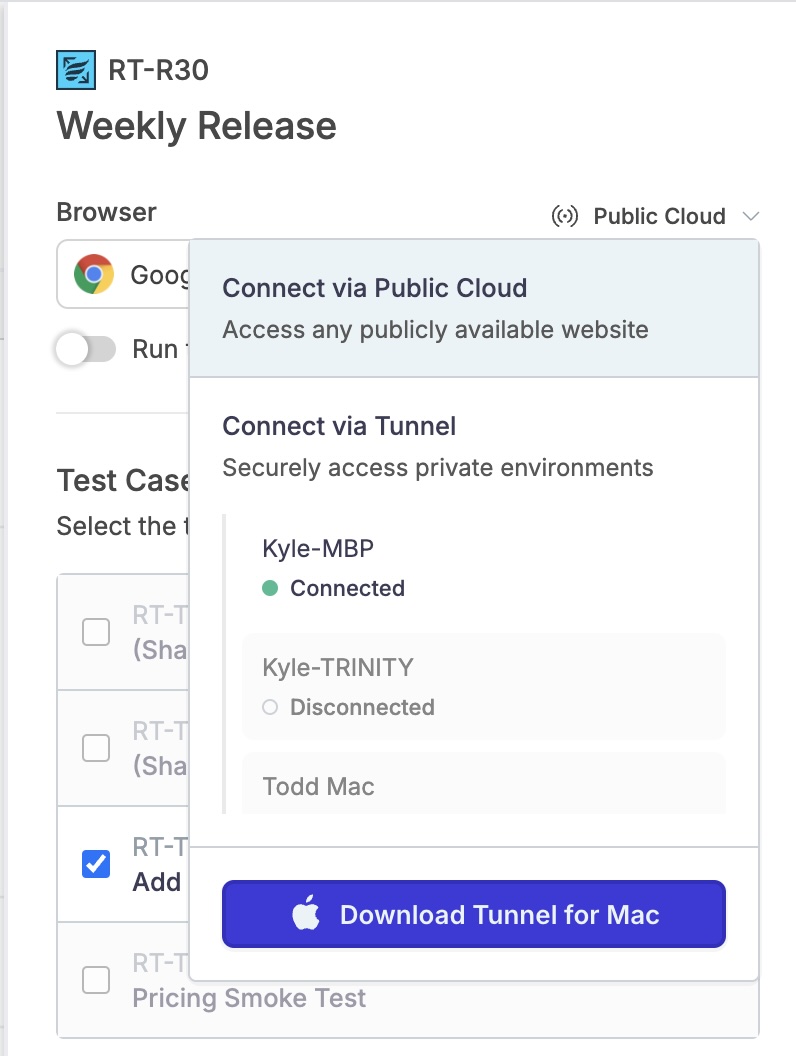
When creating a test within Reflect, the option to route all traffic via a Tunnel is presented via a dropdown to the right of the ‘Starting URL’ field:
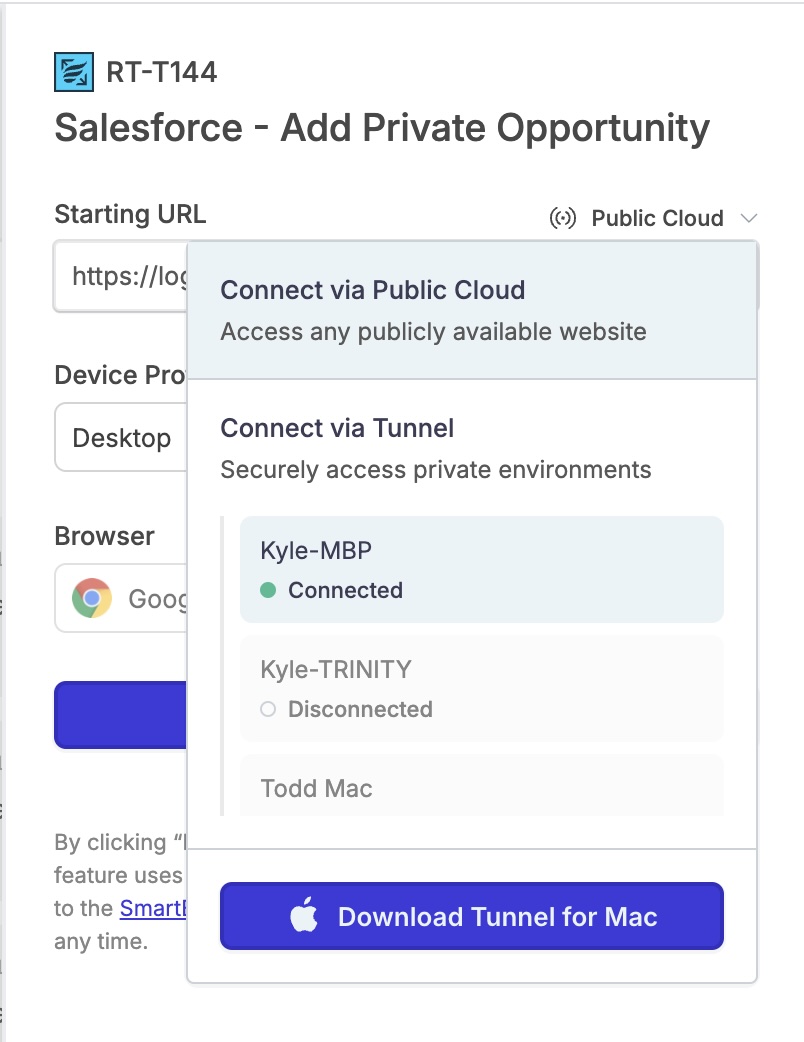
This option is also available when running automated tests directly from Zephyr Scale:
Running Tests using the Tunnel
Running individual tests
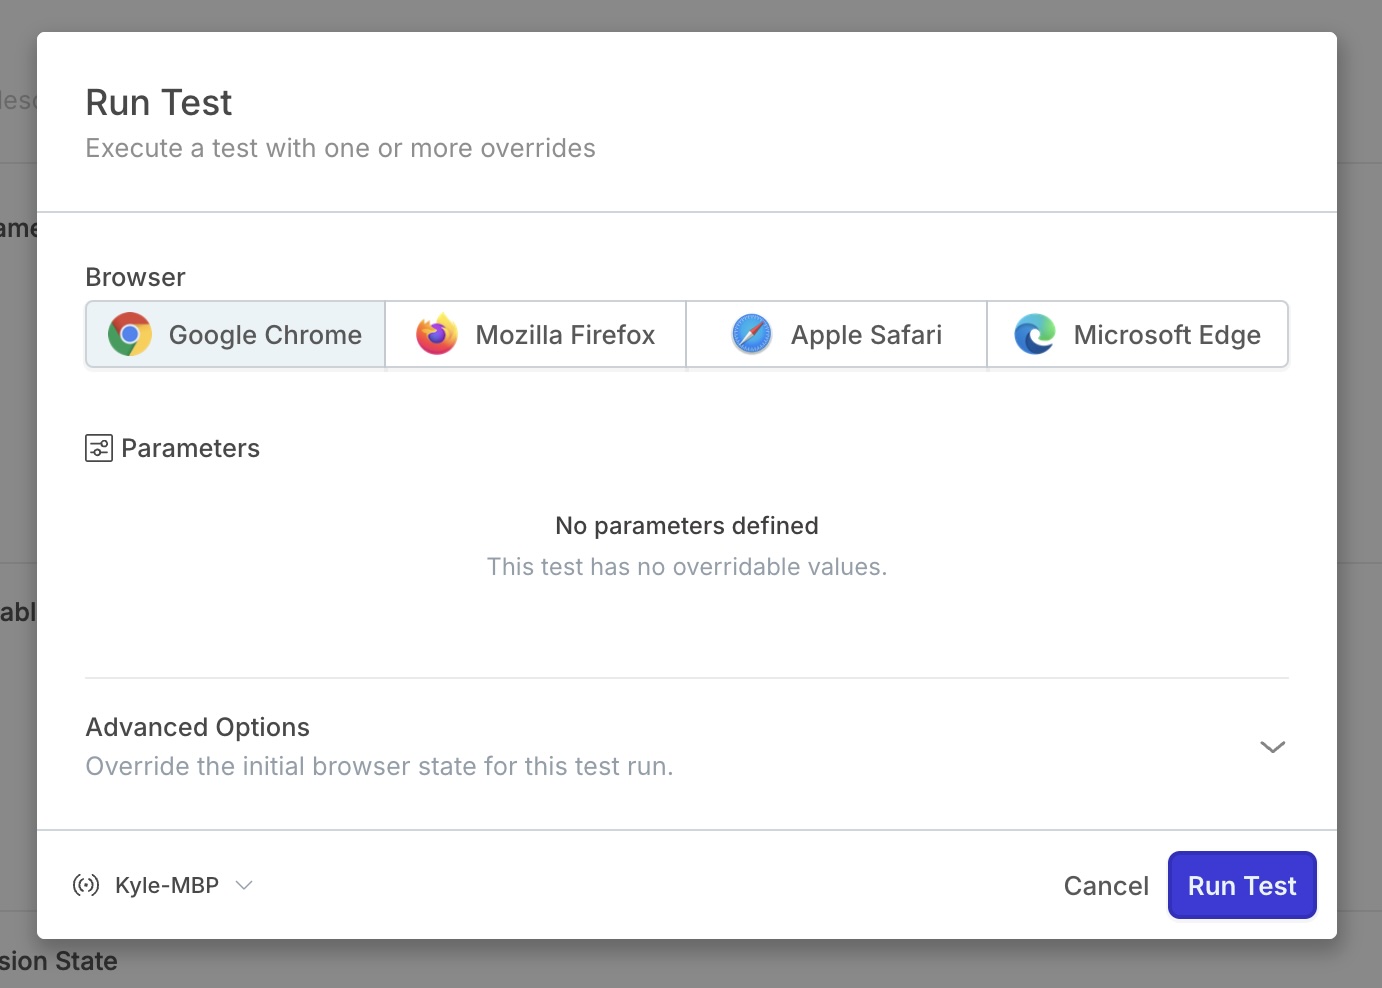
When running a test, you also have the option to choose whether to route all traffic from that test run to a Tunnel.
When running an individual test, you can choose to route traffic through a Tunnel by clicking the dropdown in the bottom-left of the Run Test modal and selecting your desired Tunnel:
Running a suite of tests
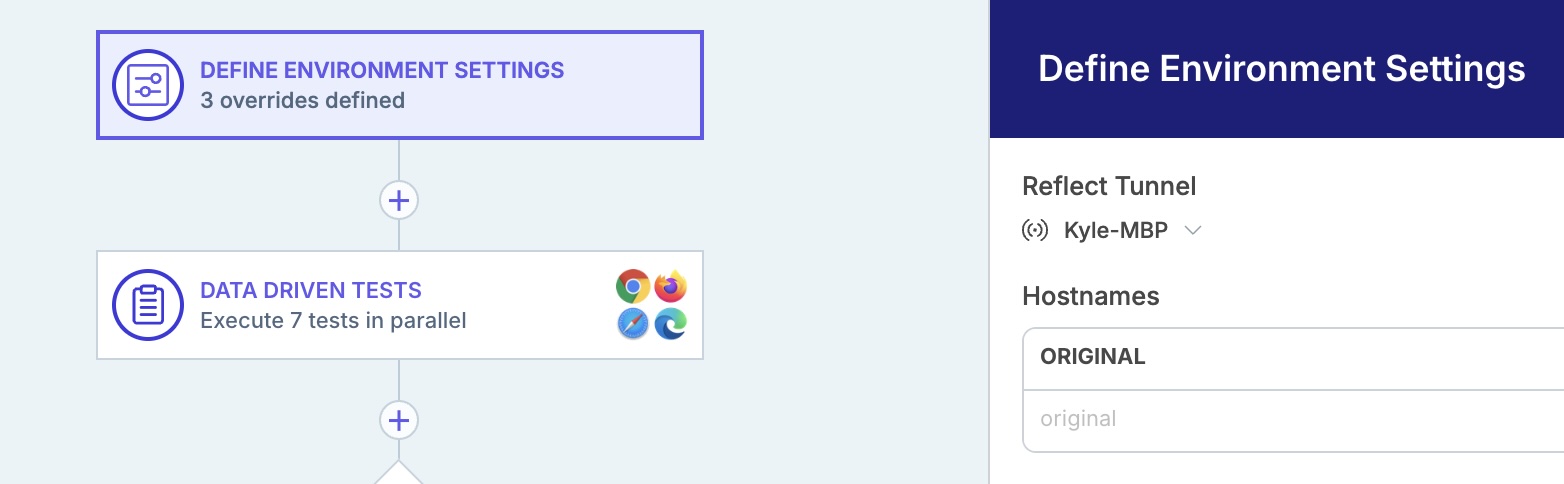
To run all tests in a test suite via a Tunnel, first select the Suite and click on the ‘Define Environment Settings’ box within the Workflow settings of the Suite. In the sidebar, choose the Tunnel that you’d like all future executions of this Suite to use:
If you’re invoking a test suite directly via the UI, you’ll also have this same Tunnel option within the Run Suite modal.
Running tests via Zephyr Scale
Finally, when running tests via Zephyr Scale, you can choose to run your tests via a Tunnel by selecting the dropdown next to the ‘Starting URL’ field within the Test Script tab of an individual test case, or the dropdown next to the ‘Browser’ field when running tests from the Test Cycle player:
Configuring access
The list of all Tunnels connected to your Reflect Account is viewable by navigating to the Settings section and clicking the ‘Local / Private Environments’ section from the sidebar:
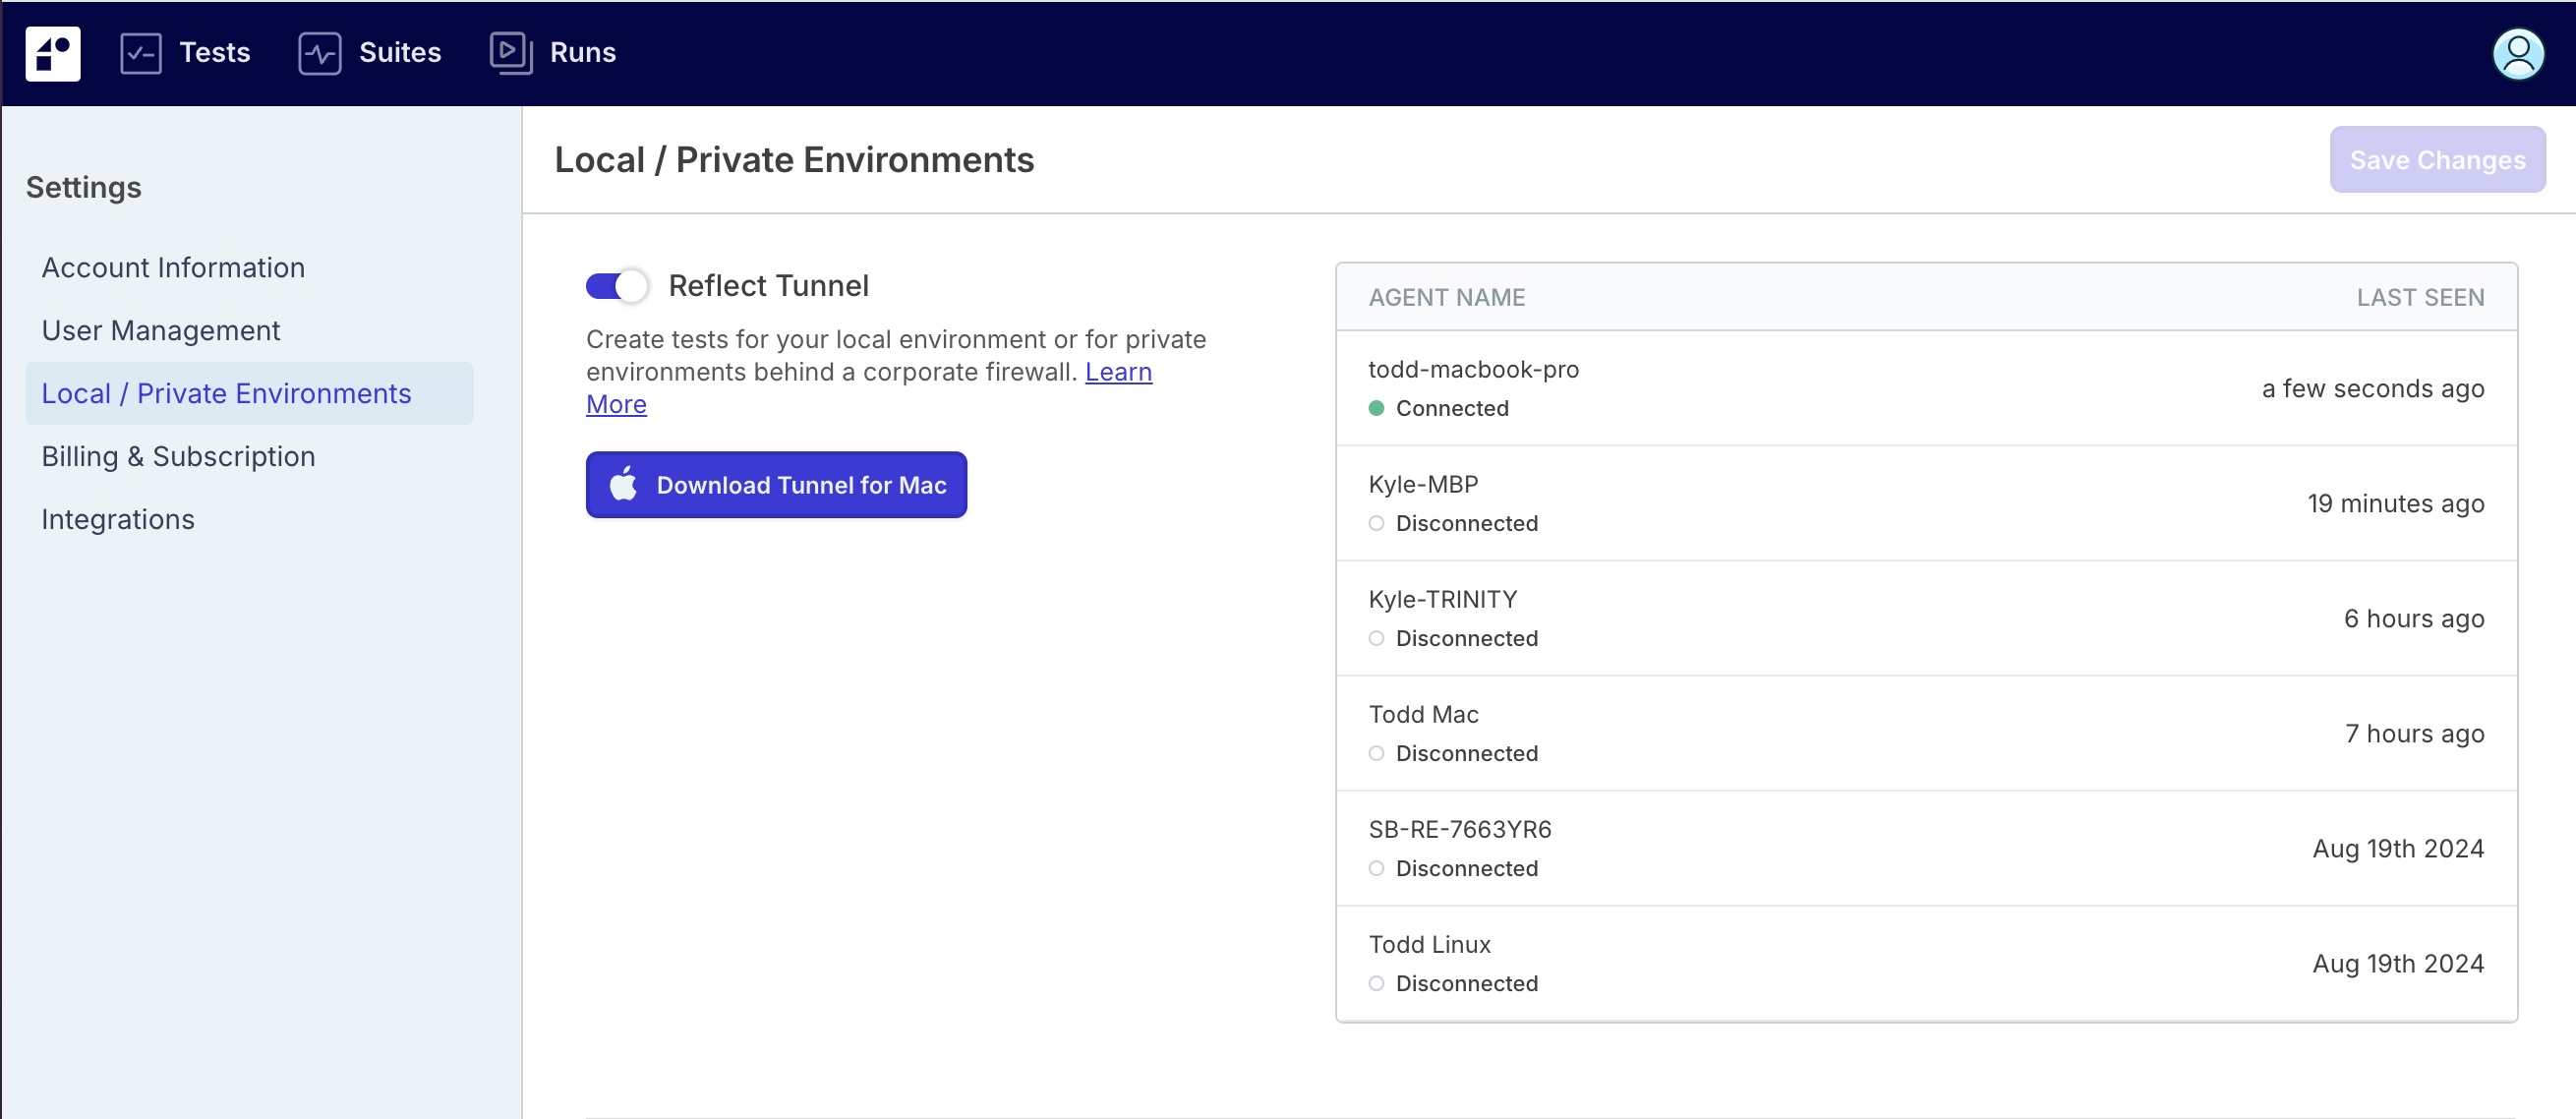
From this same view, administrators can also disable the Reflect Tunnel feature for your Reflect account by de-selecting the toggle next to the ‘Reflect Tunnel’ heading and clicking ‘Save Changes’.
Using a Static IP
An alternative approach to testing private environments is to enable Reflect’s Static IP feature for your Reflect account. Some QA or staging environments may be restricted to only allow visitors coming from a specific IP address or set of IPs. By default, Reflect assigns IP addresses to its cloud browsers from a range of dynamic IPs, which means they will not be able to access an IP-restricted environment. To support testing these environments, Reflect can provision a static IP address for your account. This forces all cloud browsers (i.e., recordings and test runs) to egress from Reflect with the same IP address. You can then add this IP address to the list of “allowed” IP addresses in your environment’s network ACL.