Test Case Management
Automatically sync Reflect tests and test results to your existing Test Case Management tool.
With Reflect’s test case management integrations, testing teams can adopt Reflect without disrupting their current process around test execution reporting and defect tracking.
Installation
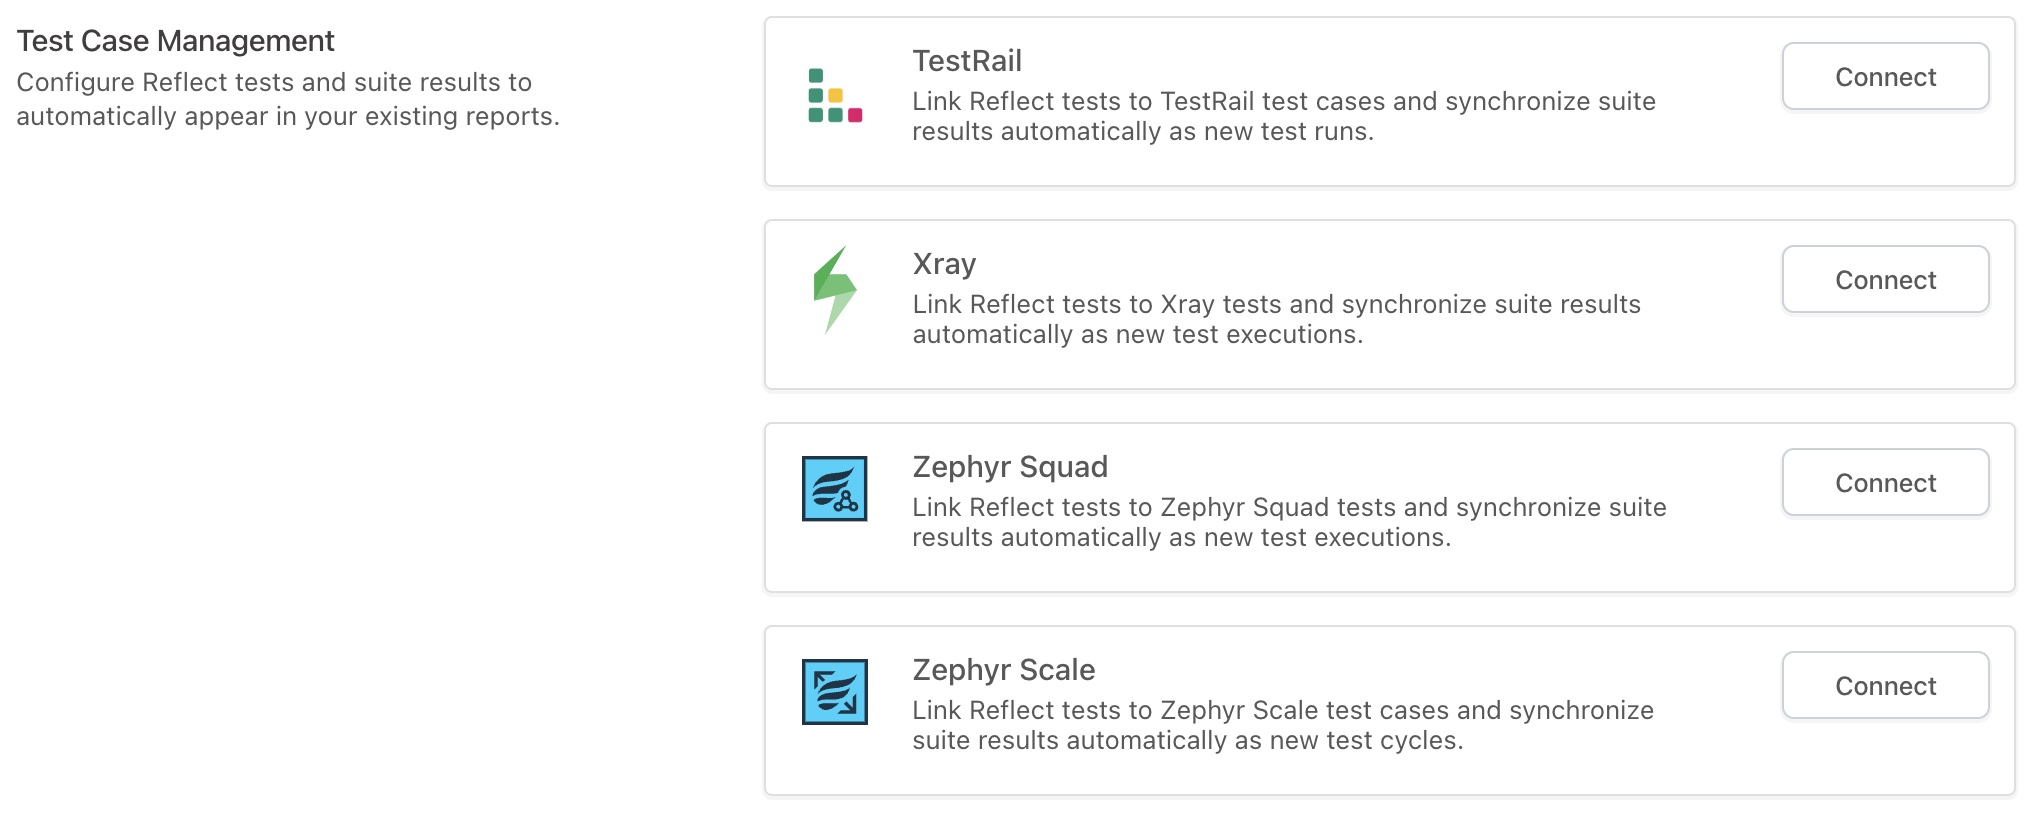
To connect Reflect to your test case management tool, navigate to the Settings section within Reflect and select the Integrations tab. Our supported integrations for TestRail, Xray, Zephyr Squad (formerly Zephyr for Jira), and Zephyr Scale (formerly TM4J) are shown under the Test Case Management section:
TestRail
Enabling the TestRail API
Reflect’s integration with TestRail requires that the TestRail API first be enabled for your account. Within TestRail, verify that the TestRail API is enabled by clicking on the Administration tab, selecting the Site Settings section, and clicking the API tab. Under API, the Enable API option should be checked. If it is not, enable this option and click the Save button to enable the API.

Generating an API key
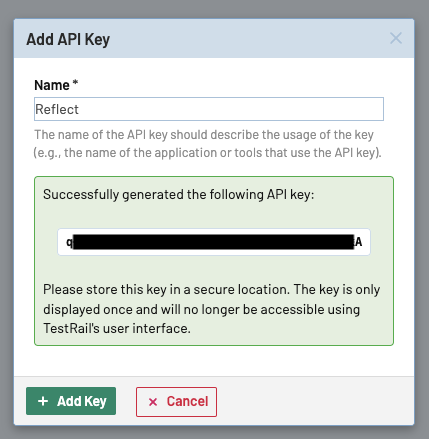
Within TestRail, click on your name in the upper right corner of the page and select My Settings. Under My Settings, select the API Keys tab. On this page you will see a list of the existing API Keys associated with your TestRail user, along with an option to add a key. We recommend creating a dedicated API Key for Reflect. To create an API key, click the Add Key link, give your API key a relevant name, and click Generate Key. A new API key will be generated and displayed on the screen.
Connecting to TestRail
Within Reflect, navigate to Settings and click on the Integrations link on the left navigation bar. Find the TestRail integration and click the Connect button. You will be prompted to enter the following fields to connect to TestRail:
- Username: The username or email address that you use to log into TestRail. Example:
john@example.com - Hostname: The hostname of your TestRail instance. Note that the hostname should NOT include http:// or
https://. Example:
acmecorp.testrail.io - API Key: The TestRail API key that you generated by following the steps in the previous section.
- TestRail Project: The Project within TestRail that should contain all of the Test Cases and Test Runs associated with your Reflect tests. Linking to Test Cases and Test Runs across projects is not supported.
- TestRail Suite: The Suite within TestRail that contains all of the Test Cases and Test Runs associated with Reflect. If you do not use Suites within TestRail, select the Master option. Linking to Test Cases and Test Runs across suites is not supported.
After saving your settings, you should see that the TestRail integration is connected:

Xray
Generating a Client ID and Client Secret
In order to connect Reflect to Xray, you’ll need to generate an API key within Jira and save the generated Client ID and Client Secret in Reflect. To generate an API key, follow the steps in these instructions provided by Xray: https://docs.getxray.app/display/XRAYCLOUD/Global+Settings%3A+API+Keys.
Connecting to Xray
Within Reflect, navigate to Settings and click on the Integrations link on the left navigation bar. Find the Xray integration and click the Connect button. You will be prompted to enter the following details:
- Client ID: The Client ID generated in Xray using the steps outlined in the previous section.
- Client Secret: The Client Secret generated using the steps from the previous section.
- Project: The Jira project that contains your Xray tests. Creating tests across Jira projects is not supported.
- Test Case Issue Type: The Jira issue type that’s used to represent an Xray test. This is usually named Test.
- Test Execution Issue Type: The Jira issue type that’s used to represent an Xray test execution. This is usually named Test Execution.
After saving your settings, you should see that the Xray integration is connected:

Zephyr Squad
Generating an Access Key and Secret Key
In order to connect Reflect to Zephyr Squad, you’ll need to generate an Access Key and Secret Key with the Zephyr Squad UI.
To begin, go to Jira and select Apps > Zephyr Squad and click the API Keys option on the sidebar. Click the Generate New Key button on this page and note the Access Key and Secret Key. See https://support.smartbear.com/zephyr-squad-cloud/docs/api/api-keys.html for more details.
Connecting to Zephyr Squad
Within Reflect, navigate to Settings and click on the Integrations link on the left navigation bar. Find the Zephyr Squad integration and click the Connect button. You will be prompted to enter the following details:
- Access Key: The Access Key generated in Zephyr Squad using the steps outlined in the previous section.
- Secret Key: The Secret Key generated using the steps from the previous section.
- Project: The Jira project that contains your Zephyr Squad tests. Creating tests across Jira projects is not supported.
- Test Case Issue Type: The Jira issue type that’s used to represent a Zephyr Squad test. This is usually named Test.
After saving your settings, you should see that the Zephyr Squad integration is connected:

Zephyr Scale
Generating an Access Token
Reflect authenticates with the Zephyr Scale API using an Access Token that you generate within the Zephyr Scale UI. To generate an access token, navigate to Zephyr Scale, click your avatar on the top right, and select the Zephyr Scale API Access Tokens menu item. On the following page, click the Create access token button to generate a new token. See https://support.smartbear.com/zephyr-scale-cloud/docs/rest-api/generating-api-access-tokens.html for more details.
Connecting to Zephyr Scale
Within Reflect, navigate to Settings and click on the Integrations link on the left navigation bar. Find the Zephyr Scale integration and click the Connect button. You will be prompted to enter the following details:
- Access Token: The Access Key generated in Zephyr Squad using the steps outlined in the previous section.
- Project: The Jira project that contains your Zephyr Scale tests. Creating tests across Jira projects is not supported.
After saving your settings, you should see that the Zephyr Squad integration is connected:

Linking test cases
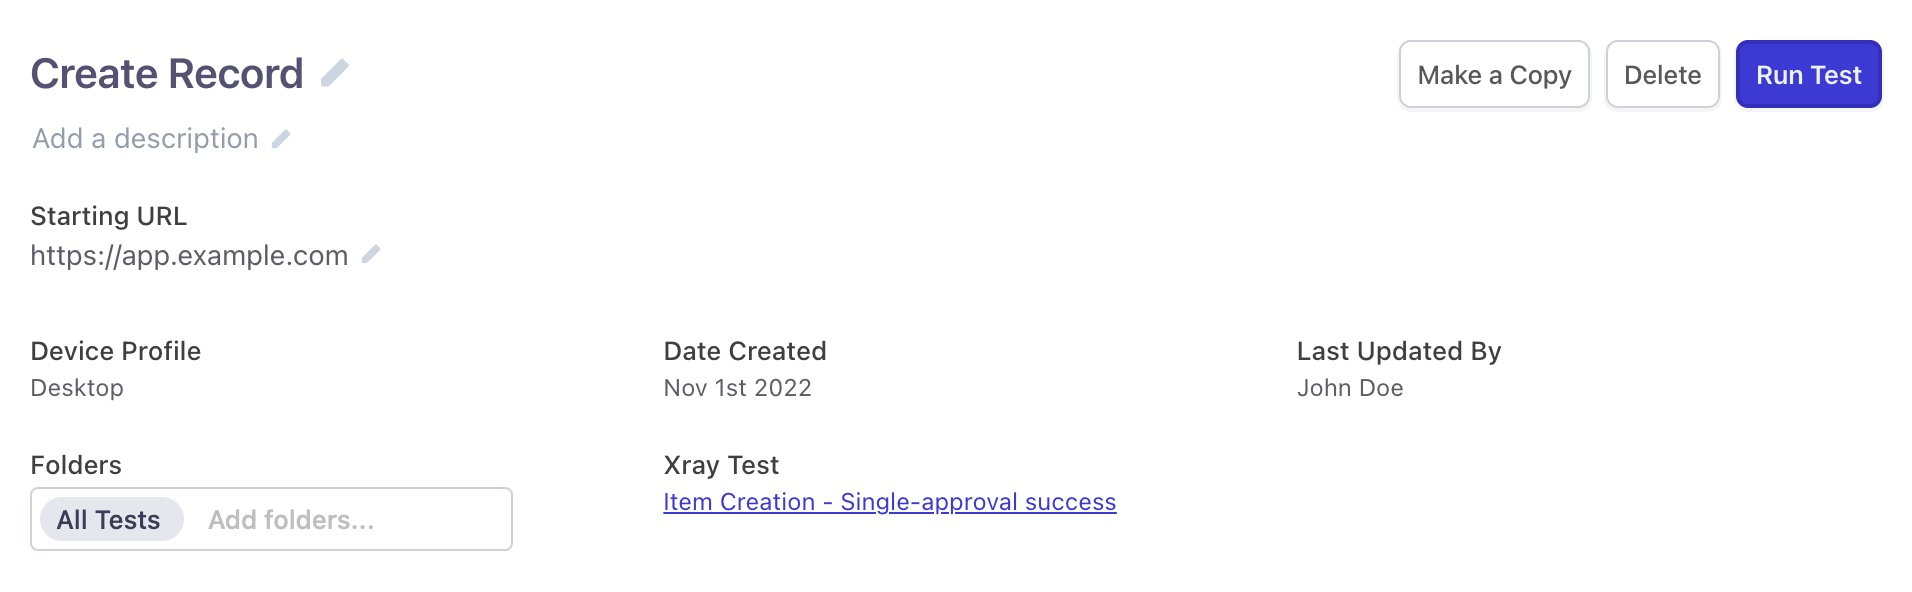
In order for test results to be synchronized to your test case management tool, you must first map tests within Reflect to their associated test cases from your test case management tool. When a Reflect test is associated with a test case in your test case management tool, a link will appear on Reflect’s test detail page:
Manually mapping test cases
After connecting your test case management tool using the instructions above, you can map Reflect tests to existing test cases by navigating to the Integrations section under Settings and clicking the Assign Tests button. A modal will appear which displays the current mappings between Reflect tests and your connected test management tool:
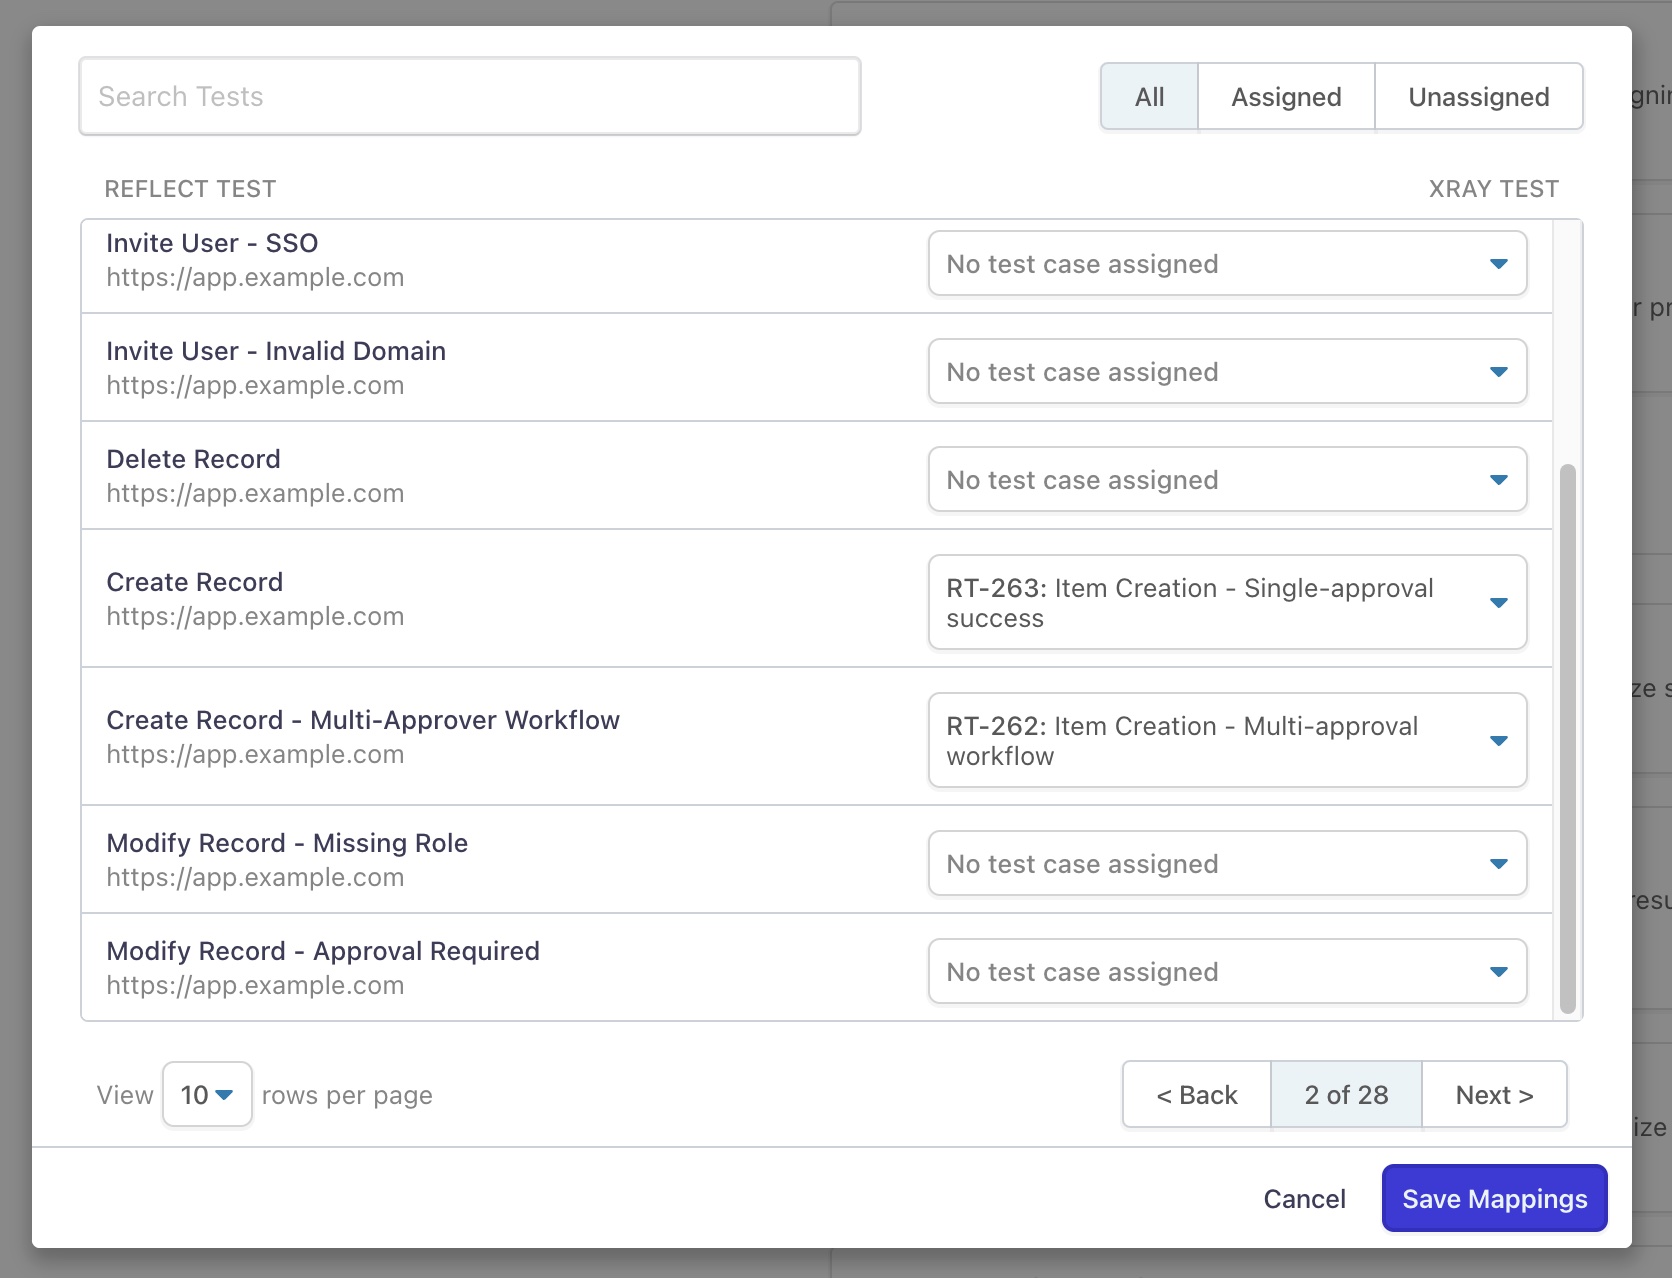
To assign an existing test case to a Reflect test, click on the dropdown and start typing the test case name in the typeahead search input. The test case should be displayed along with its associated key/id. Select the test case to update the mapping. After you’ve made your mapping updates, click the Save Mappings buton to save your changes.
Automatically generating test cases
When creating new tests in Reflect, you’ll also have the option to automatically generate an associated test case for that test in your test case management tool. When the test is created, Reflect will generate a test case that contains the test steps from the newly created test, and will automatically map the new test case to your Reflect test.
This option can be configured to be enabled or disabled by default within the Settings modal on the Integrations page, and can be overridden before saving your new test.
Syncing test results
With your test case management tool connected, and your Reflect tests mapped, test results will now automatically start syncing to your test case management tool. Specifically, the results of all Suite Executions within Reflect will be synchronized through the creation of the following, depending on your tool:
- TestRail: A Test Run is created that contains a collection of Results.
- Xray: A Jira Issue with the specified Test Execution issue type is created that contains a collection of Test Runs.
- Zephyr Squad and Zephyr Scale: A Test Cycle is created that contains a collection of Executions.
After the Suite Execution completes, a link is displayed in the header which links to the results in the test case management tool:
