Introduction
Who is this guide for?
This is a guide for developers who want to learn how to effectively build and maintain automated regression tests for web applications. We wrote this guide because:
- Most online materials about testing are focused on unit and integration testing, which means there’s little good information for end-to-end testing targeted at developers.
- Most developers do all of their end-to-end testing manually, but they would rather automate this repetitive work.
- We want to share the best practices (and pitfalls to avoid) that we’ve learned over the years while dedicating ourselves to solving end-to-end test automation on the web.
Who we are
We’re the creators of Reflect, a no-code tool for creating automated regression tests for web applications. We’ve talked to hundreds of companies about testing, and have some, admittedly, strong opinions about how to go about building test automation.
But don’t worry, this guide is written to be framework-agnostic; so whether you use our product or some other solution for regression testing, you’ll be able to apply the principles outlined here.
How to use this guide
This guide is written as a reference so you can read any section without having to read all prior sections.
If you’ve never written automated end-to-end tests before, we recommend reading the Getting Started section in its entirety. This will give you a good foundation on regression testing, educate you on the misconceptions about this type of testing, and help you understand the common mistakes made when building a regression test suite.
Getting Started
Success requires a different approach
If you take away one thing from this guide, it should be: don’t treat end-to-end tests like unit tests. It’s tempting to write an end-to-end test the same way you’d write unit tests, but they are completely different beasts. A different approach is required for you to effectively write end-to-end tests. Why, you ask?
Well, the reality of regression testing is that you’re going to be driving one of the most complex pieces of software ever built: the web browser. Browsers are built to support thirty years worth of standards, implemented by each browser vendor to some different approximation of the W3 spec. Furthermore, client-side JavaScript is an entire execution environment on its own, with frameworks and third-party plugins implementing their own abstractions. The end result is layers upon layers of complexity, which often results in unexpected behavior by itself, all standing on the shaky foundation that is a network connection!
Atop this mountain of complexity lies the custom code that you want to test.
Because of the complexities mentioned above, regression tests should be treated as black-box tests. The key to making tests maintainable is to ensure they stay repeatable and are resilient to changes in the application’s underlying state over time. We recommend making as few assumptions about the underlying implementation as possible. For example, mocks and fakes, which are common in unit testing, should be avoided. Instead, you should make reasonable assumptions about the state of your application. A reasonable assumption about your application state may be that a test user exists with a given username and password. Making this assumption allows you to test functionality using that user account, and lets you avoid starting the test by creating a brand new user via your application’s sign-up flow.
Managing Complexity
Keep Tests Small
We recommend keeping tests as small as possible, but no smaller. What this means is that a test should replicate how real users interact with your web application, including all of their logically-related actions, but have no additional, unrelated actions. Furthermore, you shouldn’t test everything a user would ever do in a single test. Rather, create multiple tests for each logical, or functional, operation that a user performs in your application. This has the dual advantage of making your tests run faster (since you can run independent, distinct tests in parallel), as well as making the issue clearer when a test run fails.
Don’t Repeat Yourself
If you duplicate the same workflows across multiple tests, you’ll need to make the same updates in each of those tests when your application changes. Workflows that appear in multiple tests should be managed in a single location and referenced by other tests. Other workflows should be tested once and not duplicated.
Create tests that are repeatable
Automated regression tests must be able to run repeatedly without changes and without failure.
The most common reason that a test is not repeatable is that the underlying account or application data changes on every execution. The most robust tests are those that make relatively few assumptions about the account or application data, but always have those assumptions met on every run.
Examples of underlying data changes that invalidate assumptions that a test might make include:
- A product goes out-of-stock
- A record was deleted when it should be present, or it already exists when it shouldn’t
- Search results whose rankings have been re-indexed and have changed
Another common issue with repeatability is non-deterministic timing. Examples include:
- Testing a calendar widget with a static date. This might work the day you create the test, but probably won’t work next week, next month, or next year.
- Running tests in parallel on an application that only allows one active session per user.
- Running tests against an environment that’s mid-deployment and is currently offline.
Repeatability issues can also occur in scenarios that require unique names or values, such as:
- A test of a sign-up flow that requires the user to register with a unique email address
- Creating a new record in your system whose name is required to be unique within that account.
Create tests that can run in parallel
End-to-end tests run much slower than unit and integration tests. To keep test suites running in a reasonable amount of time, you should make tests small and run them in parallel. Parallelism can take a test suite that runs sequentially in 20 minutes, and run it in 5 minutes or less with almost no extra work. This is the second most important point of this guide: factor your tests so that they can run in parallel, and in an arbitrary order. This guidance sounds easy, but it requires intentional effort to abide by it.
The key to parallelizable tests is that each test operates on its own data and state. That is, tests might share a user account (i.e., non-mutable state), but they should manipulate different records within the account. As long as the tests don’t alter the account (e.g., don’t delete it), then the tests can run in any order and at once because there is no shared state between them.
Running tests in parallel is the single best way to decrease the running time of your test suite, which, in turn, delivers faster feedback to your team and actually increases their commitment to testing in the first place.
A good approach to creating parallelizable tests is to have tests that mutate state do so on records that are newly created. Take, as an example, a test where you can modify an existing record within your application. The straightforward approach to implementing this is to find an existing record, modify it, and then verify the modification was saved.
But if that record is depended upon by another test, then that test will likely fail when it is run. Perhaps you modified the name of the record and another test is looking up that record by name and no longer finds it. Or, perhaps another test is verifying the ‘last modified date’ of the record, and that date is now updated every time you run this test.
Instead of handling data conflicts between tests, an alternative it to avoid them entirely. One way to do that in this case would be to first create a new record and then immediately modify the record. This test might take longer to execute since it’s creating a new record, but the advantage is that the test is now isolated from other tests. Another advantage to this approach is that you’re working with a clean slate on every test run. If the test fails midway through, leaving a half-created record in some unexpected state, it won’t impact any future test runs since they’ll create their own record. This is not the case for a test that modifies an existing record. If the test fails in the middle of the run, it may leave that record in an unknown state that you’ll need to modify explicitly before your tests can pass again.
Use stable selectors/locators
Selectors (sometimes called locators) are the method by which most test automation tools identify an element to interact with. There are two kinds of selectors:
- CSS selectors: These use the underlying page styling and structure to target elements.
CSS selectors share the same query language that’s used by the
document.querySelectorAPI, CSS styling, and in jQuery. - XPath selectors: These identify elements using a query language derived from XML. XPath includes some additional ways of targeting elements that are not found in CSS selectors, such as targeting an element by its text value.
We recommend using CSS selectors, as they are easier to read and will be more familiar to front-end developers.
The process of manually creating selectors is time-consuming. Missing or incorrect selectors during test execution are also the cause of a lot of false-positive failures. This is because as the application changes, selectors may no longer target the right element, or may not target any element at all. Some automation frameworks can automatically build selectors for you. Alternatively, if you’re building your selectors manually, you can reduce the chance of stale selectors by adding persistent HTML attributes to be used specifically in your selectors. By adding these attributes, it will make it more obvious to developers that a given change may break existing automated tests, and it will give your automation an explicit, and hopefully static, element identifier.
The most common attributes used for this purpose are:
- data-test
- data-testid
- data-test-id
- data-cy
Isolate data that’s touched by automated tests
The users and accounts in your application that are used by test automation should not be used for any other purpose. Just as tests with shared data will conflict with each other and cause failures, so, too, will modifications of the “automation account” data by real-life users.
This is because any non-automation modifications of the account data will invalidate assumptions that your tests are relying on to succeed. These types of failures can be particularly hard to debug because modifications to the state often aren’t obvious and there may not be an audit trail pointing to how the data was modified. For example, updating a record on the account may cause that record to appear at the top of a list sorted by recent edits, which, in turn, can cause tests that make assumptions about the ordering of that list to fail.
To avoid these issues, separate manual and automated testing at the highest level possible. Separate environments are best, separate accounts within the same environment are good, and anything finer-grained than that should be avoided.
Testing As Part of Your Development Process
Once you’ve built your initial test suite, you’ll want to make a plan for updating and maintaining the suite over time. Your plan should answer the following questions:
- Who is responsible for maintaining tests? Smaller teams can identify an owner, or set of owners, for the entire suite. Larger teams are usually organized into different feature areas; so, each feature team should own their respective tests.
- What tests are added as part of new feature development? Teams should identify what tests, if any, are added when a new feature is released.
- What tests are added when bugs occur? If your team does post-mortems, it’s a natural opportunity to require adding a new end-to-end test as part of completing the post-mortem.
Running the same tests across different environments
If you have multiple non-production environments (such as a QA environment and a staging environment), you should consider running at least a small subset of your test suite in those additional environments whenever a deployment occurs.
You’ll need to account for differences when running tests across environments. For example, if your tests involve authenticating as a user, you may need to authenticate with different credentials depending on the environment. Your test will also need to account for the application being served from a different hostname.
End-to-end tests in a microservice environment
Many applications today are built using a collection of microservices. This presents a challenge for end-to-end testing, as a change to any microservice could cause a regression to an end-to-end workflow.
You could run your full end-to-end test suite after every microservice deployment, but that might not be feasible or desirable depending on the frequency.
An alternative approach is the following:
- Group your end-to-end tests by feature area within your application. Most tools provide a way to organize tests into multiple tags or suites.
- Associate each microservice to the feature areas that they touch.
- When a microservice is deployed, invoke only the subset of your test suite associated with the feature areas it has modified.
Tools like Nx provide the ability to tie functionality to features, allowing you to kick off the subset of your test suite that is affected by a given changeset. SeaLights is another tool that can be used to measure the code coverage of your end-to-end tests.
Synthetic testing in production
One advantage of having an end-to-end testing suite is that it can also be used as a kind of monitor in production. This type of testing is called synthetic testing, and it’s a hybrid of automated testing and monitoring. We recommend taking your most critical and high-trafficked workflows (sign-in, sign-up, placing an order) and running them on a schedule in production. Having a small subset of your regression suite run as synthetic tests in production can be a great way to augment a traditional monitoring suite and derive additional value from your test automation efforts.
Running regression tests on every pull request
Sometimes referred to as “shift-left” testing, regression testing on every pull request moves the testing phase from right to left, or, earlier in the software development lifecycle when viewed in the traditional “waterfall” analogy. Open source tools like Docker and Kubernetes, PaaS features like Heroku Review Apps and Vercel Preview Environments, and fully-managed tools like Render and Netlify make spinning up infrastructure on every PR possible.
Common Scenarios
Testing a login workflow
The user sign-in workflow is one of the simplest to test, but also one of the most critical. We recommend creating a dedicated user account specifically for this test, and starting with a single happy-path test that verifies this user can successfully log in to your application. This user should either be in an environment that has no real production data, or it should be in an isolated account with no ability to view real customer data. See the Test Data Management section for more info.
Generally, you should run the “sign-in” test as part of your post-deployment test suite, and you might also consider running it periodically as a synthetic test in production. It’s an easy test to implement and it won’t create data or inflate your usage metrics unlike, say, a test of your new user registration workflow.
Be sure to include a final assertion at the end of the test that validates that the user successfully logged in! This may seem obvious, but it’s not sufficient to confirm that the test enters credentials and clicks the Login button. The test must include a validation of some element that’s only present if the login was successful. We recommend validating something like an avatar or user’s name on the subsequent page since that confirms login success and uniquely identifies the user.
Verifying the presence of an authorization cookie or JWT
It’s a common trap to use implementation details of your application to verify things like whether a user is signed in.
In Java Servlet applications this is usually called a cookie called JSESSIONID.
Third-party authorization tools like AWS Cognito and Auth0 store Javascript Web Tokens (JWTs) in Local Storage.
We don’t recommend asserting against values like these in your tests because
it violates the principle of validating things from the user’s perspective.
Stated differently, the validation is too implementation-specific.
Not only could this cause false positive failures when the underlying implementation changes (such as if you upgrade your authentication library),
but it will miss bugs where things look good with the authorization cookie, but the experience is broken to the user.
Potential scenarios include:
- A bug in the front-end code that prevents authorization state from being properly parsed and handled.
- A caching issue which causes users to appear as if they’re logged in as a different user.
Testing the authorization endpoint directly
Verifying the endpoint used to authenticate a user is different than verifying that users can successfully log in. The former case is easier to implement and gives you test coverage for a specific API endpoint, and if you’re using a third-party authentication library, it may not even reside in your web server.
While there is value in this type of test, it’s important to note that just like in the previous example, any bugs occurring outside of the API endpoint itself won’t be caught with this approach. A test of this nature is generally considered to be an “integration”, or API, test.
Testing a signup workflow
New user registration is often a critical workflow to the business, and should be near the top of the list when building your automation test suite. There are a few items, however, that can present difficulties in automating this workflow:
Each test needs to create a unique user
User registration workflows generally only allow you to register an email address or username once. This means the test will fail on every run after the first if the same email address is used. To work around this, your test should generate a unique email address on every run. For email addresses, we recommend using a common prefix such as ‘testuser+’ with a random series of characters before the ‘@’. This will make it easier for you to find and clear out test users in your database should you need to do so.
You may need to contend with captchas
Captchas are simple puzzles that are easy for humans to solve, and very difficult for computers to solve in an automated way. For tips on how to work around captchas, see our Handling Captchas section.
You may need to verify your email address
Many user registration workflows require the user to verify their email address before finalizing the account’s registration. This can be hard to automate because it requires the test to wait for the email to arrive, parse the email, and perform an action using the parsed value. For example, a 6-digit verification code sent in an email needs to be entered individually in the web application. We recommend using a tool that has email testing built-in rather than writing a script to poll for an email, extract its contents and then perform the follow-up action. The latter approach is brittle and error-prone.
Testing a date picker / calendar widget
Date pickers and calendar widgets can be difficult to automate because they change over time. We recommend two strategies here: one that’s click-driven, and one that is input-driven.
The click-driven approach is straightforward when you always want to select a date in the future. Click the button to go to the next month, and then choose a date in the middle of the month, such as the third row in the calendar view. Avoid choosing a date in the first or last row because there will usually be a subset of cells in those rows that are not associated with that month. Choosing a cell in the middle column ensures that you’re always choosing a day in the work week. Ensure that your test is not validating the numerical text value of the day you select, since that value will change from month to month.
The input-drive approach relies on randomly generating a valid date that is ’n’ days in the future. You can do this in a code-based script, or if the automation tool supports date generation. This approach also requires that the web application accepts explicit user input.
Testing workflows using Google sign-in
Testing Google auth workflows is tricky, but possible. You need to configure your Google Workspace account in the following way to ensure Google does not block the automation:
-
Use a GSuite user rather than an @gmail.com user when testing as Google blocks logins from @gmail.com accounts when it detects automation. This spam-mitigation technique does not seem to apply to GSuite users, though.
-
Configure the setting for the GSuite user in Google Workspace to “disable some security checks”. Without this setting disabled, Google may sometimes detect that it’s running within automation and show a message like this:

You should be able to allow automation to work properly by logging into that Google account and going here: https://myaccount.google.com/lesssecureapps. Note that we recommend using a GSuite account that is only used for testing since you’re going to be reducing the security levels for that account.
Testing role-based access controls (RBAC)
Many applications support role-based access for various features in their app. To design tests for role-based access controls (sometimes referred to by the acronym RBAC), start by listing out each user role supported in your application, and identify what features are accessible for each role.
The table below illustrates access controls for an example application we’re building:
| Role | View Widgets | Edit Widget | Manage Users | Manage Billing |
|---|---|---|---|---|
| Administrator | ✓ | ✓ | ✓ | ✓ |
| Manager | ✓ | ✓ | ✓ | |
| Contributor | ✓ | ✓ | ||
| Read-Only | ✓ | |||
| Guest |
Next, we create two tests for each feature, with one test verifying that the feature can be used, and another verifying that the feature is inaccessible. Each test is factored such that the inputs that differ for each user role are overrideable.
Finally, we create a spreadsheet where each row represents a role-feature permutation to test, and each column represents the inputs (and optionally assertions) that should be overwritten for that permutation.
| Test Name | Username | Password |
|---|---|---|
| View Widgets - Success | [email protected] | ******** |
| Edit Widget - Success | [email protected] | ******** |
| Manage Users - Success | [email protected] | ******** |
| Manage Billing - Success | [email protected] | ******** |
| View Widgets - Success | [email protected] | ******** |
| Edit Widget - Success | [email protected] | ******** |
| Manage Users - Success | [email protected] | ******** |
| Manage Billing - Blocked | [email protected] | ******** |
| View Widgets - Success | [email protected] | ******** |
| Edit Widget - Success | [email protected] | ******** |
| Manage Users - Blocked | [email protected] | ******** |
| Managing Billing - Blocked | [email protected] | ******** |
| View Widgets - Success | [email protected] | ******** |
| Edit Widget - Blocked | [email protected] | ******** |
| Manage Users - Blocked | [email protected] | ******** |
| Manage Billing - Blocked | [email protected] | ******** |
| View Widgets - Blocked | [email protected] | ******** |
| Edit Widget - Blocked | [email protected] | ******** |
| Manage Users - Blocked | [email protected] | ******** |
| Manage Billing - Blocked | [email protected] | ******** |
This type of testing, known as data-driven testing, is very powerful since it allows you to test many scenarios with relatively few tests. In the example above, just eight unique tests allow us to test 20 different permutations of user roles + features.
Data-driven testing has some drawbacks. First, they are more complex to set up since it requires parsing a spreadsheet or CSV to kick off tests. Secondly, most of the inputs for the tests need to be overrideable to allow for correct assertions based on the user role. Lastly, they are inherently testing many permutations which means many test runs and longer overall runtime for the test suite. (Cross-browser testing will exacerbate the runtime issue further.) So, in many cases, a narrower set of explicit, non-data-driven tests might be more appropriate.
Localization testing
Testing localized text can be done with a data-driven approach similar to testing RBAC.
First, create a series of tests that validate various text in your application using the application’s default language.
Next, create a set of overrides for each language that replaces the expected values with the text localized to another language.
Then, run the test and instruct the application to render text in a different language,
which can usually be done by either running the test on a different subdomain
(e.g. testing against airbnb.mx instead of airbnb.com to verify Spanish text within the Mexico locale), or
by passing in an Accept-Language HTTP header for the locale you want to test (e.g. es-mx).
Testing one-off integrations with simple smoke tests
Many companies offer integrations that can be embedded directly into a customer’s own web application. These types of integrations often provide different types of customizations, either via a set of options that the customer can choose themselves, or via more sophisticated customizations that could be unique to each customer.
Having test coverage for one-off integrations straddles the line between testing and monitoring, and can be a powerful approach for getting coverage for more complex actions versus a simple check of an HTTP endpoint. We recommend keeping these tests simple: make very few basic checks so that you can sanity-check that each integration is working without having the tests be a maintenance burden. More comprehensive testing should be done on an example integration that you completely control.
Bypassing authentication
You’ll likely have many tests that require a user to log in. One performance optimization to speed up your tests is to bypass the username and password entry and start each test as a logged in user. How you implement this depends on how authentication works on your application. For example, your application may support the ability to pass a short-lived token in a query parameter that serves to log in the user. Alternatively, you could create an authenticated session by setting the proper cookies or session/local storage values that represent a logged-in user.
The downside of this approach is that you’ll need to pass in new values for each test run, as the authenticated state usually becomes invalid after a short period of time.
If you’re bypassing authentication in your tests, we still recommend having an isolated test of your full user authentication flow. This ensures that you still have test coverage for the way that end-users will log in to your application.
Handling multi-user test scenarios
Testing scenarios that involve multiple users can be challenging. Consider a multi-user workflow that involves one user requesting approval, and another user at a different permission level approving or denying the request.
Here are two ways we could set up this test:
Running the workflow sequentially
This is usually the default approach and has the following steps:
- Login as “requester”
- Find a specific item
- Click a button to request approval for the item
- Log out and log in as “approver”
- Find item that’s awaiting approval
- Approve the request
- Log out and log in as “requester”
- Find item and verify that it is in approved state
There are some problems with this approach:
- It’s a sequential test so it will take longer to run.
- The test makes assumptions on the underlying data that can cause the test to be brittle.
One can mitigate the data dependencies by having a process or logic to reset the item back to the unapproved state prior to running the test. We discuss this proactive, explicit approach more in the Test Data Management section. Another mitigation is to create a new item at the beginning of the test and request approval on it. This will make the test longer but it will make it more resilient since it requires no data management.
We recommend taking the second approach using test data management and refactoring this multi-user test into three separate tests in the following way:
- A test to request approval of a new item
- A test that approves an item that is already in a ‘pending’ state
- A test that views an already approved item
We recommend combining this with a test data management approach that makes the following DB updates prior to running the test suite:
- Set the item from Test #1 back to its initial ‘unapproved’ state
- Set the item from test #2 back to a ‘pending’ state
To minimize the chances of missing bugs between the state changes in the tests, we recommend ending each test with a validation that the item’s state changed successfully. This might be as simple as a text or visual check that the item’s new status is displayed on the page.
Running each user workflow in parallel
Consider a different example where you’re testing an interactive chat program. One key test is to validate that one user can post a message, and another user can see that message. Running two tests in parallel can be an effective way of testing this type of workflow.
Handling captchas
Captchas are questions or challenges that are easy for humans to solve, but very difficult for machines to solve. Registration workflows often employ captchas to prevent automated account creation (e.g., with bots). Thus, solving captchas cannot be automated. Instead, you’ll need to either disable captchas in the environment you’re testing, or have some mechanism for conditionally disabling captchas for test accounts.
If you are using Google’s reCAPTCHA, you can use a separate key for testing environments to automatically pass all verification requests. For more information about enabling automated tests in your environments with ReCAPTCHAs, read Google’s Guide.
Handling A/B tests
Like captchas, the best way to avoid problems from A/B tests in your test automation is to disable A/B testing in test environments. If the environment must be deployed with the A/B framework, it’s usually still possible to disable the framework by setting a cookie or browser storage value at the outset in the browser. If neither of these options are available, the next best option is to preset whether the user sees the A or B value in each running test. This can usually be done by copying the cookie value controlling the A/B tests from an existing browser session.
Handling sites with HTTP basic auth
HTTP Basic Authentication is sometimes used as a means of preventing test environments from being publicly accessible. A page with HTTP Basic Authentication enabled will prompt the user to enter a username and password using a native browser dialog that looks like this:
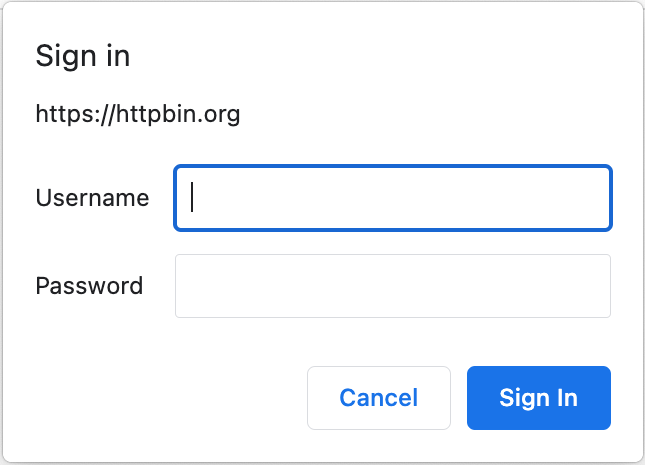
You can bypass the dialog by including the username and password in the test’s URL and
we recommend doing this rather than attempting to automate the text entry in the dialog.
For example, use https://guest:[email protected]/HTTP/Basic/ as the URL.
Including the username and password in the URL directly should grant access and
prevent the dialog from appearing for the duration of the browser session.
Visual Testing
Whereas functional regressions are bugs that affect the functionality of your site (e.g., missing button), visual regressions are bugs that affect the look-and-feel of your application. These can be just as common as functional issues and have a similar impact to the user experience, but strangely most testing frameworks provide no facilities for visual testing.
We recommend using a testing tool that has built-in support for visual testing, or adding on a third-party library that is purpose-built for visual testing.
Adding visual checks to your tests
Imagine you are documenting a manual test case for an add-to-cart workflow. A simplified version of that test case might look like the following:
- Navigate to amazon.com and search for SKU #B00032G1S0
- Observe that “Tuscan Dairy Whole Vitamin D Milk, Gallon, 128 oz” product is displayed
- Click the “Add to Cart” button
- Observe that milk is added to the shopping cart with a quantity of 1 and a price of $3.99.
When translating this into an automated test, each of these “Observe” steps could be represented as visual checks. This gives you coverage for changes to the product name, quantity, and price.
Additionally, you could add visual checks for other things that you would likely be checking when manually testing, but that are not documented in the manual test case. These include things like:
- The product thumbnail image
- The “Add to Cart” button
- The UI of the shopping cart pop-up that displays when the Add to Cart button is pressed
- The UI of the resulting shopping cart icon showing as non-empty
What is not worth visually validating are the elements on the page that are not pertinent to the test—and there are a lot of them! The navigation bar, the footer, the sidebar, etc. are not related to this specific test case and validating these elements leads to noisy tests that fail for reasons unrelated to the test case.
That is why for visual tests we recommend only validating the elements explicitly pertinent to the test. Furthermore, you should not have the same visual assertions across multiple tests. For example, if you are going to validate the top navigation bar, do it in a single test and not on every test that interacts with the top nav.
Similarly, we recommend not using solutions that screenshot the entire browser window. The visual contents of a web page will change over time for many benign reasons, and it’s unlikely that you’ll want to fail an automated test for each one. Instead, use tools that screenshot specific elements on the page when looking for visual differences.
Using visual checks as smart “wait” steps
Visual checks can also be used as a signal to the test to wait before proceeding. For example, imagine that it takes several seconds for the shopping cart widget to appear after clicking Add to Cart. For asynchronous actions like this, you may be tempted to configure the test runner to ‘sleep’ for a fixed number of seconds (i.e., a hard-coded “wait”). This is a poor approach because in the best case your test will be waiting longer than necessary to proceed to the next step, and in the worst case, the time you chose to sleep won’t be long enough and the test will fail erroneously.
Instead of hard-coded sleeps, you should set up your tests to wait for a specific element to appear in the DOM. Or, similarly, wait until an element has the expected visual state before proceeding. The former is a good approach when you know that the element will only appear after the long-running operation completes. The latter approach is better if the element changes its visual state while the long-running operation runs, such as a button which appears with a disabled state until the operation completes.
Test Data Management
Reasoning about test data management
The Getting Started section describes how end-to-end tests should make assumptions about the state of the application and not the implementation of the application. Automated tests are simpler when they can assume more about the state of the application (or environment). We introduced Test Data Management (TDM) as a means of actively managing application data, which results in tests being more repeatable and easier to maintain over time.
TDM allows defining an explicit state for the underlying application data used in a set of tests, and it generally provides a mechanism for updating the application data to produce the desired state.
Managing first-party test data with DB calls or API calls
You can manage your test data in several ways:
- Restore your database from a snapshot before executing your tests. This is a heavy-handed approach and works best for ephemeral environments that are used for testing on every Pull Request.
- Run a script to reset a subset of data prior to executing your tests. We recommend this approach if you’re testing against a long-lived environment like a QA or Staging environment.
Managing third-party test data with API calls
Your application likely has integrations with third-party providers for things like authentication, billing, etc. Managing test data within third party systems is more challenging than in the systems you control. You can use the provider’s underlying APIs to manage the data.
Set up data before tests run, don’t tear down data after tests finish
A frequent pattern in unit testing is to have a setup phase that sets up state before the tests run, and a teardown phase that cleans up state after the tests run. For end-to-end tests, we recommend the concept of a setup phase, but not a teardown phase. This is because if tests fail, you can view the application in its current, failed state by using the application directly or by querying the database. A teardown phase would clear application state which might be crucial information to help reproduce, diagnose, and root-cause any bugs that caused the failure in the first place.
Frequently Asked Questions
What kinds of workflows should I test in a regression test?
Test the workflows that are:
- Most critical to the business. These are the workflows where bugs would have the greatest impact. “Sign in” and “Sign up” flows are great candidates, as are workflows that are part of your conversion funnel.
- Historically buggy.
- “Happy Path” scenarios, rather than error conditions. Regressions in the happy path will usually be more severe and impact a larger percentage of users.
Creating effective tests for these workflows will reduce bugs and improve the quality of your software over time.
What shouldn’t I test in a regression test?
Avoid creating tests that would be better served as integration tests, or API tests. And, of course, avoid using end-to-end tests for pure monitoring/liveness scenarios that don’t interact with the application. Good end-to-end tests should closely mimic how a user interacts with your site. If your test only performs network requests and validates their responses, then it’s better to write that as an integration test using a tool like Postman.
Should I still write unit tests and integration tests?
Yes, end-to-end tests aren’t a replacement for unit and integration tests. You should create all three types of tests so that you have defense in depth for bugs. Additionally, this ensures that you’re testing assumptions and requirements at different levels of your application architecture.
When should I run my regression test suite?
Start by running your tests in the first environment that code reaches after it is merged. Ideally you’ll run these tests automatically after every deployment to this environment. Once your tests are stable, expand them to run in other environments. Running end-to-end tests on every pull request is a powerful concept but is harder to implement in practice.