Quick Start
Welcome to Reflect! To get things kicked off, here's a brief overview to get you started in creating your first Reflect tests.
Recording a Test
To create your first test, start by clicking the Create Test button. In the modal that opens, you can configure the properties of the new test such as the name, starting URL and device profile. Reflect supports profiles for Desktop, Mobile and Tablet devices.
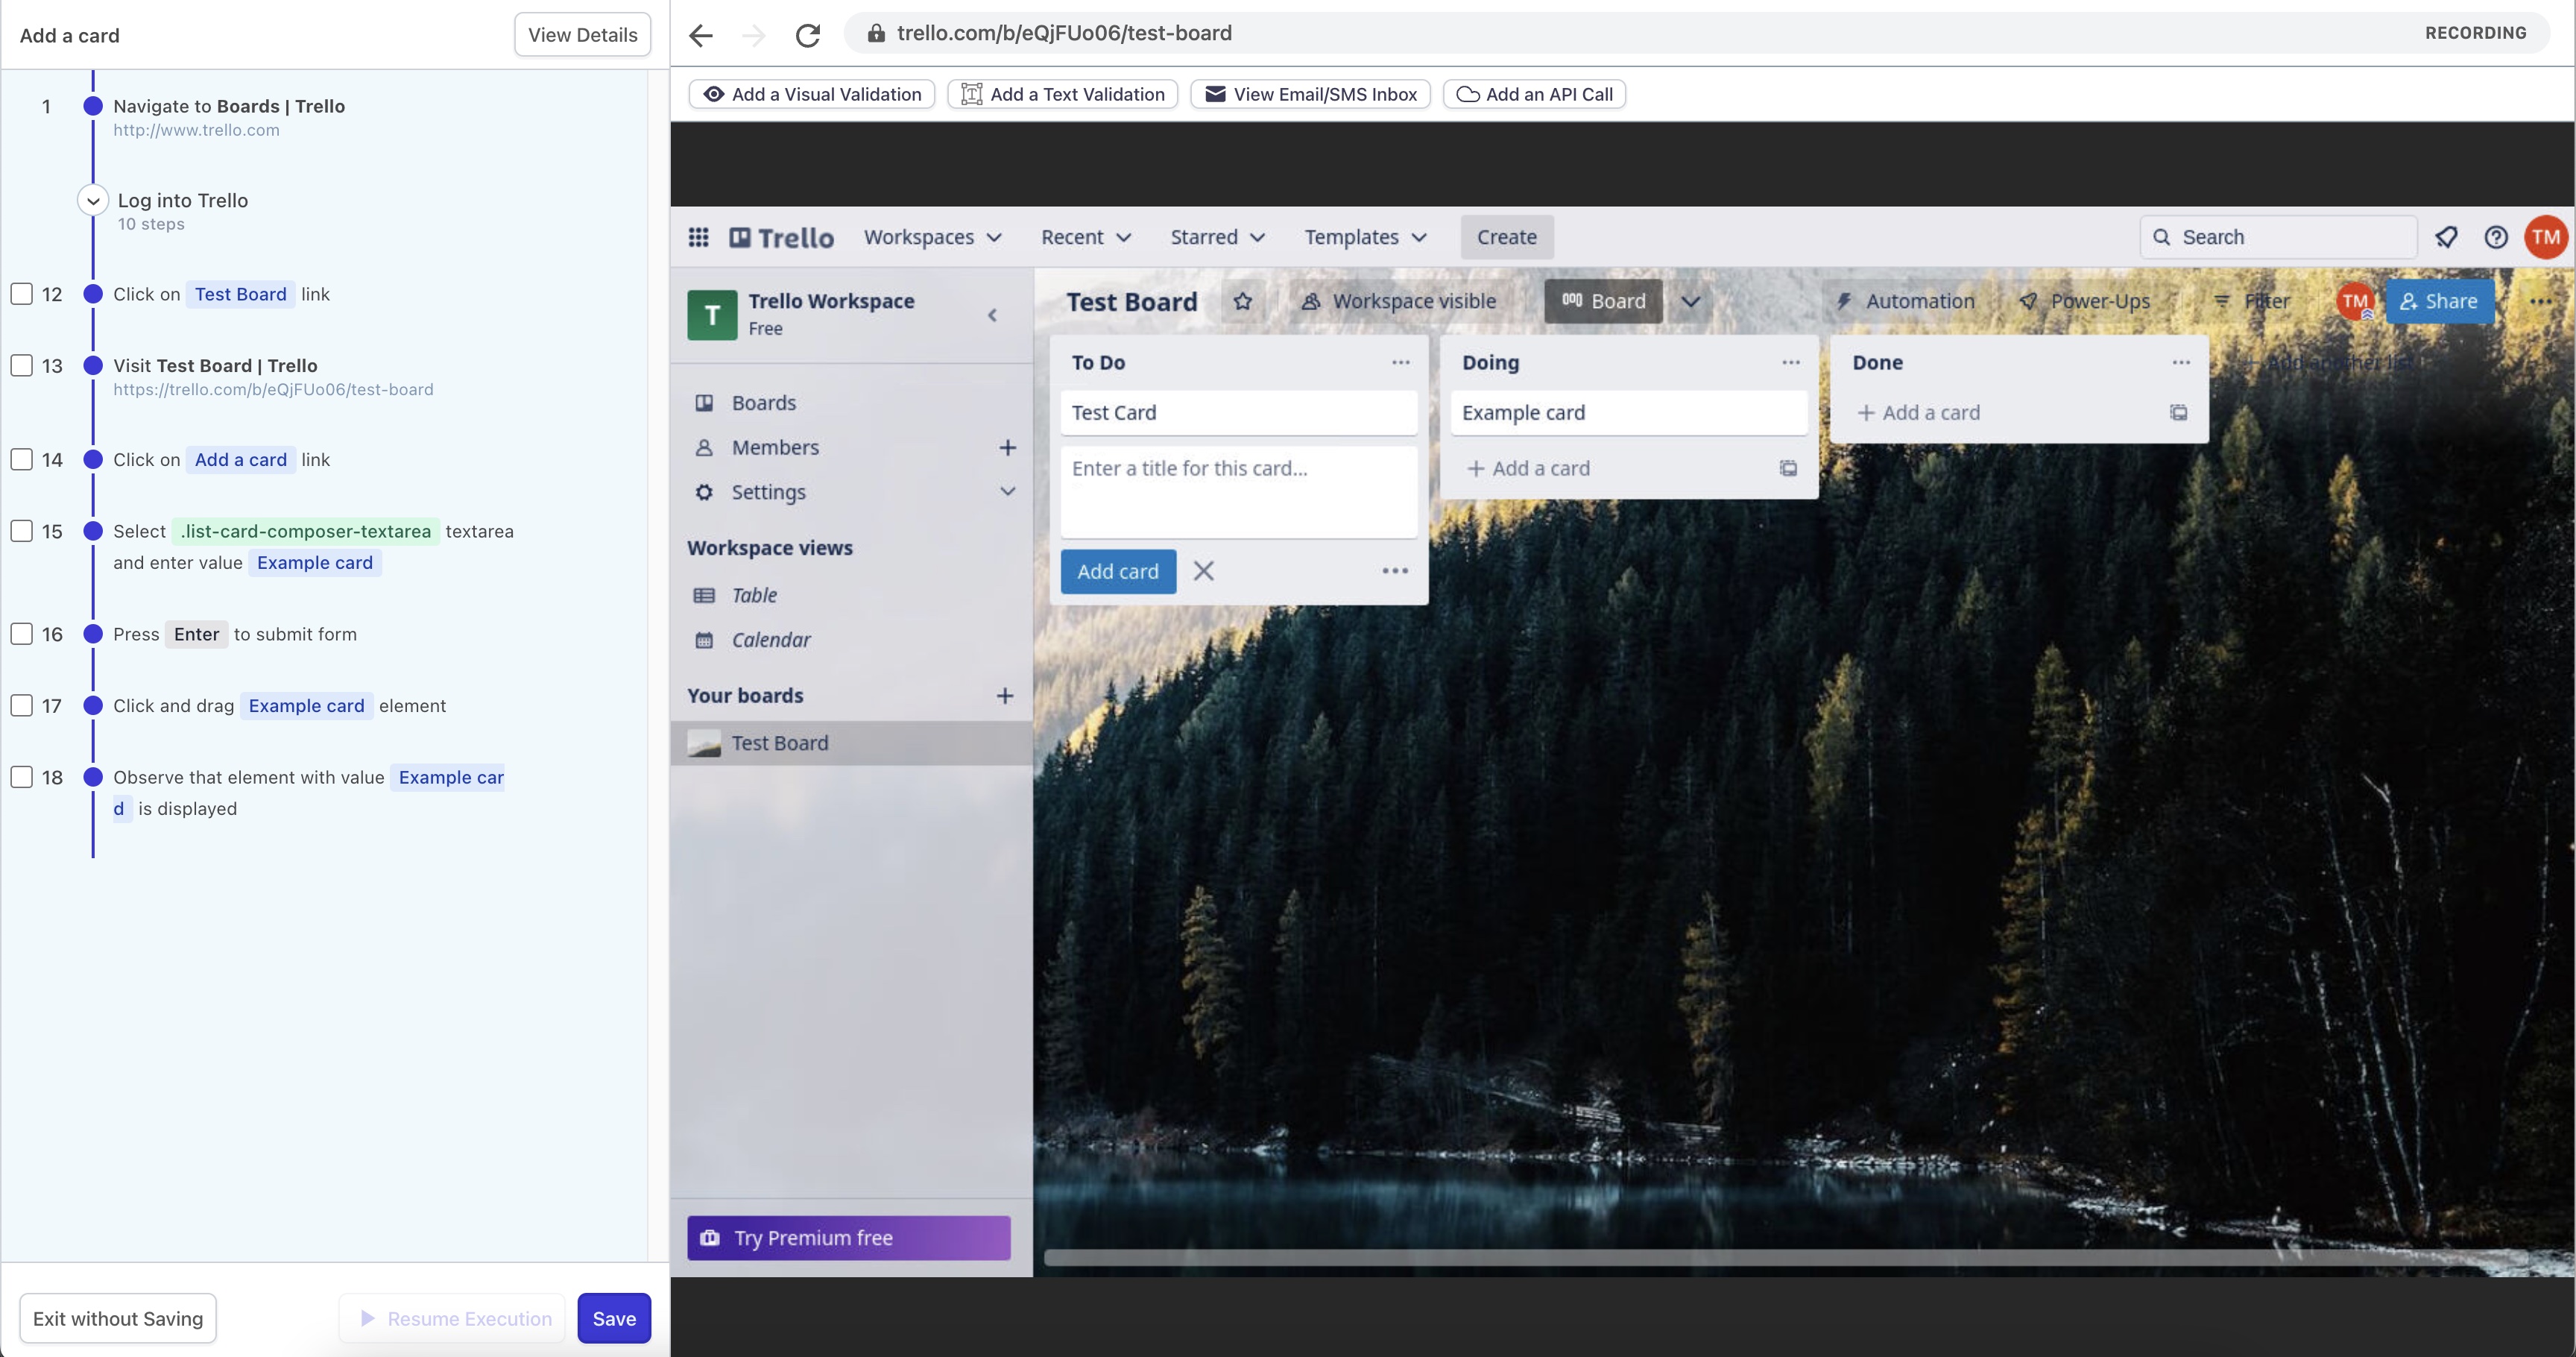
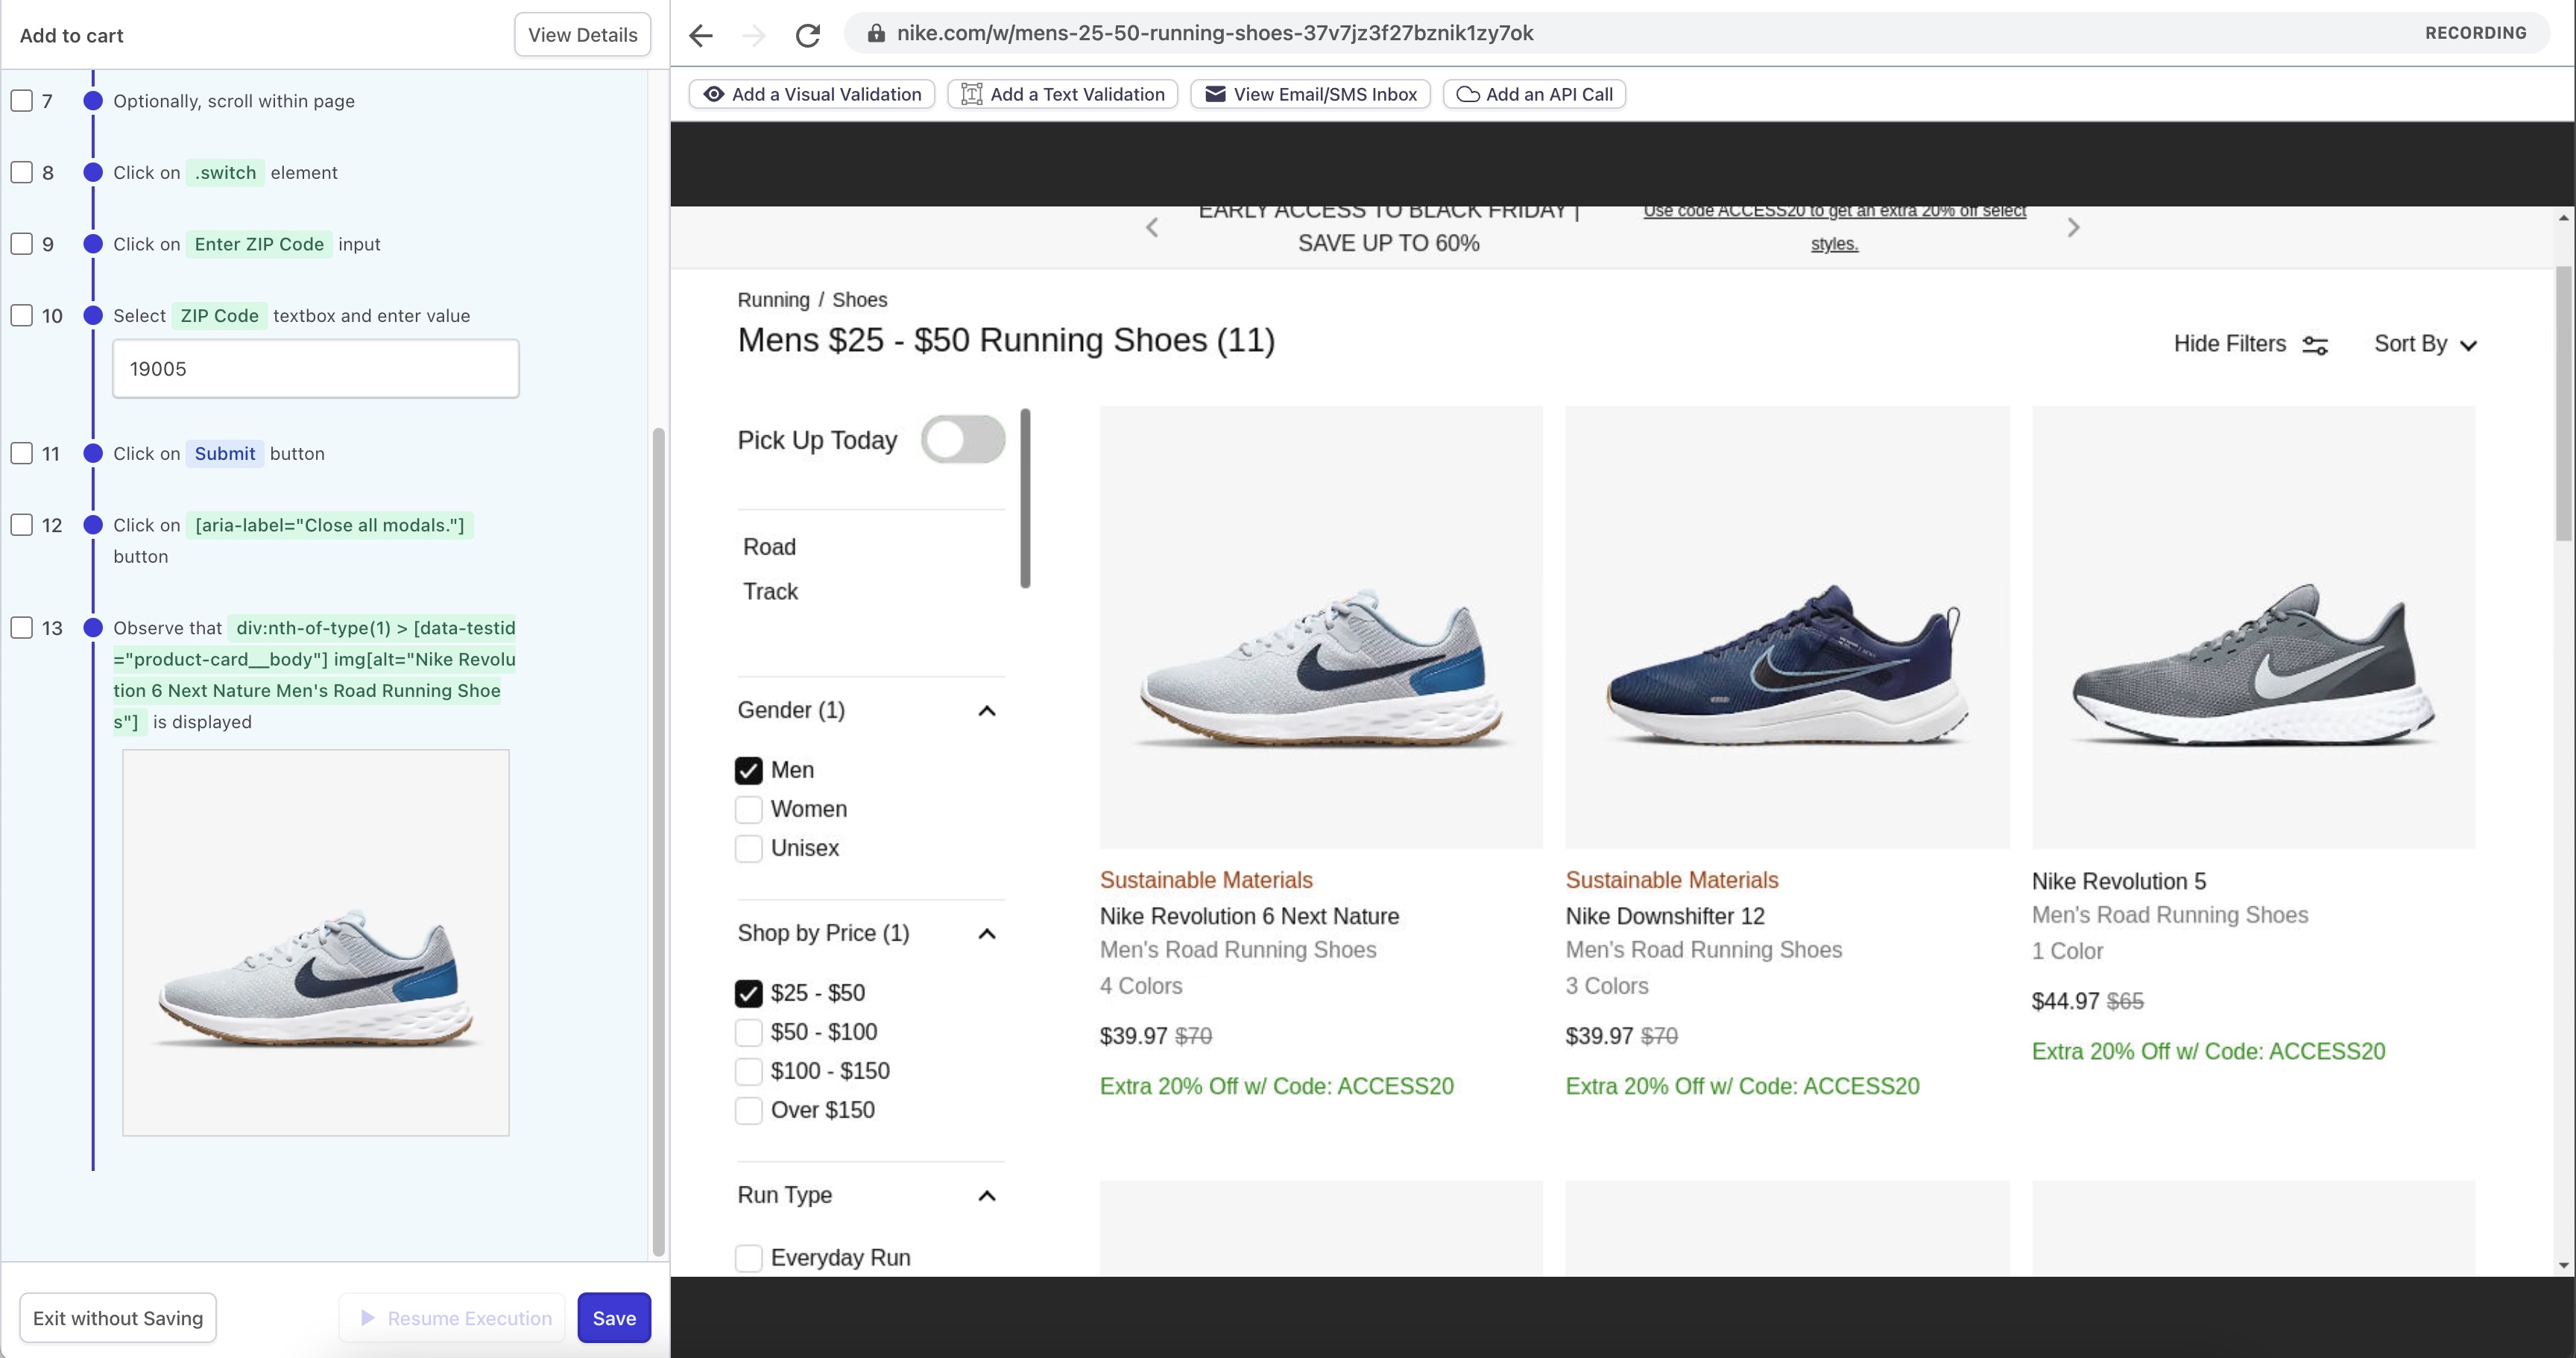
After clicking Begin Recording, Reflect will spin up a cloud-based browser session and load the starting URL that you specified. Once the page has loaded, simply perform the test steps you wish to record as if you were performing a manual test. As you interact with your site, you’ll see test steps automatically added to your test plan on the left sidebar.
Reflect is capable of recording tests across multiple pages and across multiple sites.
To prevent recording actions which will result in a failed test,
Reflect disables all inputs to your test recording while a page is loading.
This will be indicated via the Loading vs. Recording indicator at the top-right of the screen.
You’ll notice that the recording will be in the ‘Loading’ state any time a new page is loading
(e.g. after clicking a link, but before the page’s oncontentloaded event has fired).
One feature of note is our Visual Validation functionality that appears on the toolbar above the recording. Visual Validations allow you to create test steps that verify the appearance of an element on the page. To create a Visual Validation step, click the Add a Visual Validation button. Then, click-and-drag to select the region you’d like to screenshot, and click Save. To verify only the text contents of an element, use the Add a Text Validation option in the recording toolbar.
After you’ve run through all of the steps that you’d like to test, click the Save button on the bottom left of the screen. A modal will display prompting you to confirm the test details. After saving the test, Reflect immediately executes the test and connects you to the cloud browser again so that you can optionally watch the first execution of your newly recorded test. If a test step fails, you will have the option to re-record the test step and continue. You can exit the first-run experience at any time by clicking Exit.
Viewing Test Runs
Every time a Reflect test is executed, a Test Run is created which captures a range of information about the test execution including:
- The results for each test step that was executed
- A video of the test execution
- The network and console logs associated with the run
All test runs associated with a test can be viewed by clicking on the test name from the main Reflect screen. The page that’s displayed is the test’s definition page, and includes a Test Runs section that displays all test runs for the test within the account’s retention period. The test definition page also includes additional metadata about the test, such as its Folders.
Executing a Test
Tests can be run on-demand by clicking the Run button on the Test List page, or the Run Test button on the test definition page.
Slightly different than one-off test execution is orchestrating your test to run as part of a Suite. Suites combine test execution, environment configuration and notifications into a logical unit of execution.
Conclusion
You should be ready to create and run your first tests. If you hit issues along the way, please let us know by emailing support@reflect.run and we will be glad to assist!