


Introduction
Angular is one of the most popular frameworks for creating web applications. Angular is designed to be a “batteries included” framework, meaning that many of the things you’d need to build and maintain a web application are included with the framework.
In this article, we’ll cover how you can start implementing the following types of tests in Angular:
- Unit tests
- Component tests
- End-to-end tests
Let’s get started!
Setting up our Angular project
When you initialize an Angular project with the ng new command, Angular defaults to setting up
Jasmine which is a popular library for unit testing. However Angular does support the use
of alternative unit testing libraries. For example, you could instead opt to use Jest, a unit
testing library developed by Facebook which is very popular in the React community. In this article, we’ll assume that
you’re using the default library: Jasmine.
Unit tests are small bits of code that test a very specific behavior, such as the behavior of a single function in your app. In addition to being short, unit tests also tend to run very quickly; typically orders of magnitude faster than an API or integration test.
Unit tests in Angular always live in files that end in .spec.ts and can be run via the ng test command. The
ng test command is responsible for finding the unit tests that should run, and executing it using the unit test
library that you installed.
Throughout this article, we will be testing a sample web application which is a simple calculator. Before we start creating tests, let’s first create the Angular calculator project.
You should already have Angular installed, but if not, you can install it via Angular’s homepage. Once it’s installed, run the following command in your terminal to generate the example calculator app.
|
|
Open the newly generated calculator project in your favorite editor. Open the src/app/app.component.ts file. It
contains the AppComponent class with a single member, title.
|
|
Open the accompanying src/app/app.component.spec.ts file that Angular had auto-created. It contains a describe block
with 3 it tests. This is how we write test code - inside it blocks, inside a describe block.
The it block represents a stand-alone feature being tested - i.e. a single unit test. This block always has at least
one expect statement. These expect statements are the actual tests. We are expecting our code to behave in a
particular way.
The top-level describe block is just a way to organize your unit tests. For example, maybe you have a number of unit
tests you want to create for one component. Each unit test would be in a separate it block, but they all could live
inside a single describe block. The describe and it blocks take a string as its first argument. This string is
meant to describe the block, and is output in the logs when the tests run.
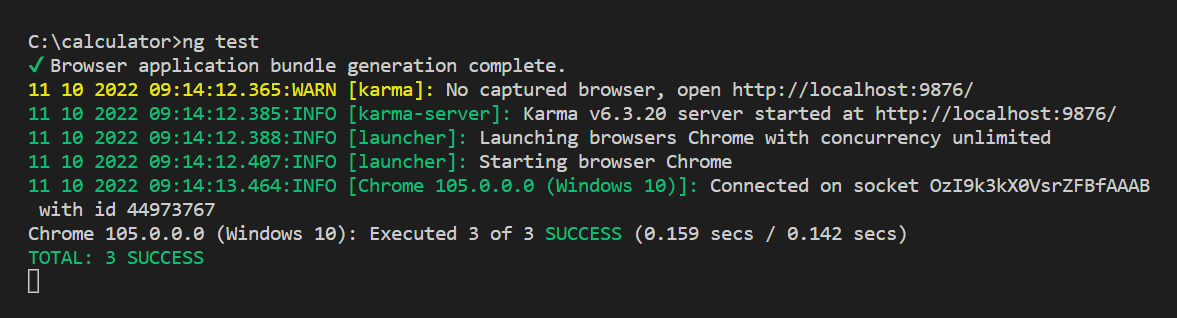
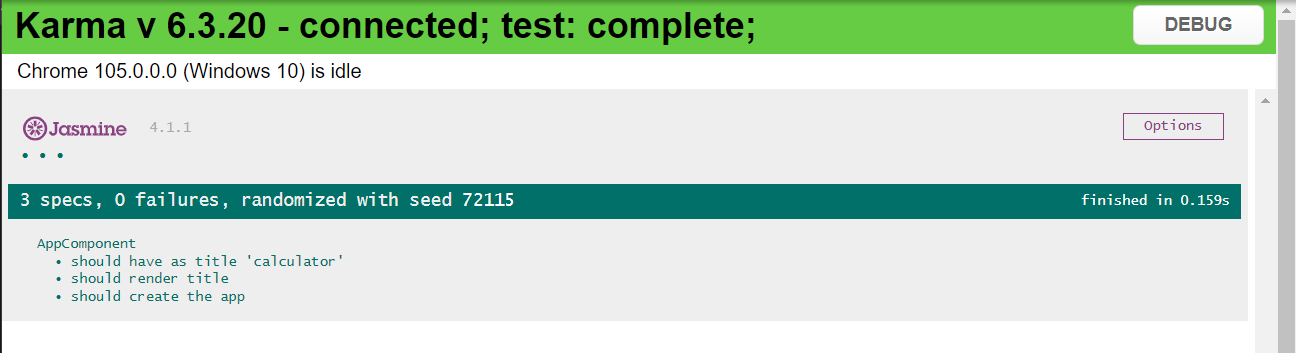
Let’s see this in action. Run ng test and observe that all 3 of these tests pass immediately. The ng test command
will output the test results in the terminal as well as in a dedicated browser instance.
How to write unit tests in Angular
As we mentioned previously, unit tests are meant to be fast and simple. In Angular, you can write unit tests for a TypeScript class, utility methods, pipes, services, or guards.
To create an Angular unit test, we’re going to complete the following steps:
- Create a file ending with
.spec.tsextension. You can name this whatever you want, but it’s considered a best practice to name the file after the class, function, or component that you want to test. - Write unit tests inside this spec file using the Jasmine library.
- Run the
ng testcommand and you will see the test results.
For the sake of simplicity, our calculator will only support addition. Let’s create an add method inside the main
src/app/app.component.ts file. Include the following in the body of AppComponent.
|
|
Your src/app/app.component.ts file should now look like the following:
|
|
Now that we’ve created the add method, let’s test it.
We already have a spec file (src/app/app.component.spec.ts). We just have to write the it block for addition. Append
the following it block to the existing 3 blocks in src/app/app.component.spec.ts:
|
|
Your src/app/app.component.spec.ts file should now look like the following:
|
|
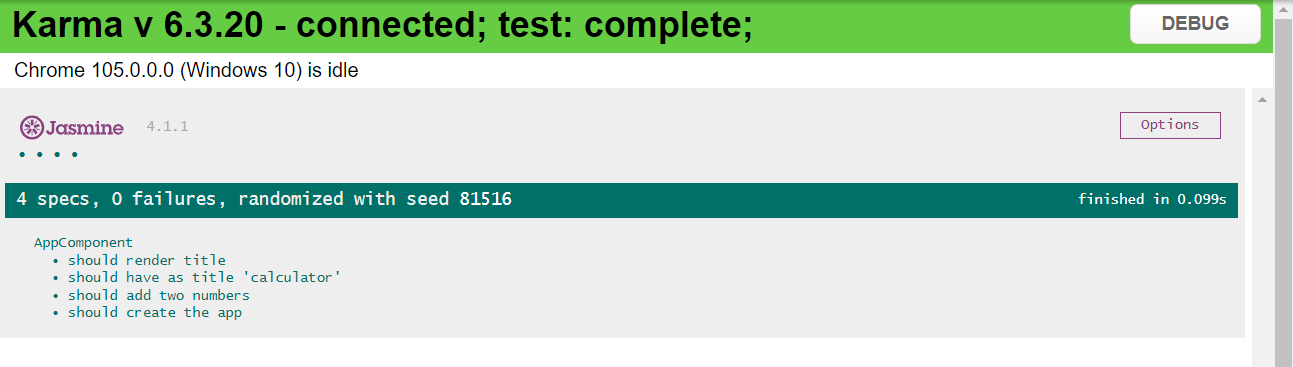
If you return to the terminal where you launched ng test or to the dedicated browser instance that the command opened,
you will see that while editing, the tests (and results) were being auto-updated.
All 4 tests should pass this time.
Component testing in Angular
An Angular component is a TypeScript class and an HTML template working together. As such, testing an Angular component involves ensuring that both parts are coupled as intended.
Because the component involves both the template and the TypeScript class, we need a way to control both in the test
code. This explains why somewhere in the spec file (src/app/app.component.spec.ts), we have the following code
|
|
The above code compiles and prepares AppComponent. Consequently, inside the it blocks, we can obtain a working
instance of AppComponent with the following:
|
|
The obtained instance will then work as if the component was actually in the browser at run time.
Angular comes with an @angular/core/testing package. This testing package provides utility classes and functions for component testing. TestBed is the most used class from this package, and is used in the snippets above.
The difference between unit and component testing is that unit testing, as the name implies, tests just a given piece (unit) of logic. Whereas component testing is for checking the entire Angular component. When you create components in Angular, write tests for the core functionalities of those components. By default, the Angular CLI generates the spec file for each component’s TypeScript file, as you generate that component. So this makes component testing easier.
To test Angular components:
- Write
expectstatements that check that component’s HTML template appropriately renders values from the TypeScript class. - Also check that the template appropriately calls the class’ methods.
- Furthermore, while testing Angular components, write unit tests for logic-only parts of the TypeScript class, that may not have interaction with the HTML template.
How to write end-to-end tests in Angular
End-to-End tests are the topmost level type of test. They supersede component testing. End-to-End tests (e2e) target full-blown applications. They ensure that the entire app works as it should.
An Angular app is made up of several components. After testing each component, write end-to-end tests (e2e) for the entire Angular app. E2E checks that the Angular components appropriately interact with each other to create a full browser page.
Reflect is a powerful tool for building end-to-end tests for Angular apps. Unlike the examples above, Reflect does not require any code. Instead, to create a test in Reflect, you simply record your actions using Reflect’s built-in recorder. Those actions automatically get translated into an end-to-end test that you can run any time.
One of the nice things about this tool is that it’s very easy to hook it up to run automatically whenever you deploy your code. For more information on how to use Reflect and integrate it with CI tools like Jenkins and CircleCI, checkout the Reflect homepage.
Conclusion
Testing is essential for a business’ success. When you write tests for your products, you minimize crashes from code changes. Testing should not be cumbersome. Reflect makes end-to-end test easy across all frameworks, Angular inclusive.
In this article, you’ve learned how to write unit, component, and end-to-end tests in Angular. Most especially, you’ve learned how to use Reflect with Angular. Cheers to the many Angular e2e tests you will run with Reflect!
Happy Coding.