


In this guide, we will cover how to handle asynchronous operations while testing our React components using React Testing Library. To follow this tutorial, a basic knowledge of React is required, as well as some familiarity with React Testing Library, which is sometimes referred to as RTL.
JavaScript: Asynchronous by default
For all but the simplest JavaScript applications, some form of asynchronous behavior is practically a given. Imagine a simple web application that fetches some data from an API and displays it on the UI. At a minimum, an asynchronous call will be used to fetch the API response. Other asynchronous behavior in this simple app could include things like:
- Handling when the API call returns with an error or timeout via Promise chaining or a try/catch block and async/await.
- Applying the UI updates in a
requestAnimationFramecallback to avoid blocking the UI thread. - Rendering updates on a delay via the
setTimeoutfunction.
From the earliest versions of JavaScript, async operations have been treated as a first-class feature. Whether you’re
using XMLHttpRequest calls, or more modern APIs like fetch or Promise chaining, JavaScript is designed to be
asynchronous by default.
Before covering how to handle asynchronous behavior in your React tests, let’s review a feature of JavaScript that makes writing and maintaining async code easier: the async and await constructs.
Async / await
Rather than using the built-in callbacks then(), catch(), and finally(), we can define how functions that return a
Promise are resolved by using the await keyword. This tells the JS runtime to wait for the Promise to be resolved
before proceeding, and allows async code to be read top-down rather than having to follow callback references across the
codebase. Note that to use this keyword, we must call it inside a function that has the async keyword:
|
|
fetch is an asynchronous function that is expected to return a Promise. As we can see, we wait for the Promise with
the await keyword inside an async function.
Another way to handle the returned Promise is to define a callback function inside the Promise.prototype.then function like so:
|
|
Rendering asynchronous data in React
To deal with asynchronous code in React Testing Library, we must first create a React application. The following code creates a simple React app that fetches a list of posts from an API called JSONPlaceholder and displays them when the component is mounted:
src/RenderPosts.js:
|
|
Note: For brevity, we’ve removed some parts of the code. You can see the complete code here.
In the RenderPosts component, we are using axios to make an HTTP call to an endpoint as seen in the useEffect
Hook. We are also using the try/catch/finally block to catch errors and update the error and loading states. This way,
we will be able to explore all the necessary async methods that React testing library provides.
Like the browser’s fetch function, Axios APIs also return a Promise, and so we wait for the resolved value or error
message with the await keyword inside an async function.
In the end, our app behaves like this:
React Testing Library setup
When working with a component that is rendered asynchronously like in the demo project above, we can write a test that confirms:
- We receive and render the asynchronous data.
- We display an error message when data could not be fetched.
- The loading text initially appears and disappears when the data arrives, or an error message is returned.
Installing React Testing Library
React projects created with the create-react-app CLI don’t need any installation because React Testing Library already comes bundled with it. Otherwise you can install it via npm:
|
|
To run the example belows, you’ll also need to install
the jest-dom utility that exposes custom matchers like
.toBeInTheDocument().
|
|
Now let’s start testing.
Using React Testing Library
Before implementing a complete test, let’s explore RTL’s facilities for debugging test failures:
src/RenderPosts.test.js:
|
|
In this example, we’ve started by importing the render and screen from RTL. The render method lets us render the
React component to test in the DOM while the screen object exposes the debug method alongside the queries to access
the rendered output.
If we run the test with npm run test, you should get the following test results:
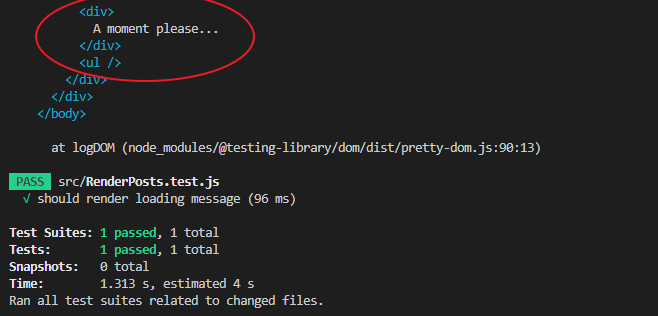
This test is passing because there were no uncaught errors when running the test case, and we did not include any
assertions. We will fix that in a bit. For now, let’s focus on the rendered message. The debug() method prints out the
state of the DOM when the method was invoked.
Next, let’s add the logic that asserts that the loading text is present in the DOM. Our updated test now looks like this:
|
|
This is pretty simple. All we did was assert that the loading text is present in the document. In the next section, we will start testing for asynchronous code.
Testing for appearance
Like we showed earlier, the RenderPosts component displays a loading message on the initial page load. A network request is then kicked off to retrieve a list of posts. Once the network response is retrieved, the loading message is replaced with the list of posts sent from the backend server.
Since the list of posts is loaded via an asynchronous fetch, we will need to set up our test to wait for the posts to
display. We can handle it using the async and await constructs that we used earlier when implementing our
RenderPosts component.
Let’s start by testing that we receive and render asynchronous data.
Using the waitFor method
RTL’s waitFor function returns a Promise which is resolved when either the given boolean condition is met, or the
operation timed out. For this test, we will use the waitFor function to tell RTL to wait for some known text from a
post to render on the screen. Like other async functions, we will use the await keyword so the code is easier to read:
|
|
When waitFor is invoked, if the condition is not met it will retry the callback again at a 50ms interval until the
text appears or the call times out. The default timeout value for waitFor is one second. If this timeout value is hit,
RTL will finally throw an error and the test will fail.
We can control the timeout, interval and other optional values by specifying an object as the second parameter:
|
|
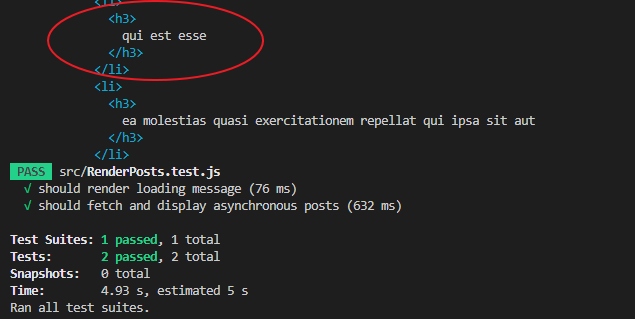
The test is now correctly checking for the expected text and is passing. And if we uncomment the debug() in the test,
we will see the asynchronous data rendered like so:
False-positive failures
False-positive failures occur when the test passes even though the functionality it’s testing is not working. When dealing with asynchronous operations, the testing framework must know when the asynchronous operation is completed before validating the expected behavior of the component.
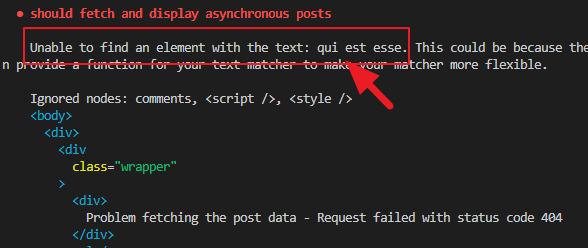
In our case, when we use an async method like the waitFor, we must ensure we handle the returned Promise. If we take a
moment and remove the async/await keywords from the test, the test will complete before the asynchronous Promise
settles. This means the test will pass even if we intentionally break the API endpoint URL in our RenderPosts
component.
If we instead wait for the Promise to resolve, it will detect errors as expected.
Mocking an API
Presently, when we run our test, we are hitting the actual API endpoint and waiting for the API to be done. This is not ideal. It can lead to slow and fragile tests, and adds an external network dependency to these unit tests. Instead, we will create a mock to model the exact API interaction.
To do this, we will use the Mock Service Worker recommended by RTL to mock the API. This way, instead of hitting the API, the msw will intercept the actual request and send a mocked response back.
To use it, we must install it:
|
|
After that, we will import the rest and setupServer from the msw package inside the test file:
|
|
Next, we’ll create a server instance and configure the mocking server. We will add the following code above the test cases:
|
|
In the code, we defined the request we want to mock and specify a mocked response to return. The mocked response should
take the shape of the actual response. Like the actual response, we received an array of objects containing the post
title and id.
If we save our file and run the test, it will fail because msw is now intercepting the request and returning the mocked response. In our case, it returns the “title 1” text.
That means we must update the asynchronous test to now wait for the “title 1” text to be present in the DOM.
|
|
Handling server error
When we make an asynchronous call, we also expect an error message from the server when the Promise is rejected. In our
RenderPosts component, the catch block catches the error which we then use as the updated error state.
This state is used to display a custom error message on the screen. To assert that the message is present on the screen,
we will also use the waitFor utility:
|
|
The waitFor implementation is the same as our earlier usage except that here, instead of creating a new server
instance with msw, we override the existing server to return a server error.
Using the findBy method
findBy is another async method provided to deal with asynchronous code. We can think of it as the combination of
waitFor and getBy. This means we can replace them with findBy.
If we rewrite our previous test that asserts that posts are present in the DOM by using the findBy, we will have:
|
|
The findBy returns a Promise which resolves when an element is found or rejected if no element is found or if more
than one element is found. Like the waitFor, it has a default timeout of one second. If we must target more than one
element, we must use the findAllBy variation.
Waiting for disappearance
Here, we will test that the loading message disappears when the post data arrives. In other words, the message is
removed asynchronously from the DOM. We can do this using the waitFor utility. However, RTL also provides a more
elegant way to test that an element initially appears and later disappears. We will take a look at both ways.
Using the waitFor to wait for disappearance
We can write a test that waits for an element to disappear by using the waitFor alongside the queryBy method:
|
|
In the waitFor callback, we assert that the loading text is not present in the document. As you may be aware, the
queryByText initially finds the loading message in the DOM making the assertion to fail because it expects the message
not to be in the DOM. waitFor then receives a false expectation and runs the callback again until the queryByText
returns null when the loading message disappears.
Using the waitForElementToBeRemoved
An elegant way to wait for the disappearance is to use the waitForElementToBeRemoved helper function that tests that
an element initially appears and later disappears asynchronously. It is a wrapper around the waitFor utility and so
the usage is similar. We import it from the testing library:
|
|
And use it like so:
|
|
The waitForElementToBeRemoved returns a Promise and resolves when the target element is removed. This function
requires that the target element is present initially in the DOM before waiting for removal.
Conclusion
As React developers, we often write components that render data asynchronously. Knowing how to deal with this situation when we write a test with React testing library is essential to improving the quality of our code. In this tutorial, we learned how to properly write a test to avoid false-positive failures.
We also learned how to mock APIs to prevent making actual HTTP calls using the mock service worker. This further improves the reliability of our test code and helps prevent false negatives. This way, even if we change the fetching implementation, our test will not break.
If you enjoyed reading this guide, endeavor to share it around the web. You can find the project source code on this GitHub repository.
Try Reflect: A no-code end-to-end testing platform
End-to-end tests are a great complement to unit and component testing. Reflect is a no-code end-to-end testing tool that makes it easy to get automated test coverage for the critical workflows in your web application.