


Introduction
Nowadays, most web applications don’t serve all of the data needed to render the entire page within the initial HTTP
response. Instead, most web applications load data asynchronously in fetch() or XHR calls that are separate from the
initial page request. This allows web applications to load new data incrementally without having to reload the whole
page, but it means that when testing web applications, it’s not sufficient to wait for the initial page load before
running your automated tests, since your tests may be reliant on data and UI elements that don’t yet exist on the page.
Given this behavior, how should automated tests interact with elements that are loaded asynchronously? A common approach to handling this problem is adding “sleeps” in your tests so that you give the element time to fully load. However as we cover in our regression testing guide, adding “sleeps” leads to brittle tests that are hard to maintain. A better approach is to wait for elements to be interactable before proceeding.
In this article, we’re going to take a look at how tools like Cypress have this functionality built-in, as well as outline how to achieve something similar in your Selenium tests.
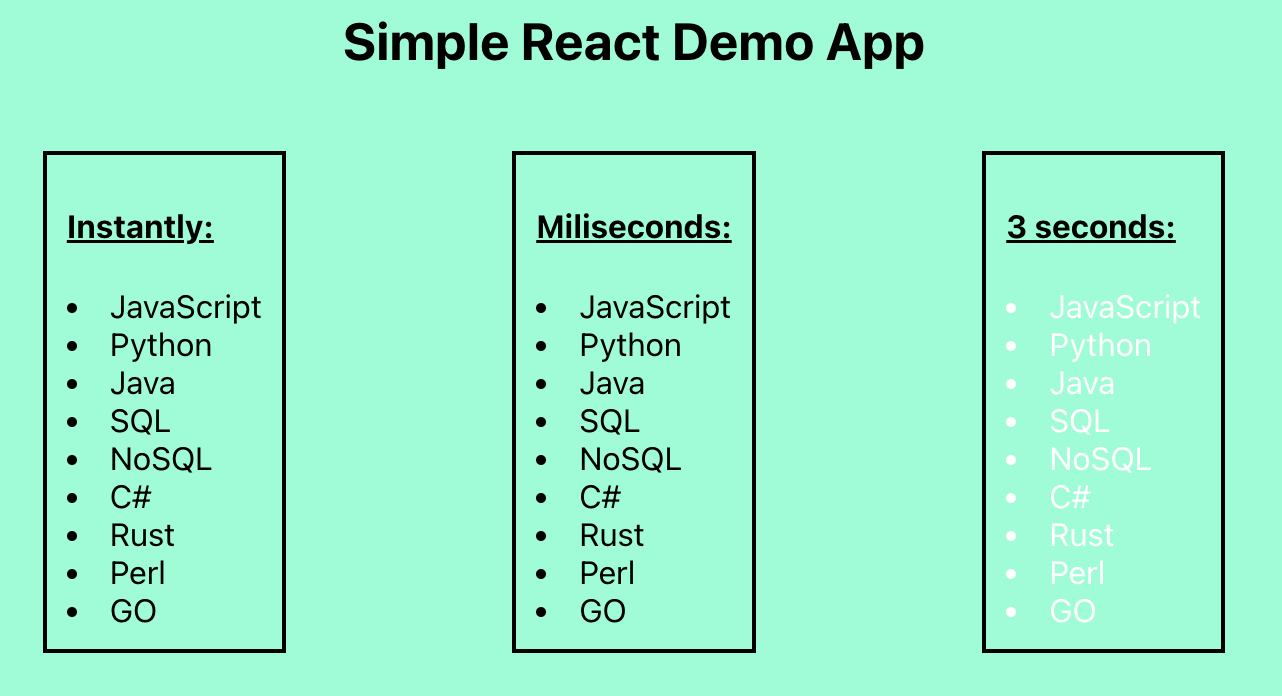
I have created a simple React app which renders three list elements at different times. The first element gets rendered instantly, the second one makes an API call which takes some milliseconds to respond, and the third element gets rendered after three seconds. Additionally, the color of the list elements will change to white/black after clicking them.

The whole source code used in this article can be found
here. In order to get the demo React app running, cd into
the “demo-app” directory and run npm install.
Why you should avoid using “sleeps” in your tests
Before we dive into the code, let me first clarify why it probably is a bad idea to add “sleeps” to your tests. The first problem is that the test execution time can increase drastically when “sleeps” are added to your tests. Secondly, it can be pretty tricky to decide on which sleep time to use (1 second, 5 seconds, or even a minute?). In case the elements are rendered faster than the expected sleep time, you’re clearly wasting time. But if the elements take longer to render than the expected sleep time, your testing script will fail.
Both problems can be solved by waiting for elements to be interactable before proceeding.
Waiting for elements in Cypress
In order to run the Cypress tests linked above, make sure that you are in the “demo-app” directory and then run:
npx cypress run --browser chrome --headed
This starts the Cypress tests in a new Chrome browser window. You can of course change the browser you want to use and
you could also run the test in headless mode by adding --headless instead of --headed.
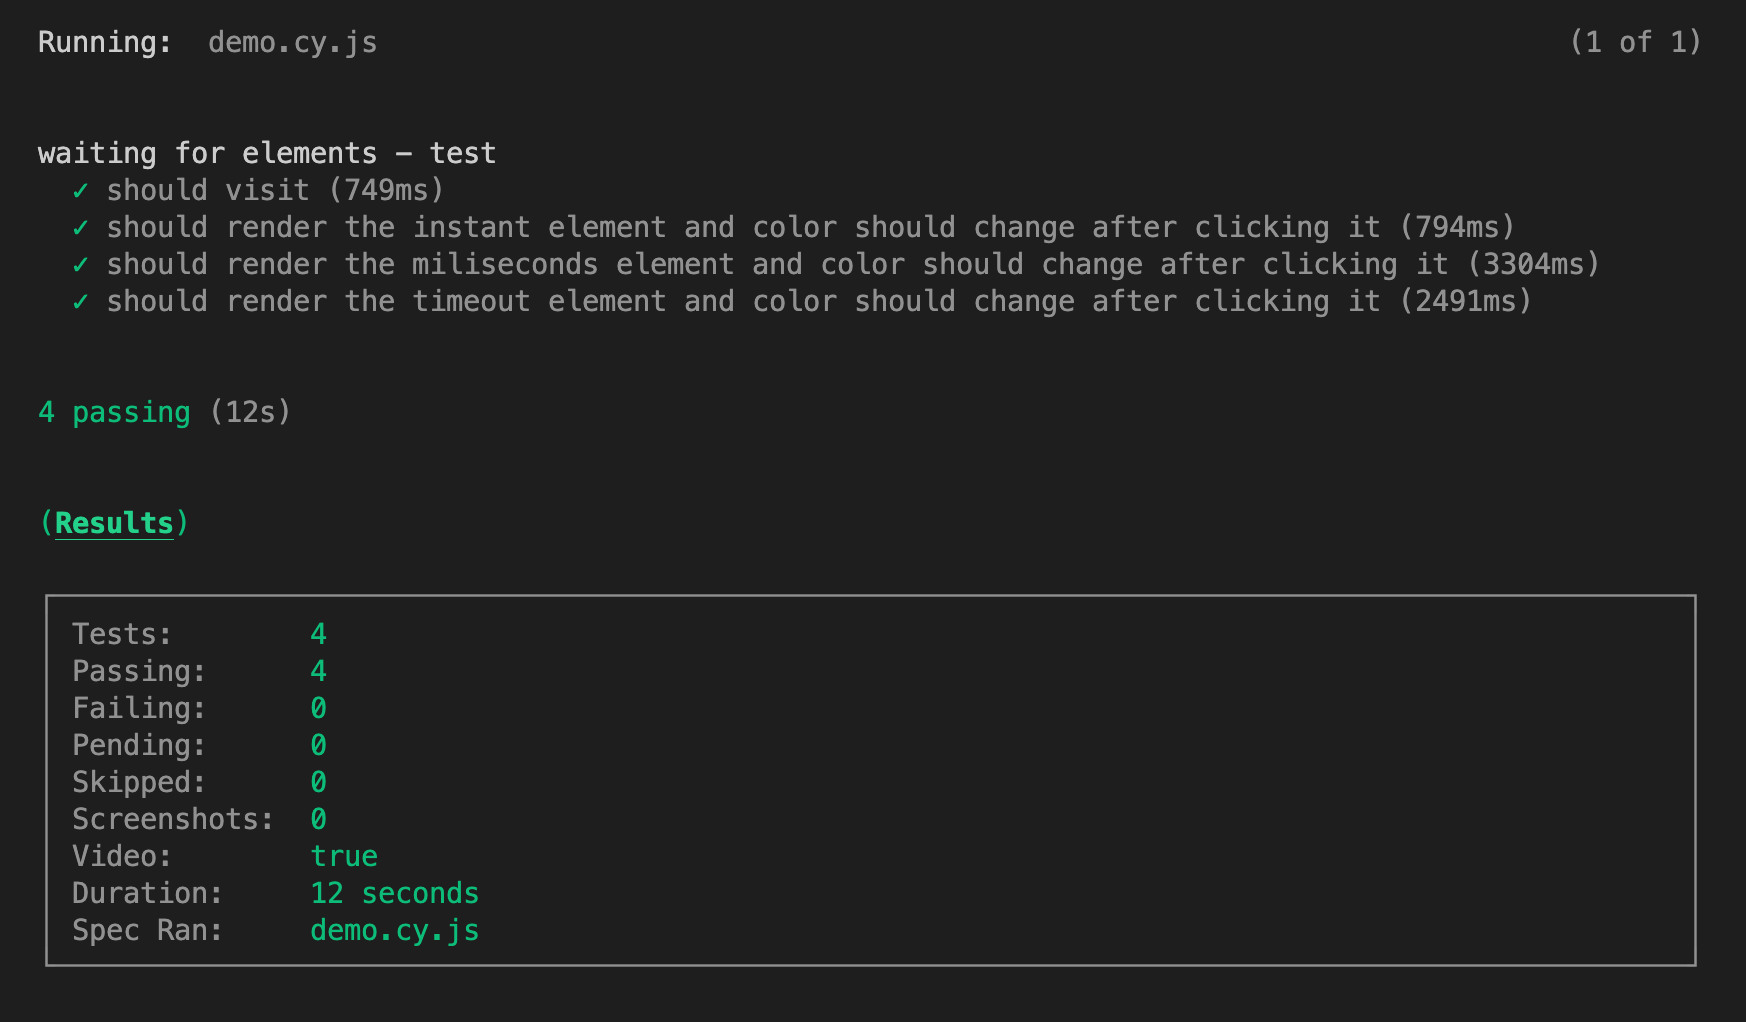
In your terminal you should see all of the tests passing successfully:
Since this article is not explicitly about testing in Cypress, we’re just going to have a quick look at the underlying test script.
The test below, taken from demo-app/cypress/e2e/demo.cy.js,
checks the visibility of an element which always renders three seconds after the page is initially loaded.
|
|
cy.get(".timeout") selects the DOM element that contains the class name “timeout”. The really interesting part lies in
the second method .should("be.visible"). .should() creates an
assertion which describes the desired
state of the application.. Specifically, this assertion expects the element “timeout” to be visible. The great thing
about Cypress’ .should() command is that it automatically retries the assertion until it passes or times out. By
default, Cypress will try to find the “timeout” element for up to four seconds and since this element gets rendered
after 3 seconds, the test will pass. You can easily adjust the timeout by adding the timeout option as a second argument
to the “get()” method:: cy.get(".timeout", { timeout: 10000 }).should("be.visible").
In the demo.cy.js test file you can find further tests, which also test the other two list elements. In addition, I
included tests which will check that the color of the list elements change after you click them.
Waiting for elements in Selenium
The code for the following Selenium tests can be found in the selenium-scripts directory. These examples were tested
on Selenium 4.2.0. For instructions on setting up Selenium in your machine, refer to
Selenium’s docs.
There are three ways of implementing waiting strategies when working with Selenium:
- Explicit waiting
- Implicit waiting
- Fluent waiting
For designing the Selenium tests I decided to go with Python’s built-in testing library
unittest., cd into
selenium-scripts and run python test.py.
No waiting
Before we have a look at the waiting methods in Selenium, let’s see what happens if we don’t add any waiting strategy to
our code. Both the function below and all the other testing functions can be found in selenium-scripts/utils.py.
|
|
Unlike Cypress’s “.get()” method, the driver.find_element(By.CLASS_NAME, element_name) statement will not wait for the
associated element to appear. Instead, it will throw a NoSuchElementException immediately if the element does not
exist on the page.
The relevant part for this topic lies in the test_get_element_without_waiting(self) method. Inside this method we call
the get_element_without_waiting(driver, element_name) function from above.
|
|
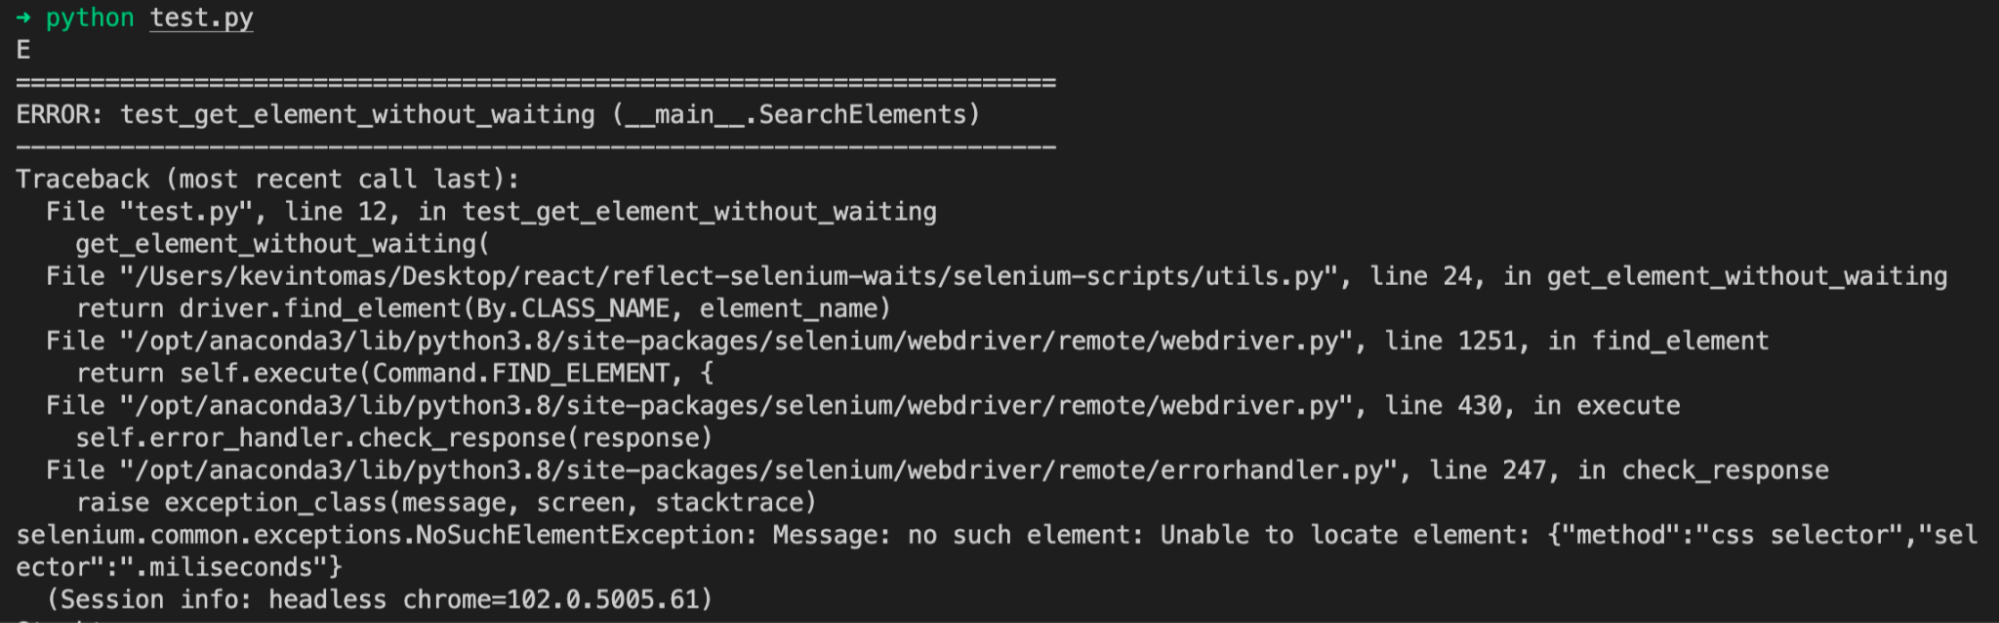
As you can see in the screenshot below, this test will fail due to a NoSuchElementExceptionbeing thrown.
Explicit waiting
When working with Selenium’s explicit waits, you’re instructing the test to pause execution until the element exists, or the maximum time exceeded. This approach is similar to Cypress’s built-in .get() method.
|
|
Firstly, we set the function to timeout after 10 seconds. Secondly, we pass a condition in the form of a small anonymous
lambda function. This function will be repeatedly executed until a truthy value is returned or the timeout is reached.
In this context a truthy value can be for example a string, an object or a non-empty array. In our case, a WebElement
should be returned.
|
|
If you add the code from above to the test script the tests should pass successfully:
Implicit waiting
The second type of implementing a waiting strategy in Selenium is the
implicit wait. An implicit wait tells the
webdriver to wait a certain amount of time before throwing an exception, in our case it would be the
NoSuchElementException. In comparison to the explicit wait approach, the waiting time of the implicit wait is
applied to all elements in the script, that’s why applying an implicit wait can increase the testing time in comparison
to an explicit wait. In addition, no conditions have to be specified when working with the implicit wait. By default,
the implicit wait is set to 0 and it needs to be added manually to your testing scripts.
|
|
In the code snippet above we set an implicit waiting time of 5 seconds by calling self.driver.implicitly_wait(5).
Since the implicit wait is applied to all elements in the script, we can simply check the availability of the elements
by calling the get_element_without_waitingfunction.
The docs of Selenium’s implicit wait explicitly warns against mixing the implicit and explicit waits! According to the docs, a combination of those two types of waits can cause the testing script to wait for the maximum time even though the elements are already visible.
Fluent waiting
Selenium’s fluent wait is comparable to the explicit wait, except that the fluent wait allows us to define the frequency with which the defined condition is checked. Additionally, you can define which exceptions should be ignored by the testing script whilst waiting for the elements.
|
|
If you compare this function with the explicit wait function, you will notice that we are using the same WebDriverWait
class in both cases. The difference is that here we define the poll_frequency and the ignored_exceptions.
The test file itself then will look like this:
|
|
Conclusion
This article showed that it is not necessary to add “sleeps” to your testing scripts. While tools like Cypress have waiting strategies built-in, Selenium WebDriver requires you to add these waits explicitly in your code. Selenium’s explicit and fluent waits are especially suitable in cases where elements are loaded asynchronously.
Try Reflect: A testing platform with better defaults
Reflect is a no-code testing tool that lets you avoid the tedium associated with other testing tools. Reflect has built-in logic to detect and wait for operations to complete before proceeding to the next step. Not only does this help reduce test flakiness, but it also makes test creation a lot faster and easier.
Stop struggling with flaky tests — try it for free.