


Overview
Visual Validation of a website is simply verifying that everything looks correct. It can cover all aspects of the website’s appearance, including layout, coloring, image sizing and contextual menus. It’s easy to see why visual validation is popular: it gives a website maintainer peace of mind that their users have the correct (positive) experience while using their site. And it’s also easy to see why it’s important: all of the popular frameworks like Vue, React and Angular have shared dependencies on hundreds of JavaScript libraries. Even seemingly simple changes can have far-reaching impact throughout a site
In practice, visual validation is often performed by the web designer or developer themselves by manually interacting with the page and scanning for errors. Recent years have seen an increase in the use of automated tools, which load the website and take screenshots of the pages and/or their elements. The benefits of automated tools are their speed and repeatability. In this article, we explore the concept of automated visual validation, or visual differencing (“diff”), and compare it to the traditional manual, human-in-the-loop process.
Considerations and Best Practices
Visual validation allows you to guarantee the correctness of your site’s visual appearance by tracking changes from a last known good compared to the current page. Of course, the site will change over time, so it’s important to distinguish between legitimate content changes and unexpected regressions. And regardless of whether you are manually verifying or using automated tools, the following best practices can ensure you are being as efficient as possible with your process.
-
Don’t validate dynamic content.
Elements that display dynamic content will change their appearance often, and the difference in appearance will not indicate any problem or bug. As such, they are poor targets for visual validation and can include anything from news widgets to time-based content.
Instead of validating dynamic content, try to validate the element or component that houses the content. For example, if each entry in a list has an icon or static inner element, validate on the appearance (and presence) of that inner element.
-
Validate a logical unit and no more.
This is really about improving the diagnosing of failures. If you validate the visual appearance of the entire page, then not only will your validation fail for even the most minor of changes, but you’ll also not have much information about where on the page the error occurred without manually inspecting the screenshot and the page. Instead, if you split up the entire page’s validation into individually-validated sections with descriptive names, then when one of those sections changes and the validation fails, the failure will be localized and the messaging specific to that section. To summarize, identify logical sections or units of your webpage and validate those.
-
Remember contextual menus.
It’s easy to forget to validate the appearance of contextual menus, such as those that are only displayed after a user action like a hover or a click. But they can suffer regressions like the rest of your site, so don’t forget about them!
-
Should I over-validate or under-validate?
You want your visual validation to be fast enough not to slow down your development cycle, but you also want full coverage of your site’s user experiences. If it’s easy to diagnose changes as either legitimate or a regression, then it’s probably better to err on the side of validating too much. Conversely, if your site is highly dynamic and/or false alarms are costly, validating fewer areas is probably better. As with most things, it comes down to the cost of a regression on your site in terms of customer goodwill, lost revenue, etc.
Automated Visual Assertions
Visual Assertions are the “truth statements” against which you measure your site for correctness during visual validation. They essentially follow the form: “The current appearance of that element or region should look like this last known good.” In manual validation, you would visually scan each region of interest and effectively compare the current appearance to a mental image or model of what is correct.
Automated validation tools actually perform pixel-for-pixel image comparisons. As such, there is a bit more process when using automated visual validation since you need to store the last known good images, retrieve and use them repeatedly during validation, and update them whenever the visual appearance legitimately changes. When you’re ready to wade into the waters of automated visual validation, here’s how you can combine those best practices above with the actual process of your implementation.
-
Creation of assertions
Since you’ll have potentially many visual assertions, it’s important that your automated tool makes it easy to capture a last known good image as part of creating an assertion.
Most automated tools provide an intuitive method for capturing screenshots. Whether it’s hovering on an element and clicking once, or clicking-and-dragging over a region to select its elements, creating assertions is usually quite easy.
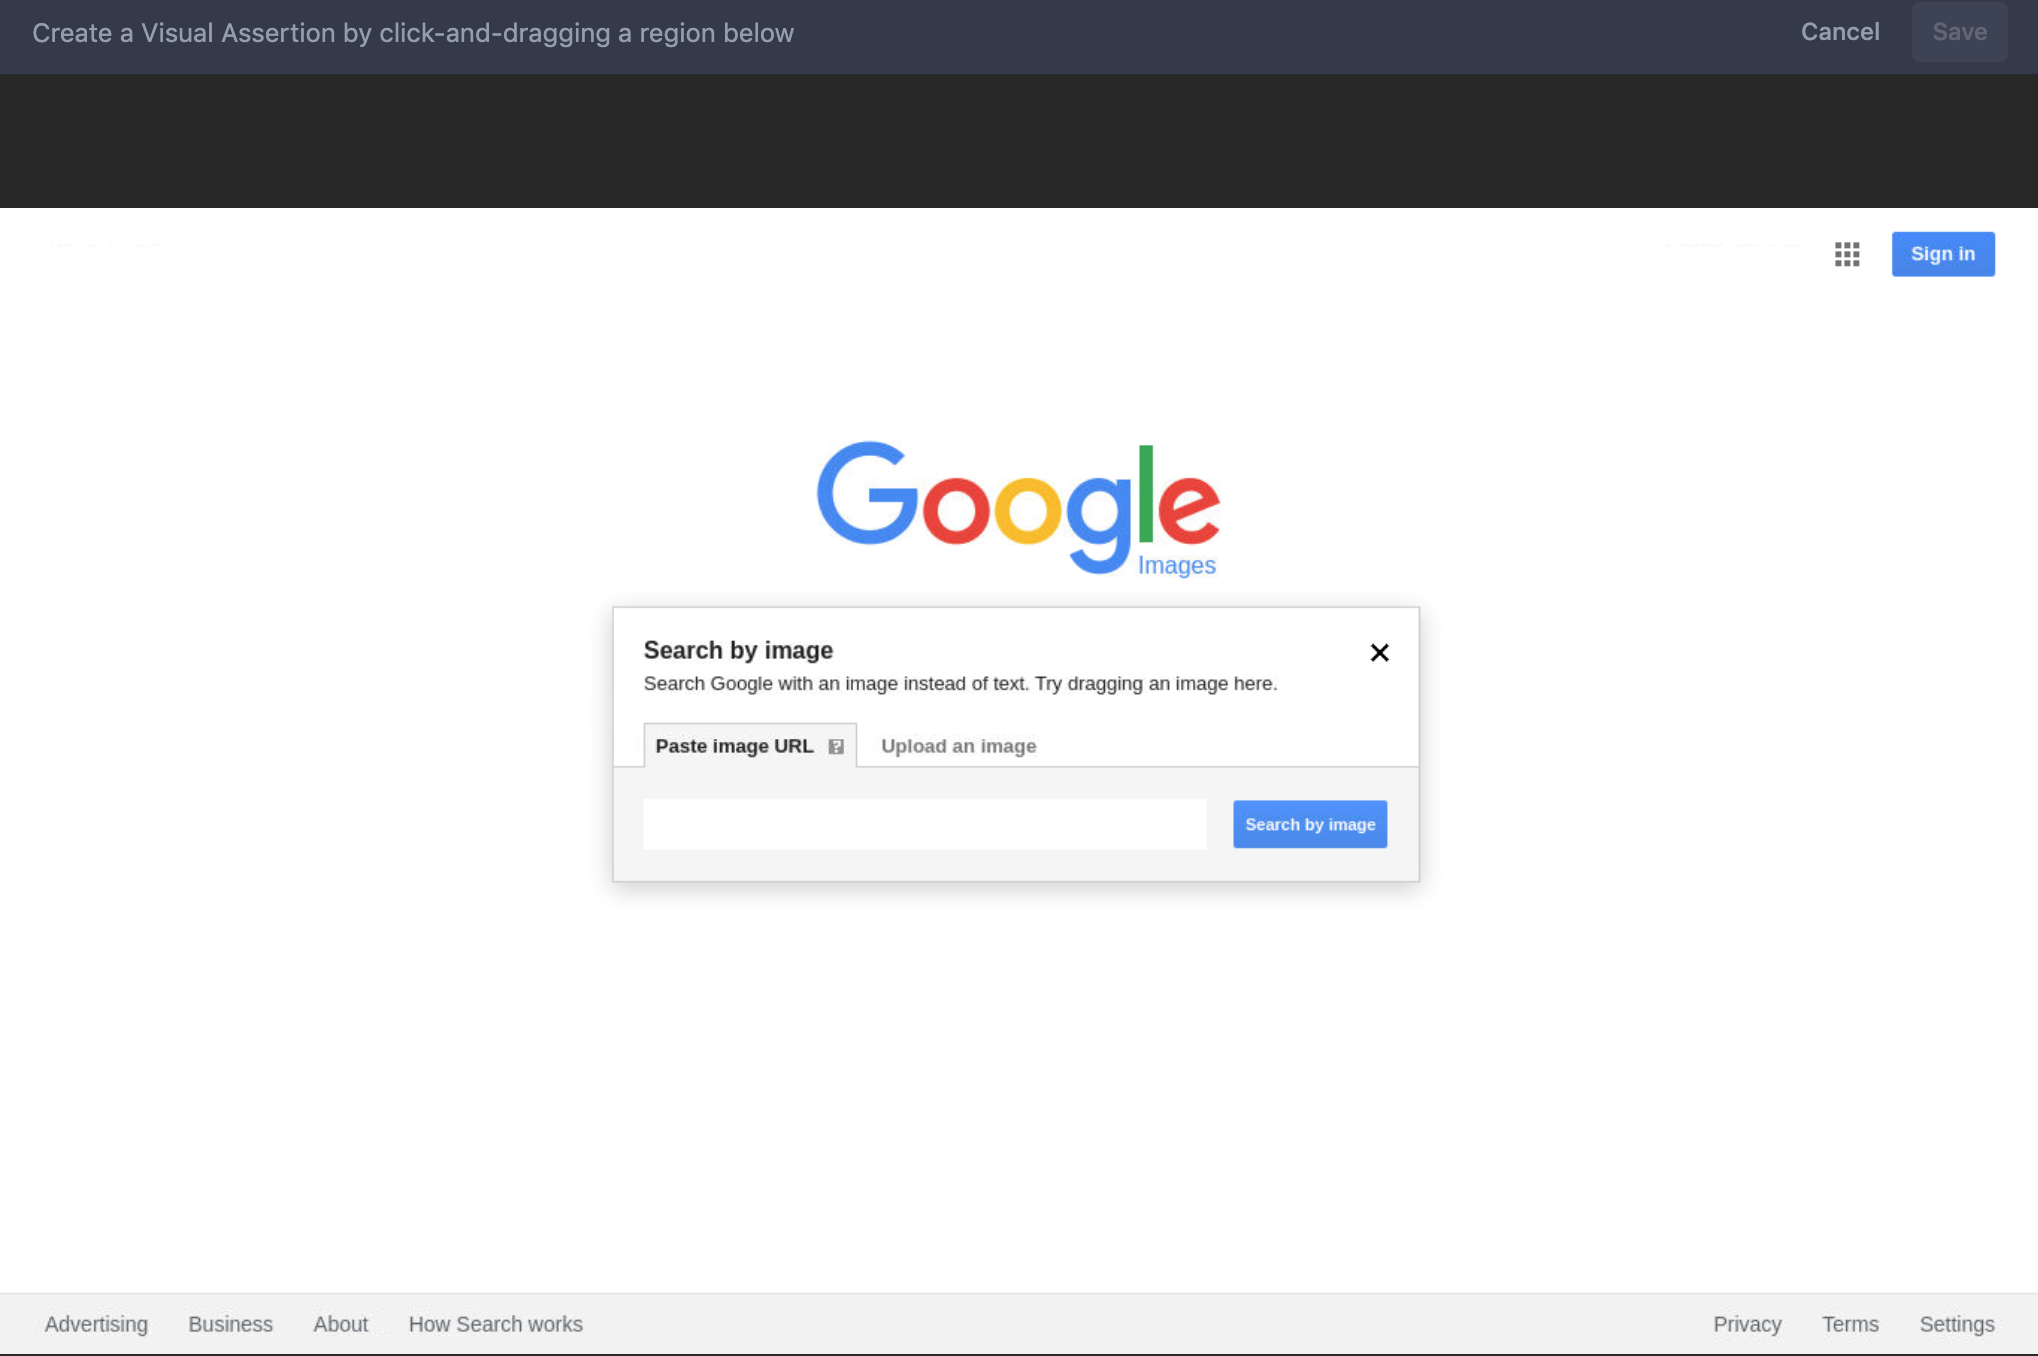
Reflect supports clicking-and-dragging over an element to create a Visual Assertion.
The method you should absolutely avoid is taking a screenshot yourself. Not only is this a slow process since you’ll need to locate the file on your hard disk and copy or upload it elsewhere, but more importantly, it’s highly error-prone since you may not have the screenshots perfectly aligned across individual validation executions.
-
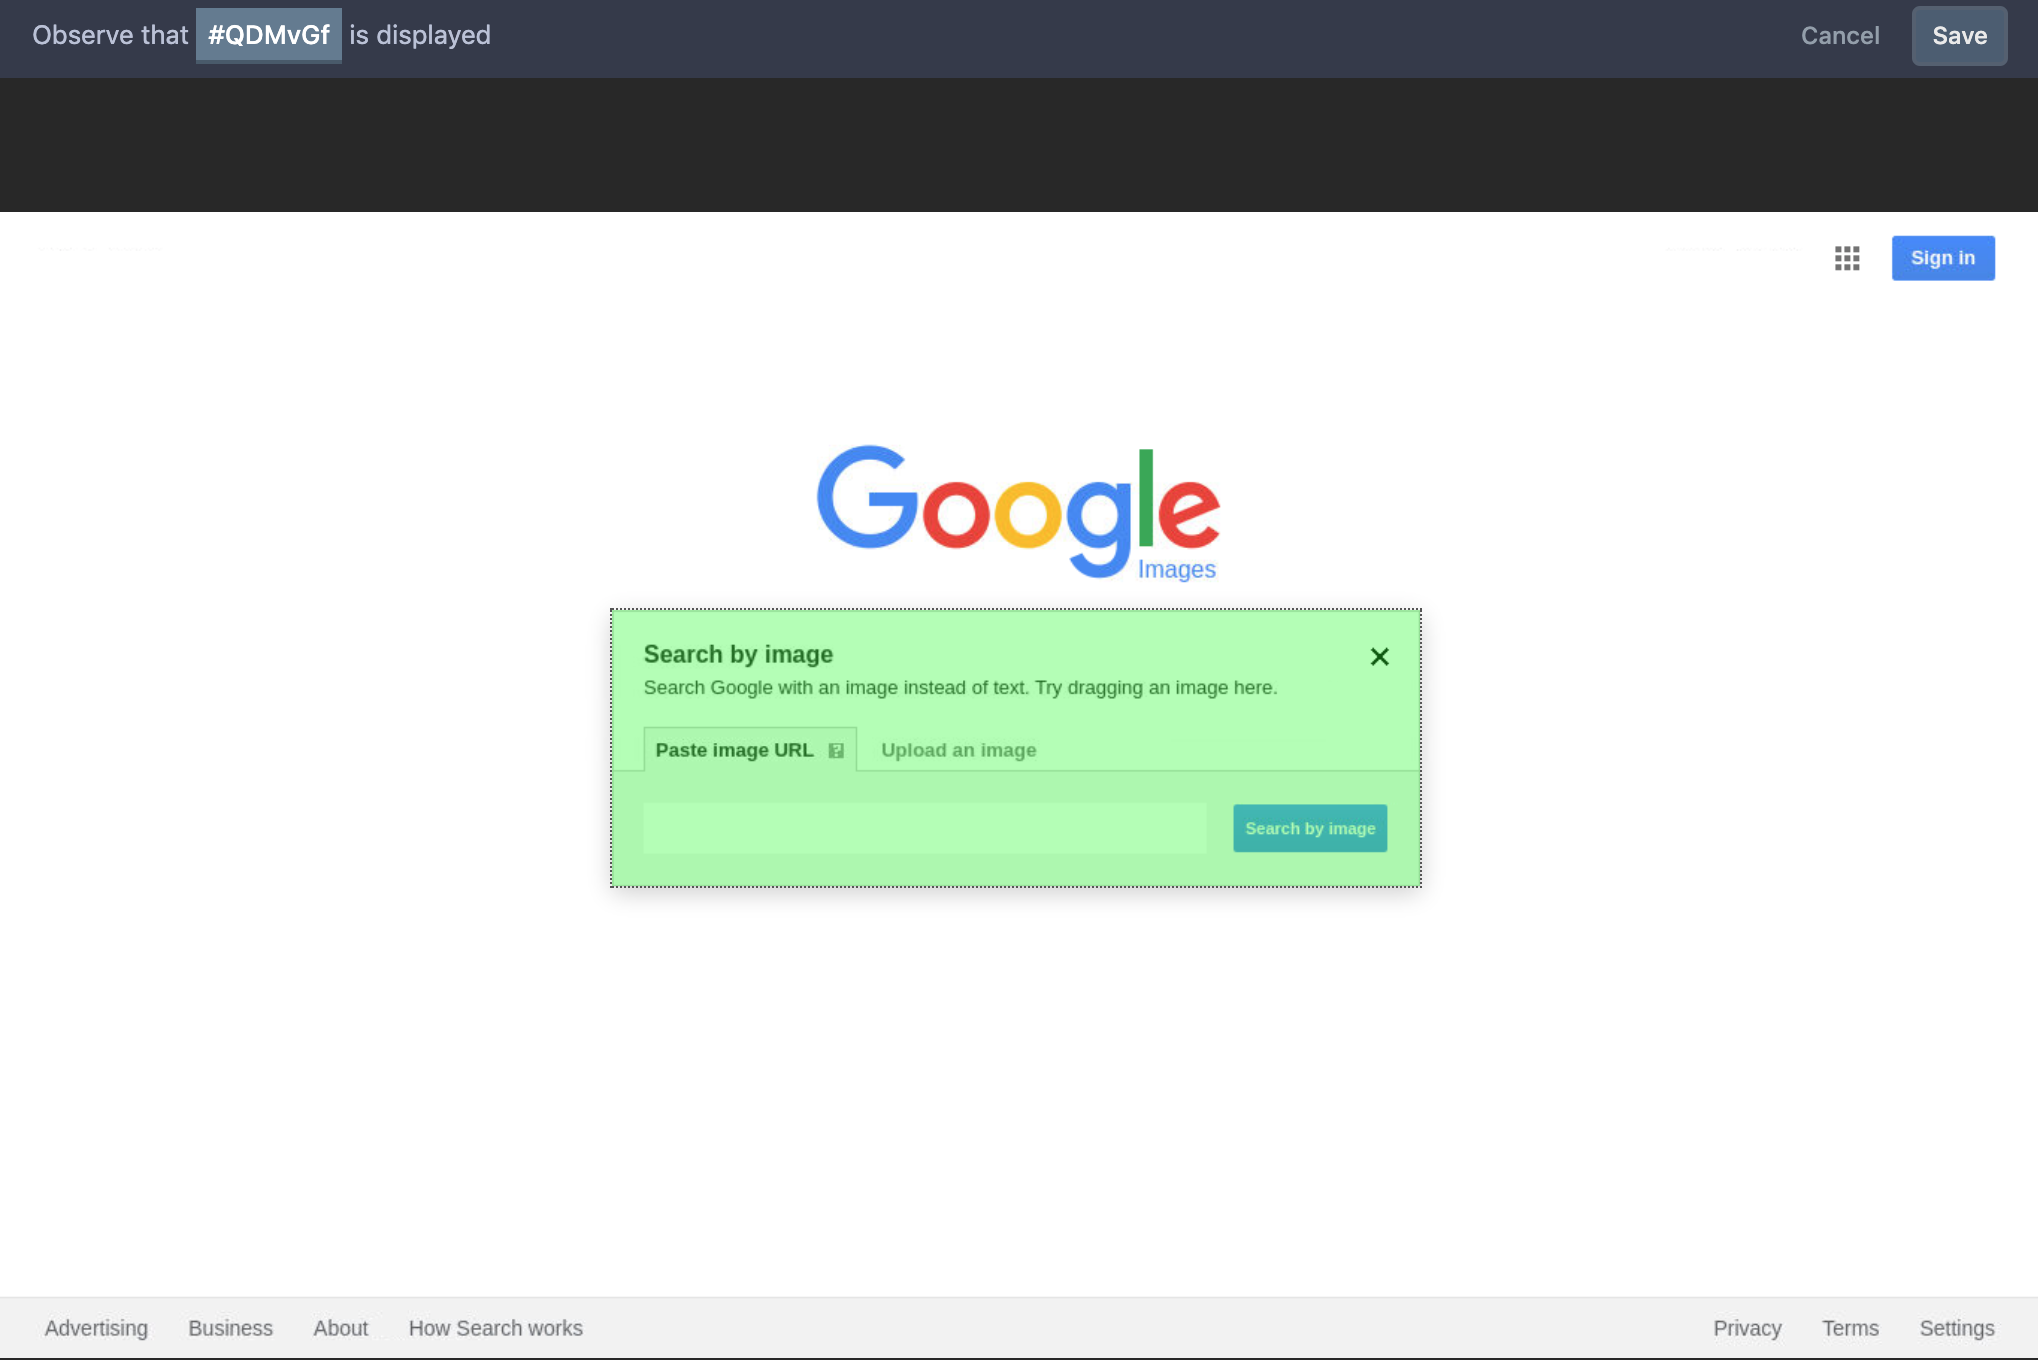
Diagnosing regressions versus legitimate changes
Changes on your site are inevitable, so the best automated tools make it simple to compare the last known good and current images. Typically, the tool displays the two images side by side for inspection, and offers a delta image that shows the granular differences at the pixel level, as in the image at the top of this article.
-
Configuring the failure threshold
So, how does a visual assertion fail? The strictest approach will fail visual assertions if even 1 pixel differs between the last known good and current screenshots. In practice, it’s typical to allow some percentage of pixels to differ between the two to account for inconsequential changes in the rendering of your website. It’s a delicate balance between a false positive failure and a false negative, which is a regression. It also relates to discussion above about over- & under-validation. Reflect sets a default of 0.5% as the maximum difference between the two images that is allowed without failing the visual assertion, but there is no one size fits all and you’ll need to find the best threshold for your site.
-
Updating the baseline image
The final task in the visual validation process is updating the last known good image for a particular visual assertion when the underlying element changes legitimately. Most tools make this an intuitive process, usually available directly at the point at which you can view the differences between the last known good and current. Selecting “Update Baseline” or “Accept Changes” will save the current as the last known good going forward.
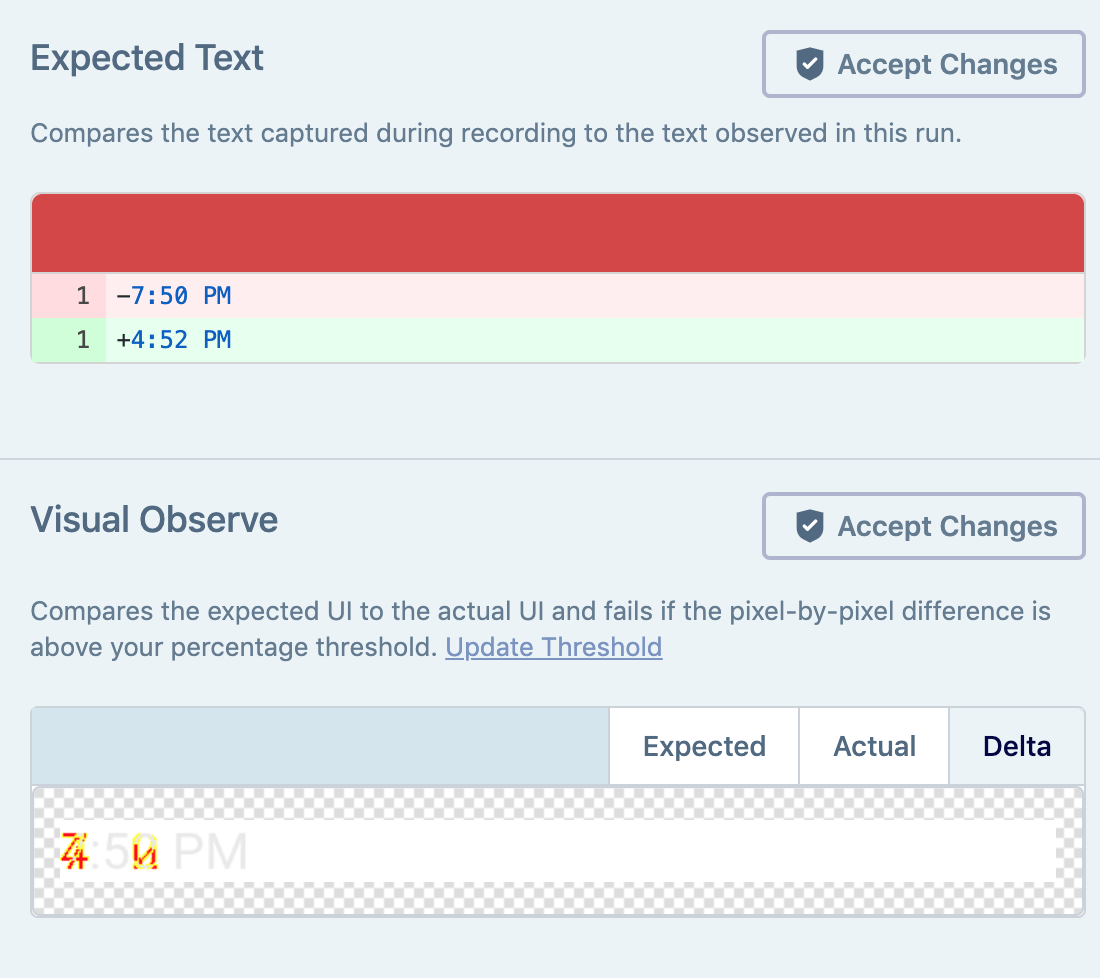
Reflect couples updating the baseline image with updating the expected text for an element.
Conclusion
It’s clear why visual validation is so popular and why the reliance on automated visual validation is steadily increasing. The best modern tools make it easy to create visual assertions, quick to diagnose visual changes as either valid or regressions, and intuitive to update the baseline image for future validations. Reflect’s visual assertions perform pixel-by-pixel comparisons and allow you to easily update validations over time. If you’re interested in fast and intuitive automated visual validation, get in touch with us at [email protected].