


Introduction
If you use Vue.js, then you’ve likely come across the need to test components. This article
introduces vue-test-utils - a suite of helper functions that improve overall development & testing experience with Vue
applications.
In the book Extreme Programming Explained, Kent Beck recommends to “test everything that could possibly break.” This goal is quite difficult to achieve, but the closer we get to achieving it roughly maps to how effective our approach to testing actually is. Software testing approaches can be split into two categories: manual testing and automated testing. With manual testing, a developer tests their app as if they were an end-use rto ensure that the changes they’ve made are working as expected. With manual testing, every time you make a change you’re either going to need to re-test both new and existing behavior, or have confidence that the change you made has not left anything in a broken state.
As the name implies, automated testing takes the work that you’d normally do manually, and automates it. Usually automated tests are set up so you can run them both locally and against remote environments.
The main types of automated testing are as follows:
- Unit testing: Ensures the working of the individual, isolated piece of the application.
- Integration testing: Tests how different parts of the application interact with each other.
- Functional testing: Validates the application meets a set of functional requirements (i.e. it works the way you’d expect).
- End-to-end testing: Validates a complete user workflow from beginning to end.
What is Vue Test Utils?
Vue Test Utils (VTU) is the official unit testing library for Vue components. It provides an isolated environment to interact with Vue components. Vue Test Utils provides a set of helper functions to validate the component’s attributes, make HTTP requests, execute async behaviors, and test stores.
VTU includes all the commands you need to write unit and component tests in Vue. These utils will help you ensure that your components do what they should do without going into implementation details.
To get started with using Vue Test Utils, you’ll need to install the following dependencies:
- Node
- Vue 3
- Vue Test Utils
- Jest - A popular JavaScript testing framework developer by Facebook
- Pinia – A state management library for Vue
Key concepts
Let’s explore how we can use Vue Test Utils to test Vue component. Consider the simple Vue component below:
|
|
Using Vue Test Utils, we can utilize the shallowMount function to load our component and test its initial state:
|
|
mount vs. shallowMount
The concept of “mounting” just means that we’re adding component into the DOM. Most front-end libraries provide a virtual DOM to add your component for unit testing.
VTU provides two functions for this: mount & shallowMount. Both functions take a component as a first argument and
return mounted components inside a wrapper. The wrapper offers several helper functions for querying and interacting
with that component.
The mount function renders all child and parent components in a DOM. In contrast, the shallowMount does not render
the child components and only adds the parent component.
Let us review the following app component that has a child component:
|
|
The test of the above snippet will look like this:
|
|
When using the mount function, wrapper contains the text from child component. When using shallowMount, wrapper
only renders the parent’s component text.
In summary, default to using shallowMount because it provides better isolation and testing, and use mount only when
your objective is to test the group of components as a single unit.
Other options
The mount & shallowMount also accepts mounting options as a second parameter. These options provide you with better
control in testing.
Aside from the options documented below, the options object can contain any option that would be valid in a call to new Vue ({ /options here/ }). These options will be merged with the component’s existing options when mounted with
mount / shallowMount."
The values sent from mounting options will merge & override the attribute of the component. Let’s look at some common mounting options:
data
If you want to test the data() elements of your component, this is how you can pass it in shallowMount as a second
argument:
|
|
propsData
Similar to data(), you can pass props from the unit test as a mounting option.
|
|
The complete list of mounting options and their syntax can be found here.
Wrapper objects
The mount method returns an object that includes many different methods for interacting with the component or object.
This type of object is called a Wrapper object. For methods that return more than one result, Vue Test Utils will
return a WrapperArray, which is simply an array of Wrappers.
Wrapper objects provides several methods for testing the different aspects of a component. Some of the most commonly used methods are below:
attributes- Returns the list of attributes associated with the element.classes- Returns the list of classes associated with the element.emitted- Returns the events that have been emitted by the element.find- Finds an element based on either a CSS selector or reference to a component.findAll- Similar tofind, this returns all occurrences of a given CSS selector or component referene.html- Returns the HTML of the element as a string.
Setting up Vue Test Utils
In order to use Vue Test Utils, you’ll need a a test runner. A test runner picks unit tests from the directory, executes them, and prints their results.
We recommend using Jest given it’s popularity and breadth of features, but other popular test runners such as Karma, Jasmine, and Mocha can also be used with Vue Test Utils.
In this tutorial, we’ll use Jest, which is known for its simplicity, isolation in parallel execution of tests, code coverage, easy mocking, and great API support.
The simplest way to get started with using Vue Test Utils is to install the vue-cli. Open a terminal window and run
the following command:
|
|
After that, you can create a Vue project in two ways:
- Using the command line
- Using the GUI
If you are using Windows, the interactive prompt will not work by executing the following command:
|
|
In that case, the creation of a project via GUI is preferred. Open the terminal and run the command:
|
|
This command will open the project creation dialog in the local host of your project.
Whether creating a project from the command line or GUI, be sure to select Jest as your preferred test runner.
Code examples
The newly created project has the following structure:
All the components will reside under the src/components/ folder, and all unit test files will live in the tests/unit
folder.
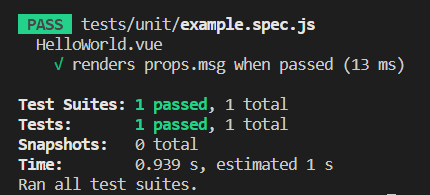
Use the following commands to run all the unit tests:
|
|
The result of the above command will be:
Now that we’ve successfully installed Vue and Vue Test Utils, let’s create some sample unit tests that test Vue components. The code below test various different form controls within an application, and provides different examples of how to use the utility functions within Vue Test Utils:
|
|
Testing the state of a Pinia store
State management concerns when a user interacts with the application and how data will update, sync, and be shared among all the components.
Different patterns are available to manage the state. Each has its pros & cons.
Vue has several libraries for state management that are differentiated based on their architectural pattern:
- Vuex
- Pinia (officially recommended)
How to test the Pinia store
Pinia is a Vue store library that enables you to share a state among components across the application. It is now the officially recommended library for Vue state management.
Let’s begin Pinia store testing step-by-step:
We’ll start with the installation of Pinia. You can use your favorite package manager:
|
|
Now create a Pinia instance and attach it to the root of the application in main.js
|
|
At this point, we are ready to define a store. Let’s create a store in src/sotres/StudentStores.js
|
|
While defining a store, assign a unique name to the store.
Before going into further implementation, let’s discuss the components of a store. A store has three major components:
- State - Initializes the state
- Getters – Getters are similar to methods in Vue. They accept the argument, access the state, filter/process, and return a function.
- Actions – Change the state
A complete store’s implementation will look like this:
|
|
Let’s also review the component structure:
|
|
The MapStore produces the name studentStore, which is a combination of both the store’s unique name student and
the word Store.
Let’s create a simple script to test the initial state of the store:
|
|
setActivePinia will enable the pinia instance for testing. Similarly, we can test the actions and getters of the
store:
|
|
Vue Test Utils vs. React Testing Library
Hopefully this tutorial is helpful in getting you started with the Vue Test Utils library. Before concluding this article, I wanted to briefly mention React Testing Library, which is a similar library for React applications. In fact, both libraries share a common dependency, DOM Testing Library, which explains why RTL is quite similar to VTU.
In React Testing Library, there’s two main ways to access component information: the render function, and the screen
object. The screen is similar to VTU’s Wrapper object and is the recommended way to introspect component
information, since all methods are available for every object. In contrast, with the render function, you must update
the object for the next query.
To simulate user events such as button clicks, option selection, and radio buttons, RTL requires importing a separate
userEvent function for testing, which is a little clunkier compared to VTU.
However in my opinion the debug function in RTL makes debugging tests really easy, and is something I wish had an
equivalent in Vue Test Utils. In VTU I often find myself adding the debugger keyword when I need to pause and inspect
unit tests.