


Introduction
Selenium is a free and open-source framework for automating actions inside of a browser. Selenium scripts can be written in a variety of languages, including Java, C#, and Python.
Selenium’s built-in features can also be combined with other libraries to let you do things that Selenium doesn’t support by default. In this tutorial, you’ll learn how to take screenshots using Selenium and Python. We’ll cover how to use Selenium’s built-in functionality for taking full-page screenshots and saving them on your local computer. We’ll also use Selenium alongside another Python library, which will enable us to take screenshots of specific elements.
Prerequisites
Before getting started with this tutorial, you’ll need to meet the following requirements:
- You have Python 3.x installed.
- You have installed Google Chrome and Chrome WebDriver.
Setting up a Virtual Environment
Let’s start by creating a virtual environment for this project so that we will have a dedicated environment to install the packages needed to take screenshots in Selenium. We’ll be using virtualenv to install the virtual environment. Ensure virtualenv is available by installing it via pip:
|
|
Once your virtual environment is installed, switch to your desired directory and create a virtual environment with the command below:
|
|
Next, install Selenium and Python’s webdriver-manager package with the command below:
|
|
Once the installation is completed, we are good to start implementing the core logic for this project.
Taking screenshots on Chrome
Now that we’ve set up our local environment, let’s dive into how to capture screenshots in Selenium. We’ll be working with Chrome (using Selenium ChromeDriver) for this example, but the same approach works with other browsers.
To get started, create a new file called selenium_chrome.py and import the following Python modules.
|
|
In the above code snippet, we imported the Selenium webdriver, which gives us access to the ChromeDriver instance.
Now, let’s use ChromeDriverManager to load the proper WebDriver version and take a screenshot with the code snippet
below.
|
|
The driver.get method takes the URL of the website you want to screenshot and opens it in a new window.
Taking a Full Page Screenshot
The driver.save_screenshot method allows you to take a full screenshot of a page. It takes the preferred name and file
extension for the image and saves it in the project’s root directory. Add the code snippet below to your
selenium_chrome.py file.
|
|
Similarly, you can also use the WebDriver get_screenshot_as_file function to take a full screenshot of a page.
|
|
To test this out, save your file, and run the command below in your terminal:
|
|
You should see a python.png file created in the root directory of your project that contains a full page screenshot of
Python.org’s Downloads page. You can also try this in other browsers like Firefox, Edge, Internet Explorer, and Safari.
Just make sure you have installed the browser you want to test, and have also installed the associated WebDriver for
that browser. Also note that if you try this on multiple browsers, you’ll probably notice subtle differences in how each
browser renders this page!
Taking a screenshot of a particular element
While screenshotting the entire page can be useful in some instances, in other cases it’s more useful to grab screenshots of individual elements on the page. For example, you may want to refer to the screenshot of certain elements in previous test runs to see if the look and feel of these elements have changed over time.
Unfortunately, Selenium does not provide a way to screenshot an individual element, so we’ll need to use Selenium alongside a separate library to accomplish this task. To do that, we’ll install another Python module called Pillow. This module will allow users to perform some operations on the screenshot.
|
|
Then import Pillow with the code snippet below;
|
|
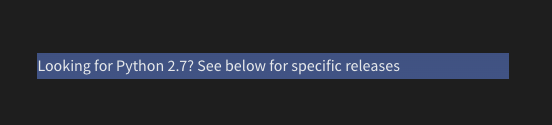
Next, use the driver.find_element_by_xpath method to capture a paragraph of text with the string
Looking for Python 2.7? See below for specific releases on the page with the code snippet below.
|
|
Then we need to define the dimensions of the element, including the width,, and starting location of the element with the code snippet below.
|
|
Now let’s use Pillow to crop the areas selected on the page in the screenshot with the code snippet below;
|
|
In the above code snippet, we used Pillow to open the screenshot, then we cropped the image using vertical and horizontal axis, width, and height that we passed into the “crop” method. We then saved the cropped image.
If you run the application, you should see the screenshot and the cropped image, which are the areas selected as shown below:
Alternative Option: The Selenium-Screenshot Python library
The Selenium-Screenshot Python module is an add-on for Selenium that allows you to take screenshots of a web page. Before you can use this module, you need to get it installed with the command below.
|
|
Then import and use it in the project with the code snippet below.
|
|
In the above snippet, we imported the Selenium-Screenshot module that we just installed. Then we created an instance
of the Screenshot class to have access to the full_Screenshot
This method allows us to screenshot the page on the URL passed to the get driver function, and the full_screenshot
method takes three required parameters. The Chrome WebDriver object, the path to save the image, and the name for the
image.
Conclusion
Throughout this tutorial, you have learned how to take a screenshot inside a Selenium WebDriver. This tutorial started with a brief introduction to Selenium, then we proceeded to demonstrate the various ways to take a screenshot inside the Selenium WebDriver, including workarounds for some gaps in screenshotting capabilities within the latest version of Selenium.
Try Reflect: A testing platform with visual testing built in
Reflect is a no-code testing platform that has first-class support for detecting visual regressions. It’s easy to add visual checks of individual elements (like a button) or an entire section of a page (like a sign-up form). Reflect runs your tests and notifies you when unintended visual changes in your application occur.
Get coverage for visual regressions today — try it for free.