


A failed test is ten times better than failed code. - Anonymous Developer
On a more serious note, as a developer, embracing the practices of test-driven development (TDD) and test automation will do you a lot of good today and the day after. Although the purpose of this article is not to preach to you about TDD, I will instead be taking you through one of the most popular tools there is in Javascript Land when it comes to writing automated tests - Cypress.
Side note: If you need some motivation to get started writing tests, you might want to watch this video.
A quick introduction to Cypress
If you are reading this article, I believe you already know what Cypress is and how it works. But for the sake of those who might not, over the next few sections, I will be showing you the basics of setting up and using Cypress for testing.
We will start by installing a quick simple project using npm.
Run the following command to create a project:
|
|
Then install Cypress with the command npm install cypress --save-dev. This will install the latest version of Cypress
(v10.3.0 at the time this article was written).
Installing Cypress might take a while, so grab a glass of water while it installs.
Once installation is complete, you can open the app in any of the following ways:
Using npx
Note: npx is included with npm > v5.2 or can be installed separately.
|
|
Using yarn
|
|
Using the full path to Cypress
|
|
Using the npm bin shortcut
|
|
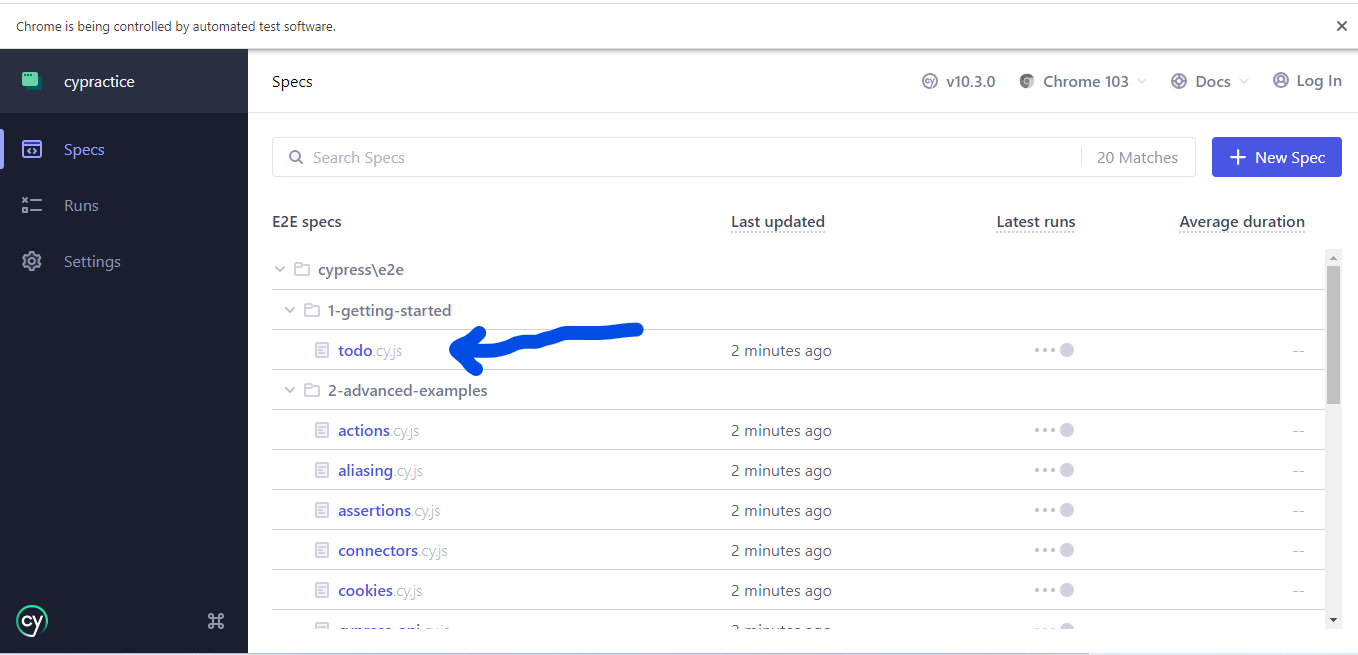
Once the Cypress app is launched, you will be presented with the following screen:
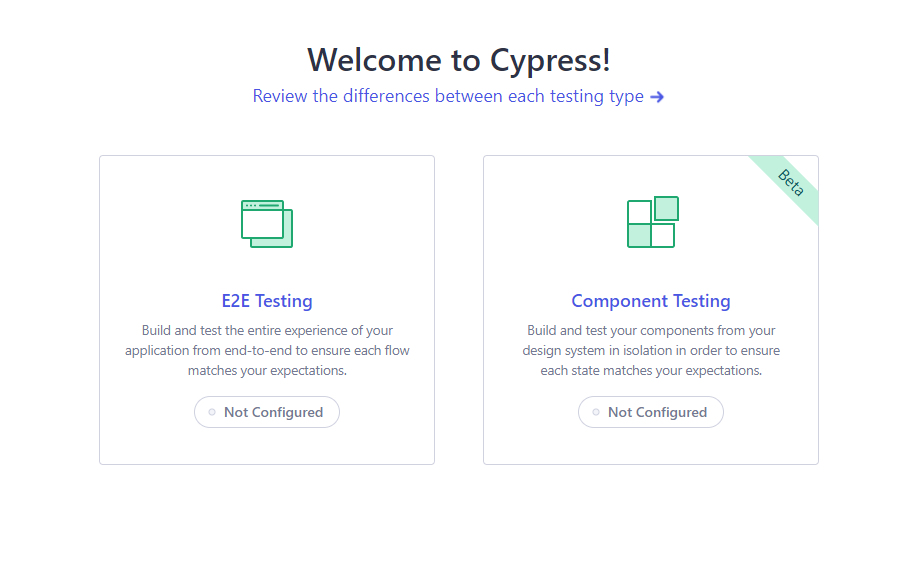
Select the E2E option. Cypress will then try to create some basic configuration files for you, after which you can click Continue.
You are then presented with a list of browsers installed and detected on your computer. Select your preferred browser and click on the Start E2E Testing button.
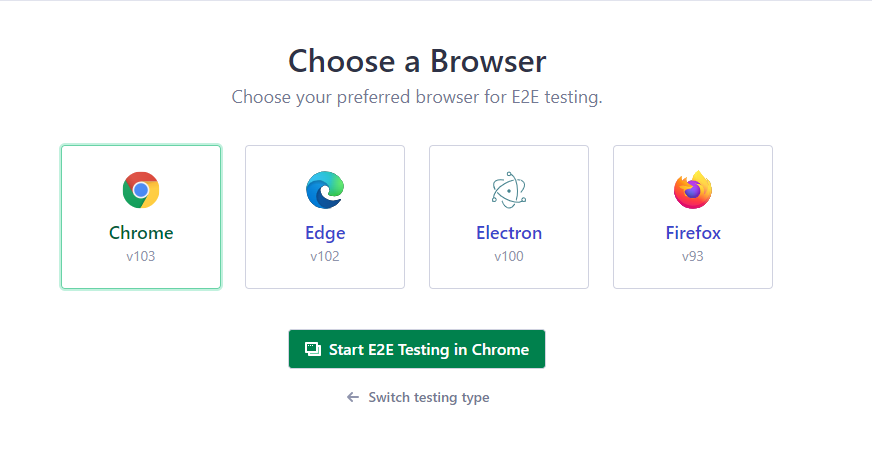
Cypress will then open a window based on the browser you selected.
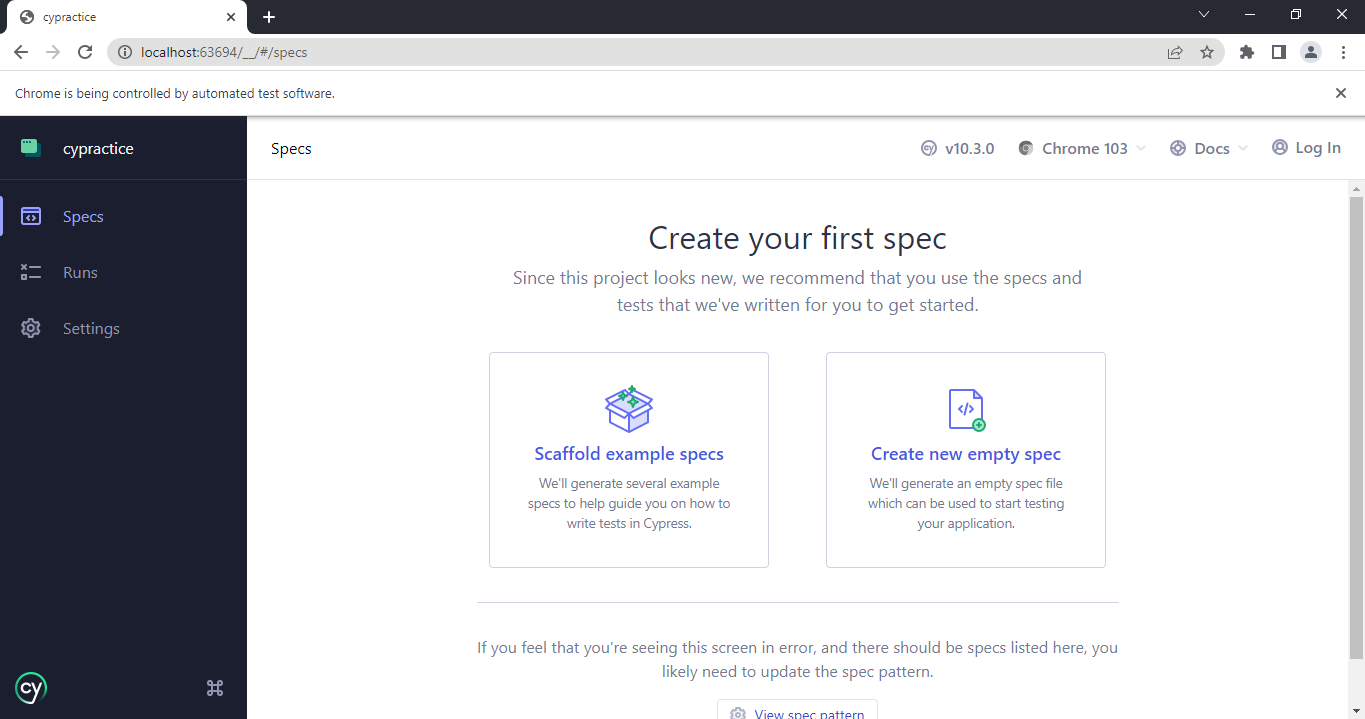
Since we have not written any tests yet, we will let Cypress create some scaffold example tests for us. Select the Scaffold example specs box.
If you take a look at your project folder now, the folder structure will be like below:
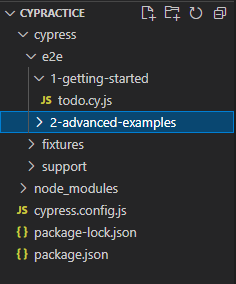
All tests will be stored in the e2e folder. In the browser tab opened by Cypress, click on any spec file, and the test
will start running.
Cypress is now installed, set up, and running.
What is visual regression testing?
To understand what visual regression testing is, we need to first talk about what a regression test in general is.
Whenever you make changes to a codebase, there’s a high chance of introducing bugs as well, especially to the part of the code that was working fine long ago. Regression testing is a software development practice that ensures that software still works as expected after changes have been introduced. This can be done either manually (which is of course draining and error-prone) or via automated test suites.
With regression testing, you are able to quickly identify when a previously working code is broken for any reason.
Regression testing should be done when any of the following happens:
- A new feature is added
- An existing feature is modified
- Bugs are fixed
- A hotfix was done
Visual Regression Testing has the same goal as regression testing, however, we are more concerned about what users of the software see (i.e the user interface).
Visual regression tests help to capture bugs that might affect how users see and interact with the interface after changes are introduced. For example, on a page that has been designed to be responsive, if the width of the browser changes, a button that had been formerly visible might become hidden. How do you ensure your users have a consistent experience when the device width changes? Yes, by carrying out visual testing!
Now that you get the picture (pun intended) of what visual regression testing is, let’s talk about how it is done.
Steps involved in carrying out a visual regression test
- At the start of the test, you take a snapshot (an actual picture) of what the interface looks like. This snapshot is called a baseline.
- You run your testing tool to interact with the page the way a user would. For example, changing the device orientation, popping up a modal, clicking a button, etc.
- As these changes occur, the tool captures these changes in snapshots and then compares them with the baseline on a pixel-to-pixel basis. A report is generated by the tool to highlight the differences between the baseline snapshot and the subsequent captures.
- These reports can then be reviewed to see if there’s a fix required.
- Or if the baseline needs to be updated, it gets updated and tests are rerun.
Cypress and visual regression testing
While Cypress is a powerful end-to-end testing tool, as at the time of writing this article, it doesn’t natively provide a way to take snapshots during tests. However, there is a third-party Cypress plugin we can use to take snapshots and effectively carry out visual regression tests.
Meet cypress-image-diff.
Getting started with the cypress-image-diff plugin
This plugin allows us to take snapshots during the running of tests, and further, even allows for comparing between different snapshots. Let’s get started using the plugin.
In your existing project that makes use of Cypress, run the command
|
|
Configuring the plugin
-
Open the
cypress.config.jsfile in the root directory and add the following line into thesetupNodeEventsmethod:1 2 3const getCompareSnapshotsPlugin = require("cypress-image-diff-js/dist/plugin"); getCompareSnapshotsPlugin(on, config);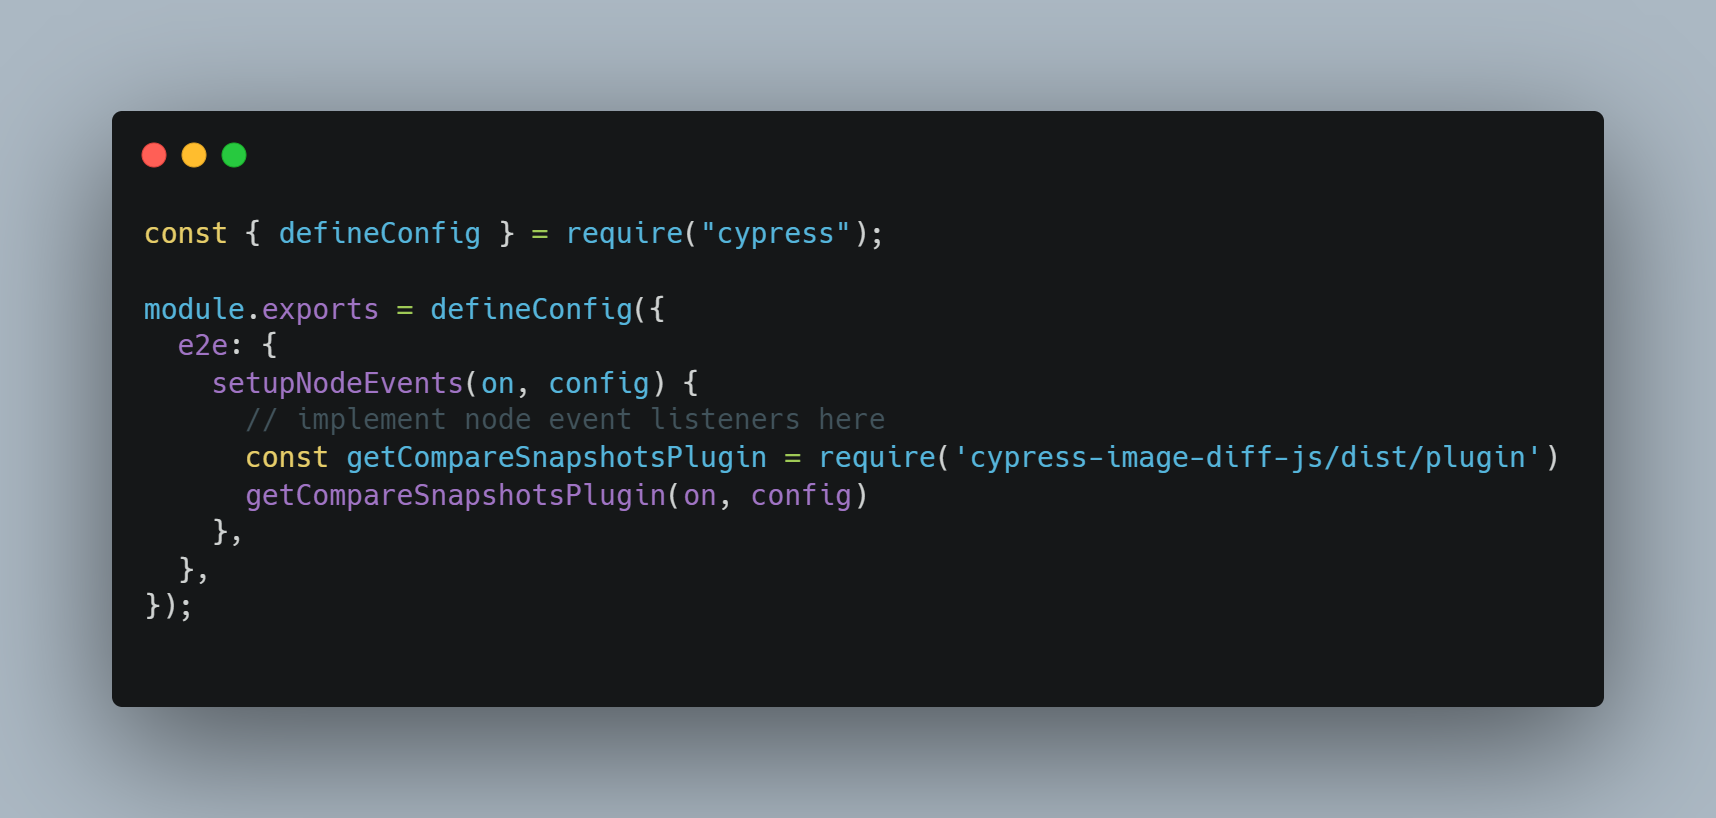
-
Add the following lines to the
cypress/support/command.jsfile:1 2 3const compareSnapshotCommand = require("cypress-image-diff-js/dist/command"); compareSnapshotCommand();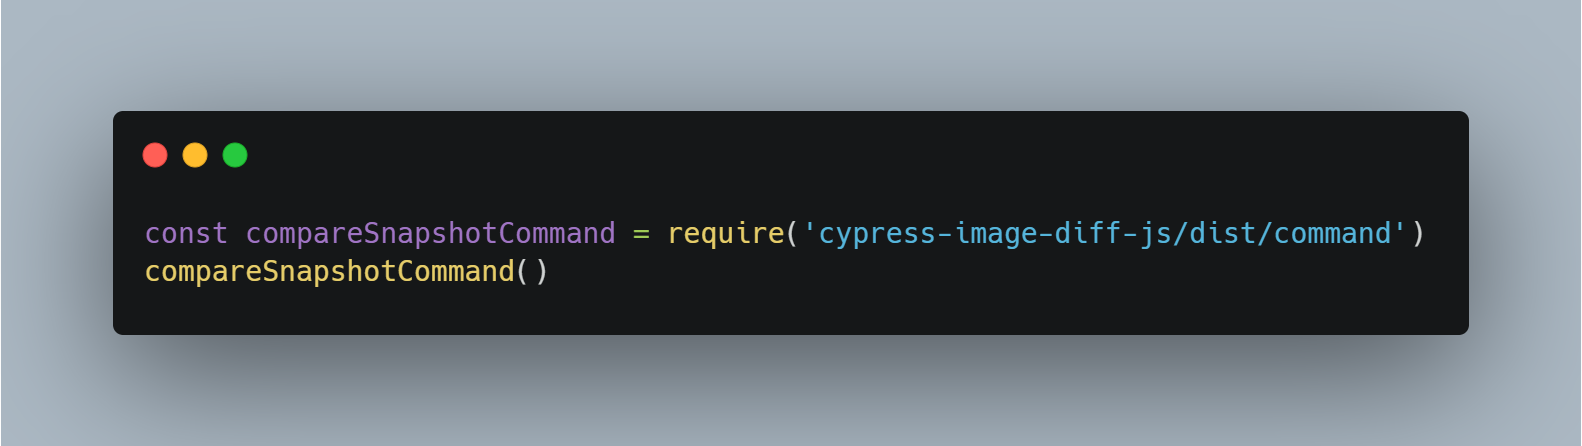
This will make a new command ‘compareSnapshot’ available to Cypress, such that we can write
cy.compareSnapshotin our test suites. -
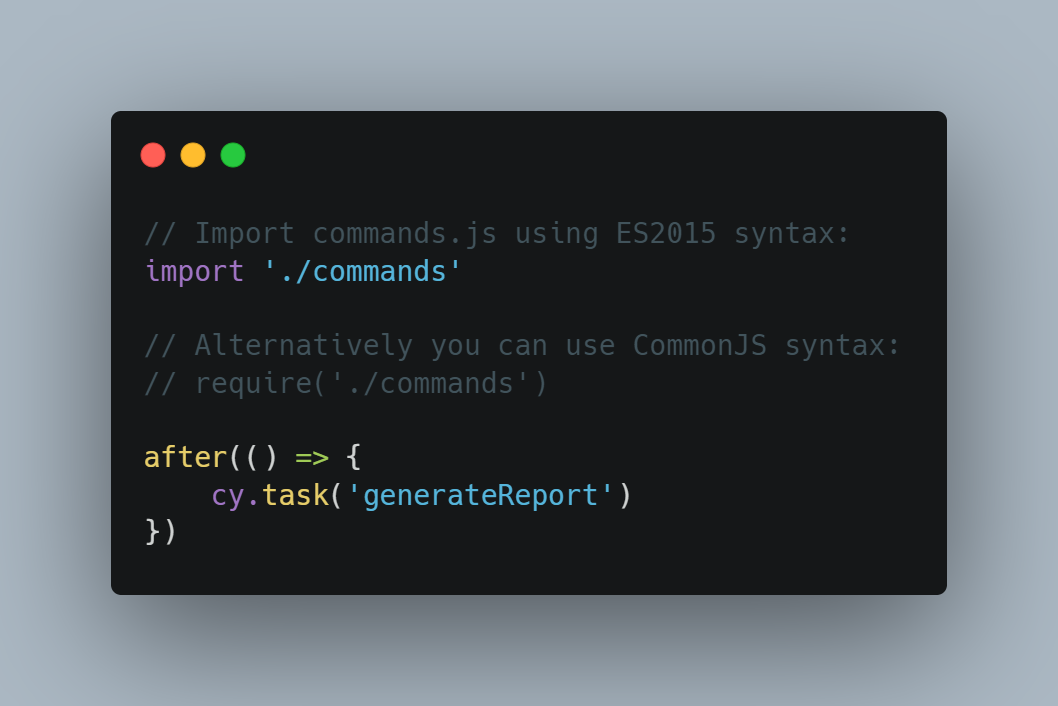
Check the cypress/support/e2e.js file to be sure either one of
require('./commands')orimport './commands'is present. -
Add the following lines to the
cypress/support/e2e.jsfile1 2 3after(() => { cy.task("generateReport"); });The plugin will use this hook to generate a report after comparing screenshots. Your e2e.js file should be looking like below now:
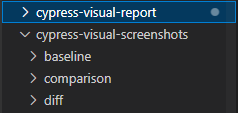
Folder structure of the plugin
The first time you run your tests with the plugin present, the plugin will create two folders in the root directory:
- cypress-visual-screenshots, this folder will contain the subfolders housing the snapshots:
- Baseline: will contain the baseline images that other snapshots will be compared to.
- Comparison: will contain subsequent images that are compared to baseline snapshots.
- Diff: will contain the result of the difference between baseline and comparison snapshots.
- cypress-visual-report, this folder will contain the report generated after tests. This report will usually be an HTML file displaying the baseline images, comparison images and the diffs.
Below is the folder structure generated by the cypress-image-diff plugin:
Using the plugin
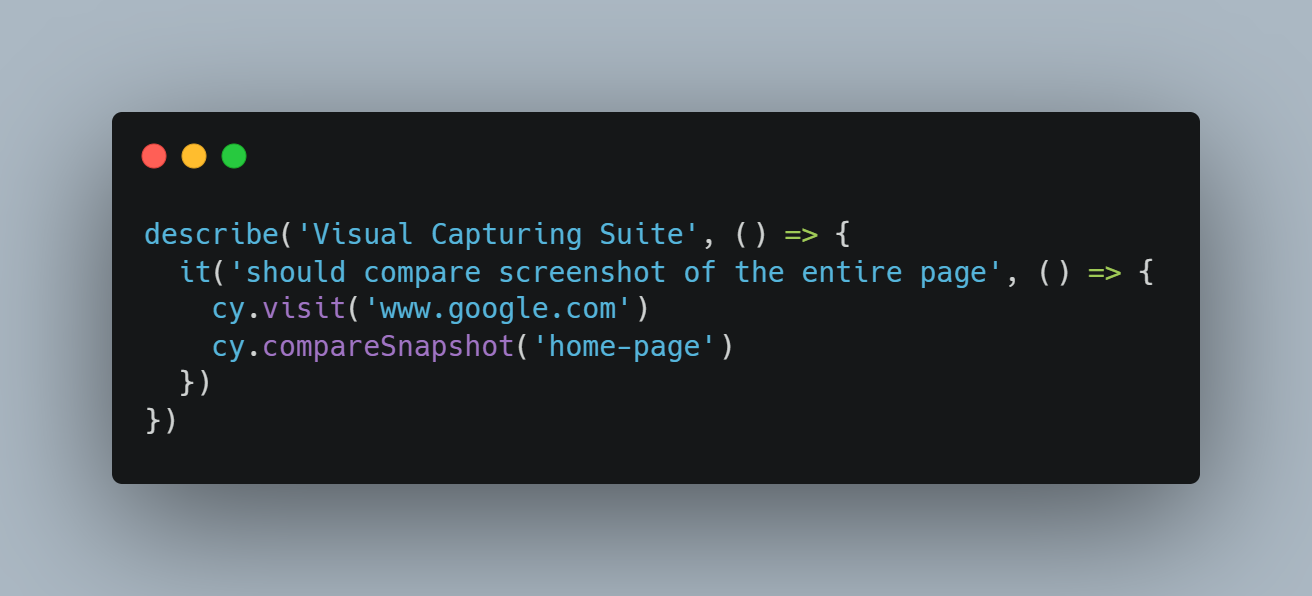
To see how this plugin works and how to use it, we will make a request to Google, take a snapshot then make some manipulations and compare the snapshots.
Step 1:
Create a new spec file inside cypress/e2e folder (e.g visual-capture.cy.js) with the following content:
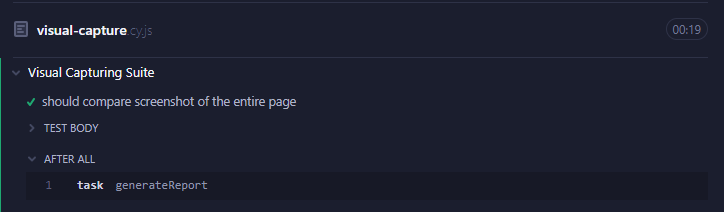
Step 2:
Run the test now either from the browsertab of the launchpad, or from the command line with
npx cypress run --spec "cypress/e2e/visual-capture.cy.js"
The first time you run the test, all tests would pass.
If you check the baseline and comparison folders now, you will see snapshots in those folders with no issues. This is because at this point, both snapshots are exactly the same. But on subsequent runs, the comparison snapshots will be compared to the baseline snapshots, and if changes are detected, the test will fail.
Step 3:
Now, we will make changes to the Google homepage, and compare the screenshot.
Update your test case to look like below:
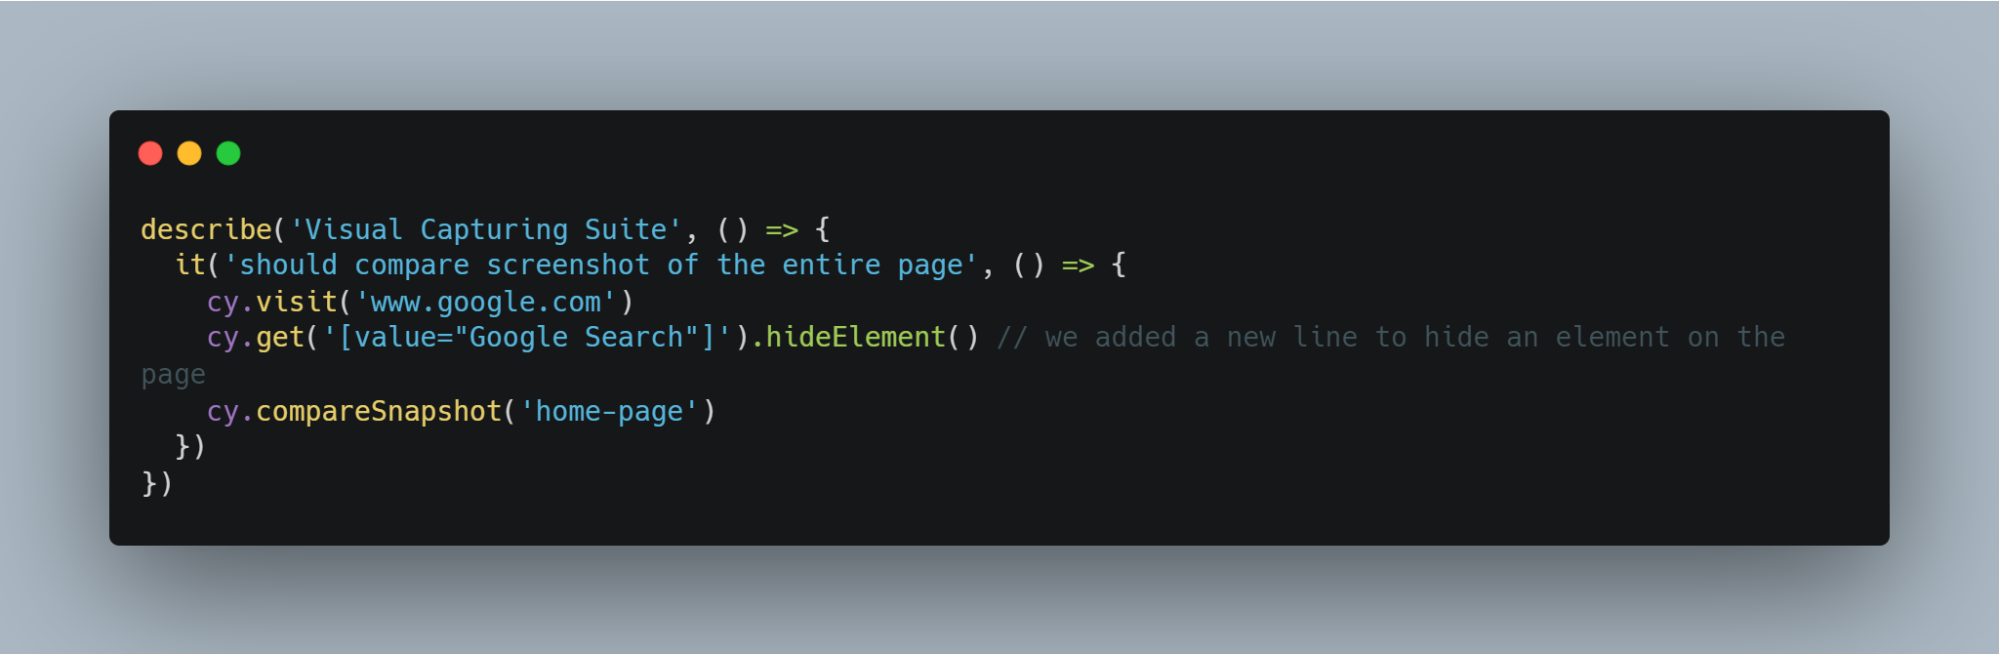
In the code above, we added a new line to remove the “Google Search” button and then capture a new snapshot.
Step 4:
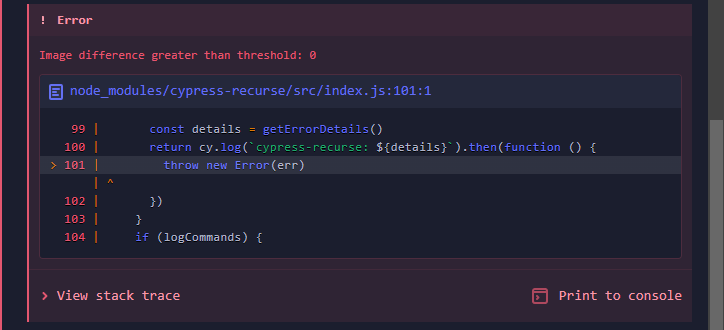
Running our test case now fails since the new snapshot differs from the baseline.
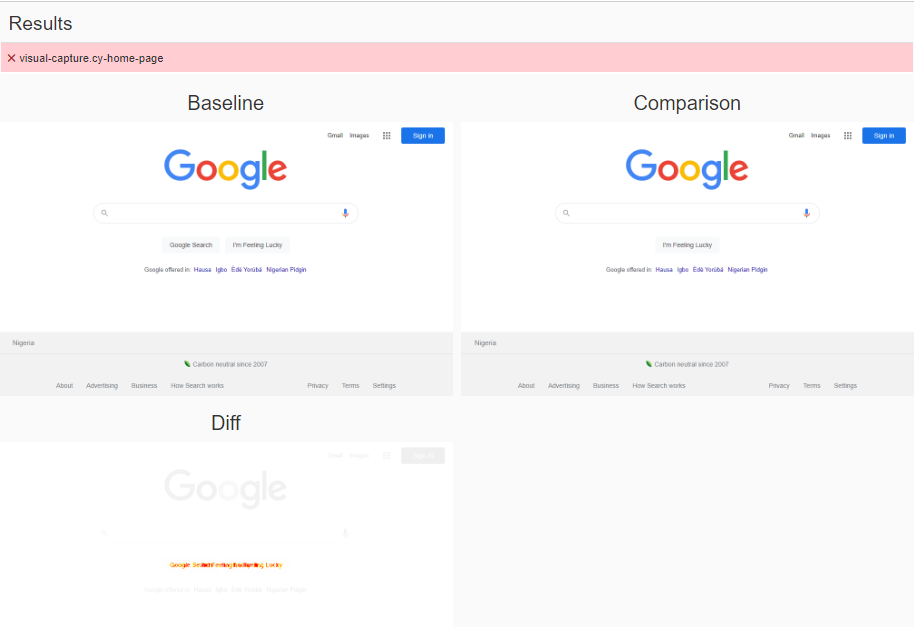
Step 5:
Checking the report generated now, we can see the baseline image, the comparison and the diff highlighting where both images differ.
With the 5 steps highlighted above, you can easily create snapshots and compare them to find out early if there are significant changes in your UI.
Going Further
There are situations where your UI actually needs to change, which means your baseline is no longer correct. In this case, you’ll need to update the baseline snapshots.
You can do this by either deleting the baseline images manually in the folder and rerunning the tests, or running your
test on the command line with the --update flag i.e
npx cypress run --spec "cypress/e2e/1-getting-started/visual-capture.cy.js" --update
Also, there are cases where minimal differences between baseline and comparison are allowed, for example, to account for things like slight differences in margin or padding. You can achieve this by increasing the threshold used for the comparison.
Conclusion
In this article, we have covered what regression testing is and how it can be useful. We also touched on Cypress and how to execute visual regression testing with Cypress using the cypress-image-diff plugin.
Try Reflect: A no-code alternative to Cypress
Reflect is a no-code testing platform that lets you build and run tests across all popular browsers. In addition to robust visual testing support, virtually any action within the browser can be easily automated with Reflect.